AirPort base stations: Setting up and configuring an extended wireless network (802.11n)
This article explains how to set up an 802.11n extended wireless network.
To learn about other options for expanding your Wi-Fi base station wireless network and things you should keep in mind before expanding your network, click here.
Setting up: Components of an extended network
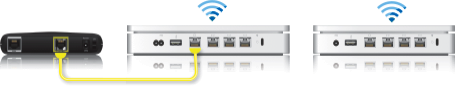
➊ Primary Wi-Fi base station (this is the base station connected directly to the Internet)
➋ Extended base station
Configuring a wireless extended network

To create a Wi-Fi extended network, you must place any extended Wi-Fi base stations within range of the primary Wi-Fi base station.
Start with the device that will be configured as the primary Wi-Fi base station. Then configure your extended Wi-Fi base stations, ensuring that each is within direct range of the primary Wi-Fi base station. The physical location of extended Wi-Fi base stations will vary according to the building environment and may require some experimentation.
If you have previously configured your Wi-Fi base stations, it may be helpful to do a factory default reset of each Wi-Fi base station that will be part of the wireless extended network before you begin.
Configuring the primary Wi-Fi base station
Turn on all 802.11n Wi-Fi base stations and allow some time for them to appear in the AirPort Menu Extra.
Open AirPort Utility (On a Mac, choose Go > Applications from your desktop, click the Utilities folder and then open AirPort Utility. In Microsoft Windows, choose Start > All Programs > AirPort to start AirPort Utility).
Select the primary Wi-Fi base station in the Base Station Chooser and then click Continue. Note: If a message appears indicating that the Wi-Fi base station has been reset, click Cancel to continue.
Click Manual Set-up. Enter the base station password, if necessary.
Click AirPort in the toolbar.
Click Wireless.
Choose “Create a wireless network” from the Wireless Mode menu.
Select the “Allow this network to be extended” checkbox.
Enter a Wireless Network Name.
Optional: By default, Wireless Security is set to "None" so that a password won't be required to join the network. We recommend that you click on the Wireless Security menu, select WPA2 Personal and create a password that is between 8 and 63 characters long.
From the Radio Channel Selection menu, select Automatic.
Click Update.
The next window may state that there are some problems. Resolve the problems, then click Update.
You are now ready to add extended Wi-Fi base stations to your network.
Configuring an extended Wi-Fi base station
Place any extended Wi-Fi base stations within range of the primary Wi-Fi base station
Ensure that all 802.11n Wi-Fi base stations are turned on and allow them time to appear in the AirPort Menu Extra
Open AirPort Utility (On a Mac, choose Go > Applications from your desktop, click the Utilities folder and then open AirPort Utility. In Microsoft Windows, choose Start > All Programs > AirPort to start AirPort Utility).
Select the Extended Wi-Fi base station in the Base Station Chooser, then click Continue. Note: If you see a message appear that indicates that the Wi-Fi base station has been reset, click Cancel to continue.
Click Manual Set-up. Enter the base station password, if necessary.
Click AirPort in the toolbar.
Click Wireless.
Choose “Extend a wireless network” from the Wireless Mode menu.
Choose the network that you want to extend from the Network Name menu.
Enter the network and device password if necessary, then click Update.
The next window may state that there are some problems. Resolve the problems, then click Update.