Change the background of a clip in iMovie
In iMovie on iPhone, iPad, or Mac, use the green-screen effect to change the background of your video.
With the green-screen effect in iMovie, you can superimpose a video clip over a background video clip, photo, or other image. First, record your subject in front of a green or blue screen. Next, add that clip above the background clip in the iMovie timeline. Then, use the green-screen effect in iMovie so the background clip is visible behind your subject.
Record video in front of a green or blue screen
Record video with your iPhone, iPad, iPod touch, or another camera in front of a green or blue screen. If the subject of your video is green or is wearing green, record in front of a blue background. If the subject of your video is blue or is wearing blue, record in front of a green background.
Use the green-screen effect in iMovie on iPhone or iPad
With your project open, add the background video clip or still image to the timeline.
Scroll the timeline so that the playhead (the white vertical line) appears over the background clip.
Tap the Add Media button
 , tap a category from the list, then tap the green-screen clip to select it.
Tap the More button
 , then tap Green/Blue Screen. The green-screen clip is added to the timeline above the background clip.
In the viewer, tap Auto to automatically remove the green or blue from the clip. Or tap the color in the clip in the viewer to remove that color.
Trim and move the background video clip to match the length of your green-screen clip. Because the clips are connected, the two clips move together when you rearrange clips in the timeline.

Adjust the green-screen effect on iPhone or iPad
After you’ve added the green-screen effect, you can make adjustments. Tap the green-screen clip you want to adjust in the timeline, then use any of the green-screen controls to make adjustments:
To change the amount of green or blue removed from a green-screen clip, tap the Adjust button, then drag the Strength slider left or right.
To crop parts of a green-screen clip, tap the Mask button, then drag the corners.
Use the green-screen effect in iMovie on Mac
With your project open, add the background video clip or still image to the timeline.
Add the green-screen clip above the background clip in the timeline.
Trim and move the background video clip to match the length of your green-screen clip. Because the clips are connected, the two clips move together when you rearrange clips in the timeline.
If the video overlay controls aren’t shown, click the Video Overlay Settings button
 above the viewer, then choose Green/Blue Screen from the pop-up menu.
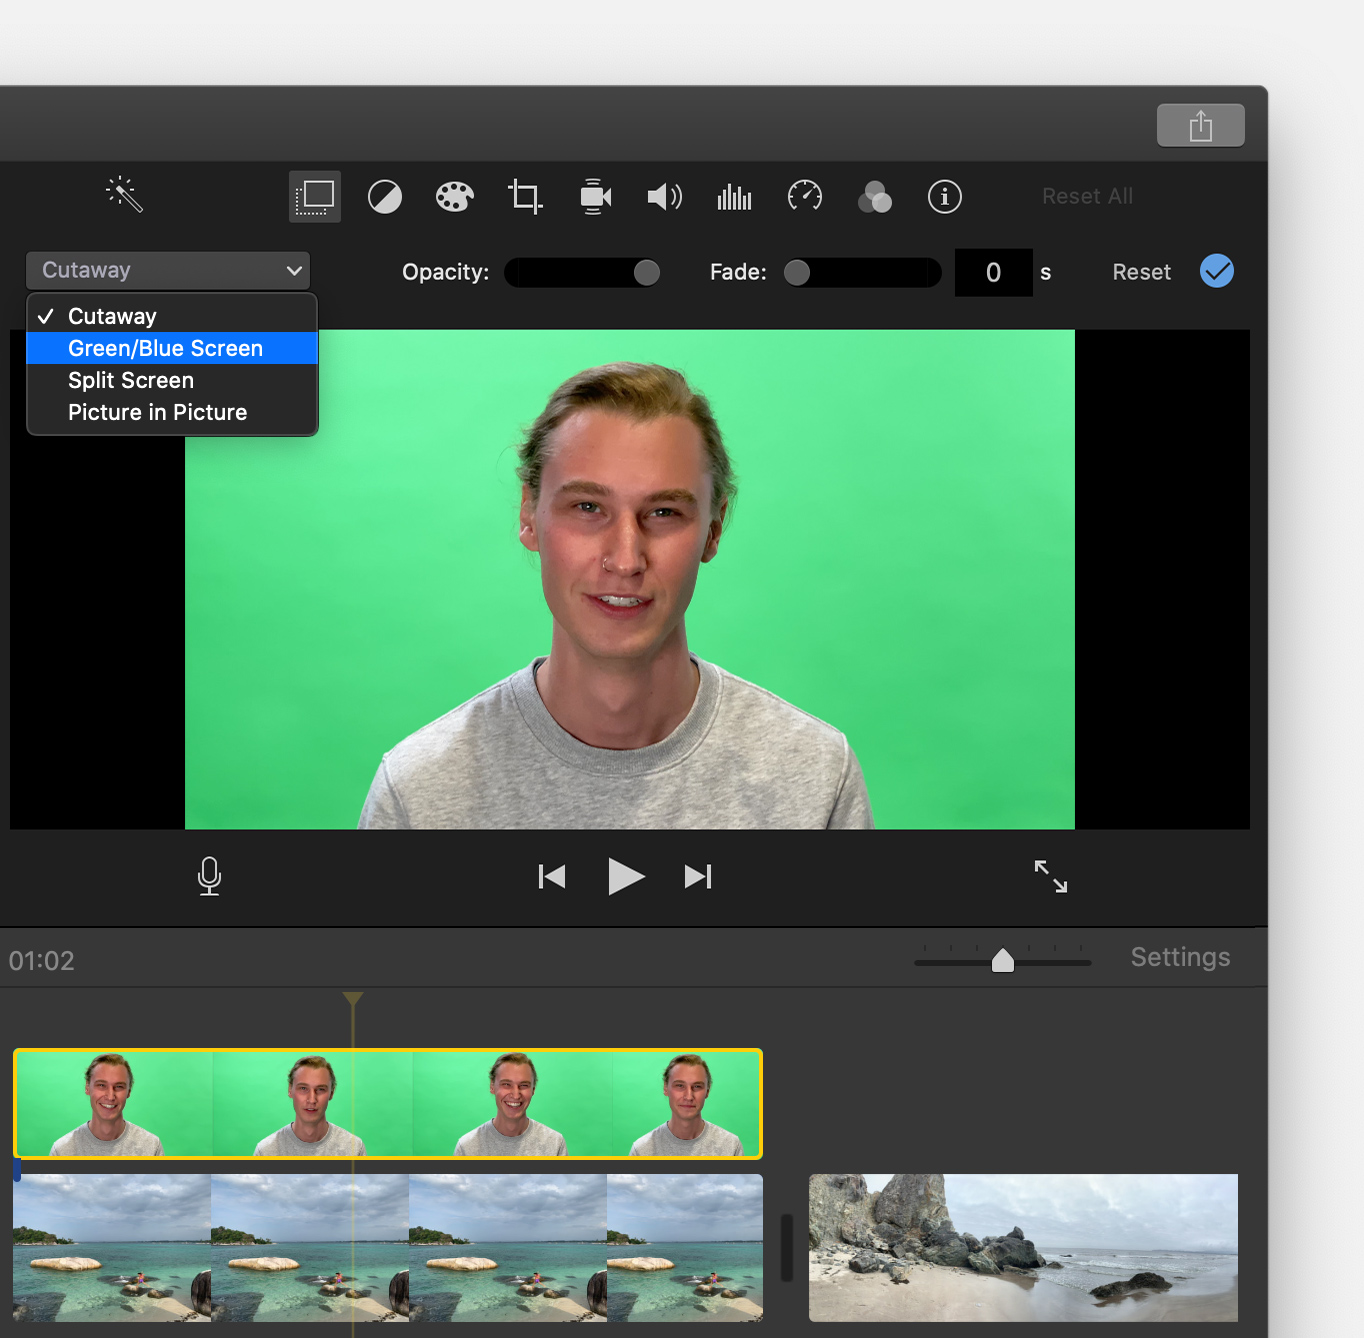
In the viewer, iMovie removes the green or blue from the green-screen clip to reveal the background clip behind your subject. Because the clips are connected, the two clips move together if you rearrange clips in the timeline.
The color that iMovie removes is based on the dominant color in the frame at the position of the playhead when you choose Green/Blue Screen from the pop-up menu. If the frame below the playhead isn’t representative of the rest of the clip, reposition the playhead and reapply the effect.
Adjust the green screen effect on Mac
After you’ve added the green-screen affect, you can make adjustments. Select the green-screen clip in the timeline, click the Video Overlay Settings button![]() , then use any of the green-screen controls to make adjustments.
, then use any of the green-screen controls to make adjustments.
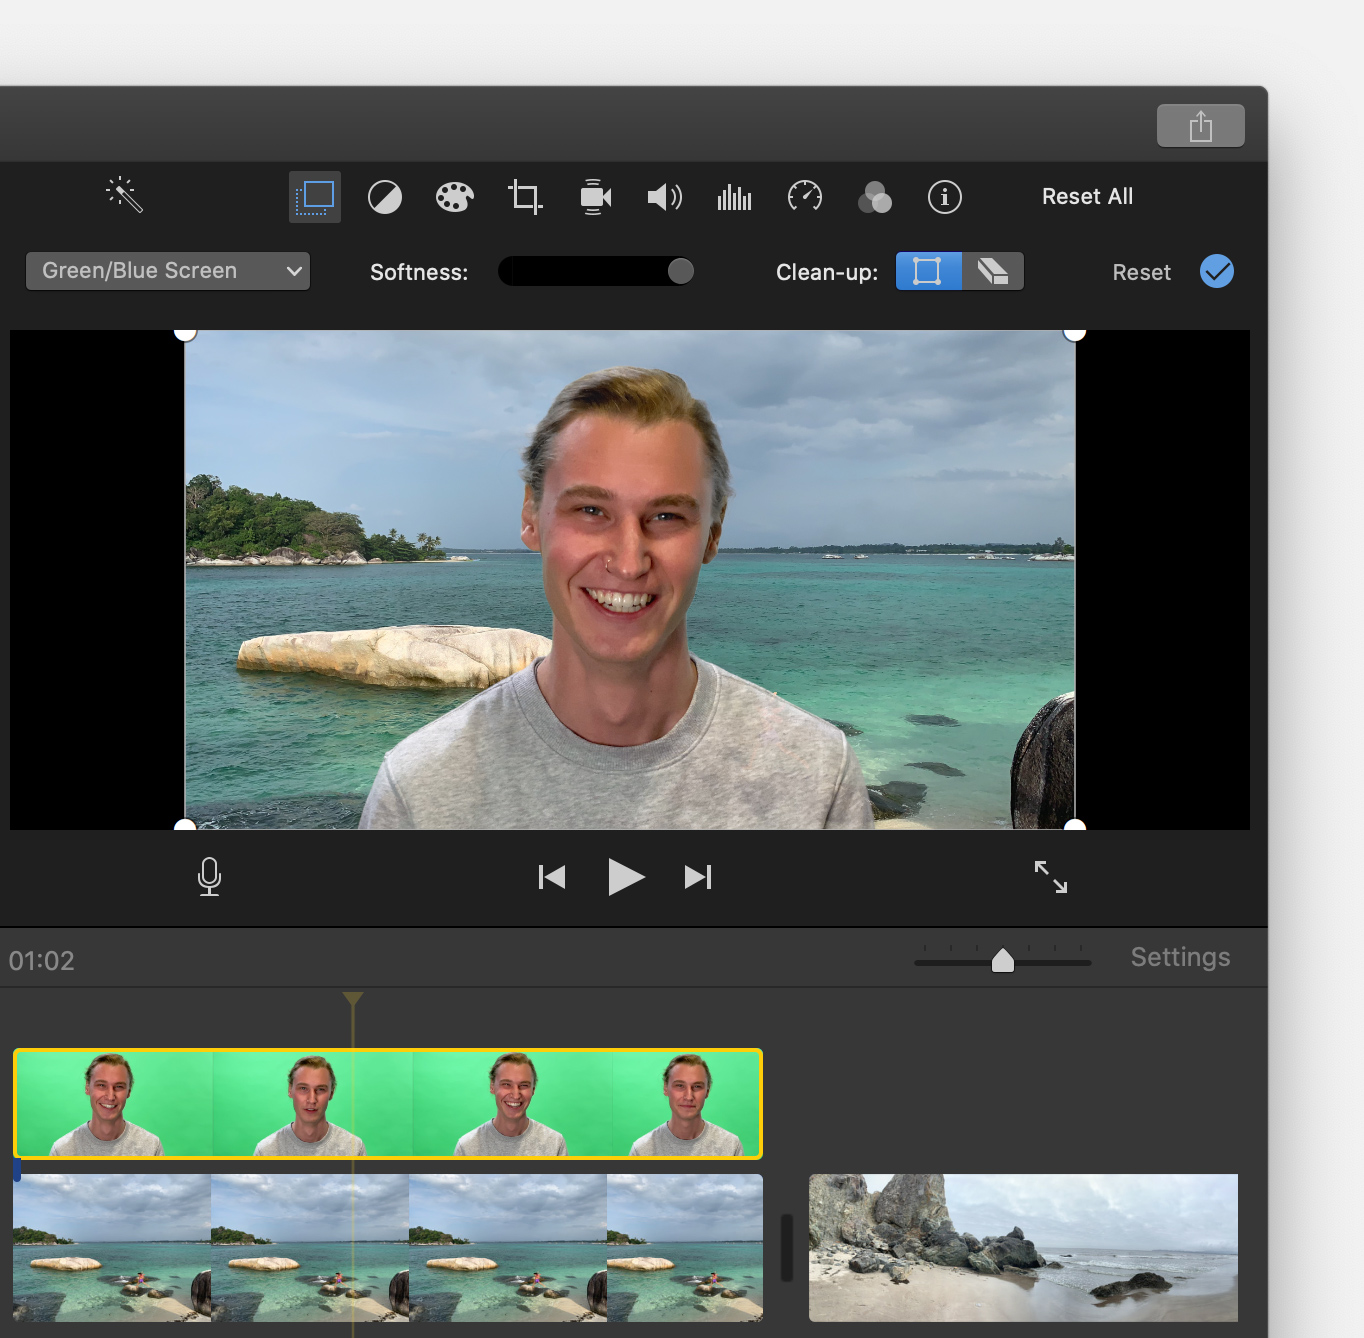
To adjust the transition between the green-screen clip, drag the Softness control.
To isolate areas of the green-screen clip, click the Crop button
 , then drag the corners of the frame in the viewer.
To mask parts of the green-screen clip, click the Clean-Up button
 , then drag across the clip in the viewer.