How to trim a clip range in the Final Cut Pro for iPad timeline
If you use Trim Start or Trim End with an active range selection in a clip, the trim takes place where the playhead is located.
Instead of using the Trim Start button![]() or Trim End button
or Trim End button![]() with a range selection, switch to Clip selection mode to trim or split a clip.
with a range selection, switch to Clip selection mode to trim or split a clip.
With your project open, tap the yellow Select control in the top-left corner of the timeline, then tap Clip.
In the timeline, tap the clip that you want to trim or split.
Drag the playhead to the frame where you want to cut.
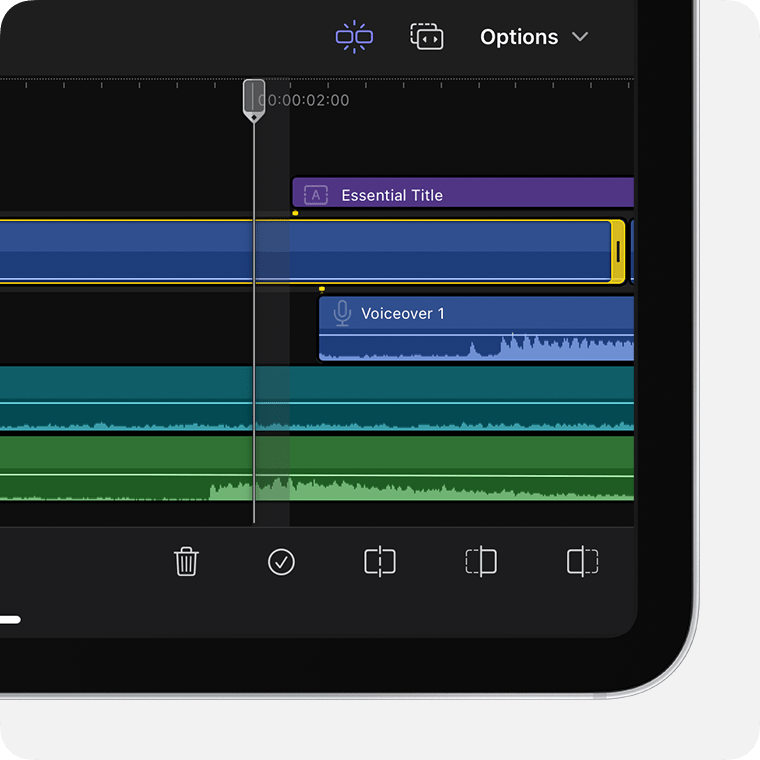
In the lower-right corner of the screen, tap the Split button
 to split the clip, or tap the Trim Start button
 or Trim End button
 to trim the clip. If these buttons are dimmed or don't appear, make sure that the clip is selected, the playhead is positioned over the clip, or the Volume and Animate buttons aren't highlighted.
Learn more about cutting clips in the timeline
Need more help?
Tell us more about what's happening, and we’ll suggest what you can do next.