Find out how to send your Powerbeats Pro earbuds to Apple for repair from Europe
Here's how to send your Powerbeats Pro earbuds to Apple for service.
Need a different country or region?
After you’ve contacted Apple for a service, you’ll receive a kit that contains everything you need to return your product to Apple.
Pack your Powerbeats Pro earbuds
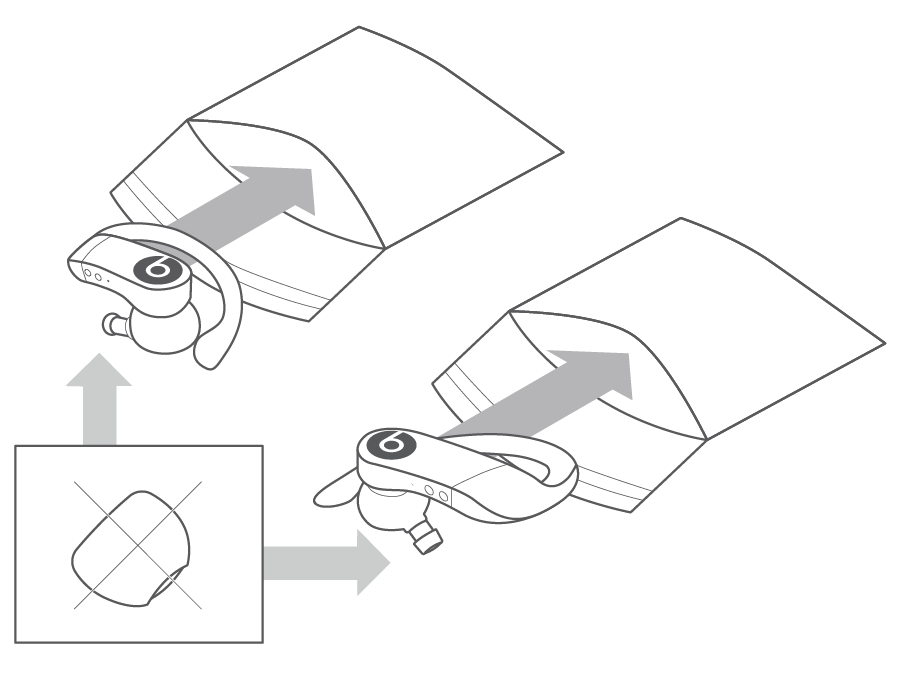
Put each of your Powerbeats Pro earbuds into a separate small plastic bag and fold down the flaps to seal the bags. Don't include any accessories with your earbuds (such as your ear tips or charging cable). If you include extra items in the box, we won't be able to return them to you.
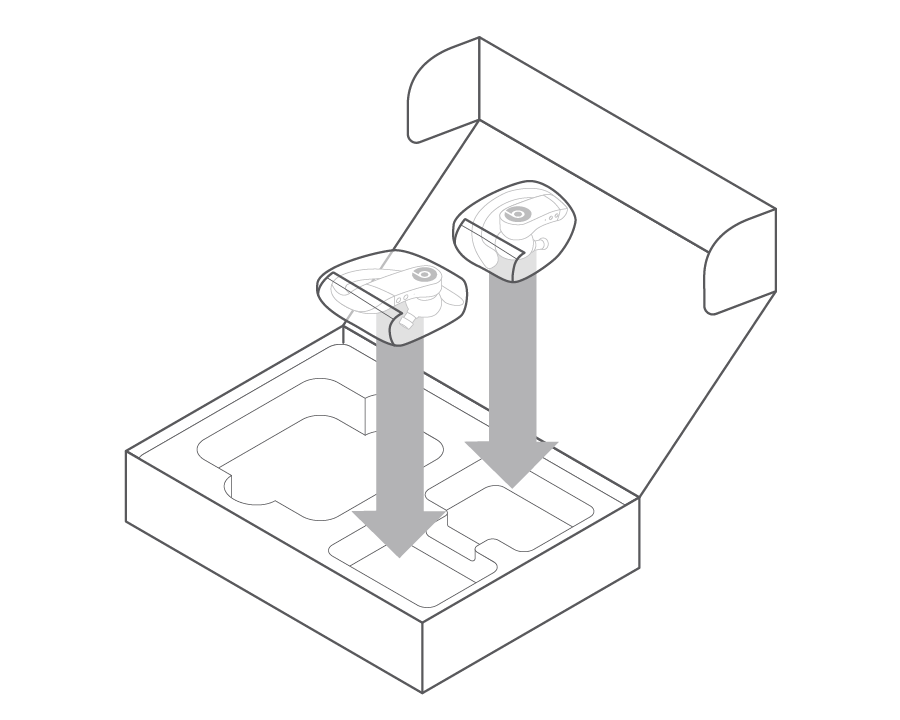
Place each of your bagged earbuds into one of the smaller holes in the plastic insert.
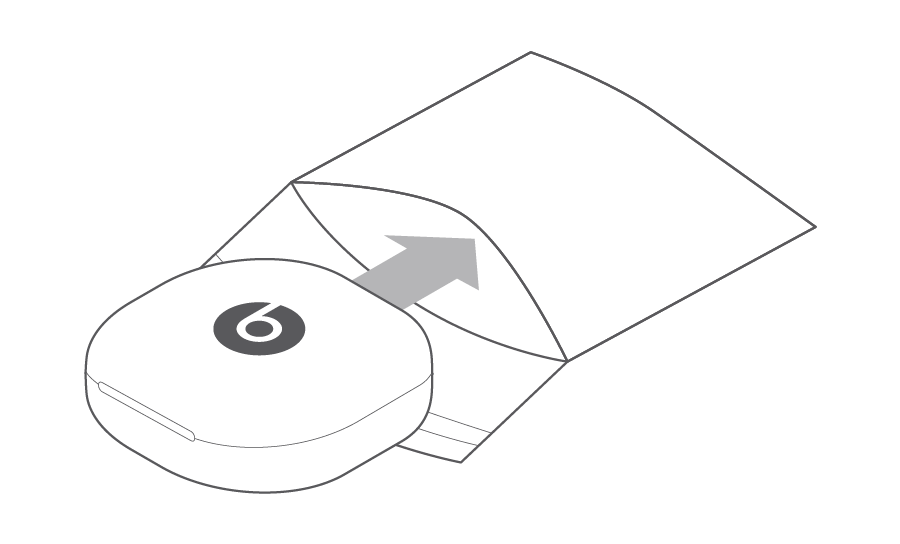
Place your charging case in the large plastic bag and fold down the flap to seal it.
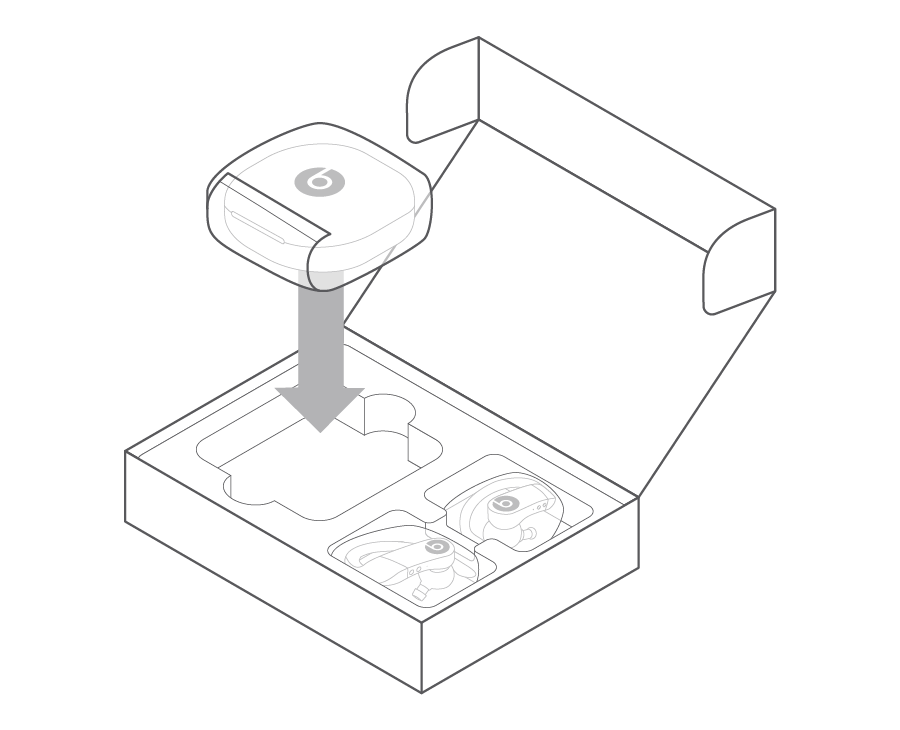
Place your bagged charging case into the large hole in the plastic insert.
Tape the brown delivery box closed.
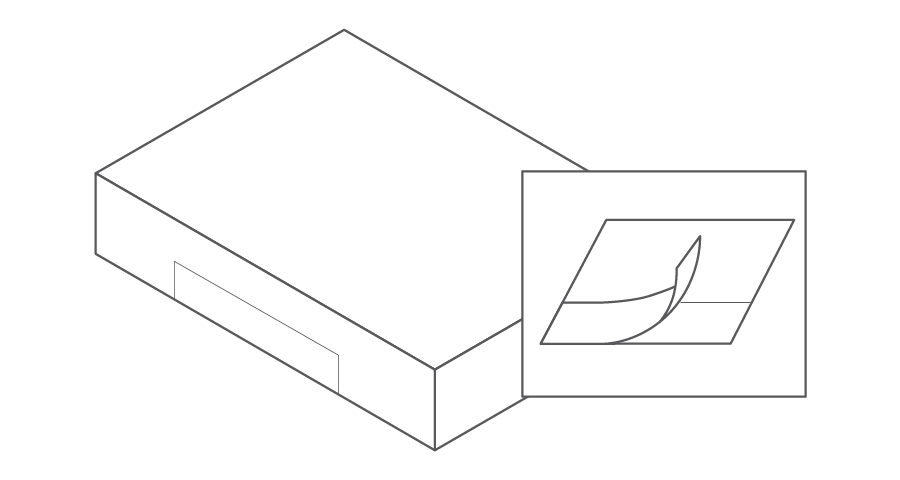
Seal the box with tape and send the box to Apple.* If there is a battery sticker pasted on the outside of the box, please make sure the battery sticker is not obstructed. In Norway, if your delivery box was delivered by the national post, please return your product via your local national post office using the provided pre-paid UPS return label.
*Apple is not responsible for any damage sustained during delivery.
Send your Powerbeats Pro earbuds to Apple
If a return shipping label is included, place it on the outside of the packaging. If applicable, make sure the return shipping label completely covers the old shipping label, or remove the old shipping label before applying the new shipping label.
If a commercial invoice is included, place it on the outside of the packaging. Failure to put the commercial invoice on the outside of the packaging may render the package undeliverable. Commercial invoices are only necessary in some European countries.
Find the name of the courier on the label (or elsewhere in the packing materials) and visit their website to arrange a collection or to find a drop-off location.
Ask the courier for proof of collection.
Use your repaired or replaced Powerbeats Pro earbuds
Your replacement Apple product is covered by a 90-day service warranty, the remainder of your original product warranty or AppleCare plan, or by consumer law, whichever is longer.
Set up your replacement Powerbeats Pro
Put both Powerbeats Pro earbuds in your charging case. Keep the lid open.
Check the LED status light on the front edge of the case. It should flash red.
Press and hold the system button on the inside of the case for 5 seconds. The status light should flash white. If it is still flashing red, connect the case to power, close the lid and wait 20 minutes.
Pair your Powerbeats Pro with your device.
Pair with iPhone
With your earbuds still inside and the case still open, hold the Powerbeats Pro next to your unlocked iPhone. A setup animation will appear on your iPhone.
Follow the onscreen instructions.
Pair with another device
Make sure you have enabled Bluetooth on your device.
With your earbuds still inside and the case still open, press and hold the system button on your Powerbeats Pro until the LED blinks.
Open the Bluetooth menu on your device. For example, on your Mac, choose Apple () menu > System Preferences, then click Bluetooth.
In the list of discovered Bluetooth devices, tap or click your Powerbeats Pro.
© 2022 Apple Inc. All rights reserved. Apple and the Apple logo are trademarks of Apple Inc., registered in the US and other countries and regions. AppleCare is a service mark of Apple Inc., registered in the US and other countries and regions. Beats, Beats by Dr. Dre and the circle b logo are trademarks/service marks of Beats, an Apple subsidiary.