If Boot Camp Assistant states that your disk could not be partitioned
Boot Camp Assistant may state that an error occurred while partitioning the disk for Windows.
When attempting to create a Windows partition, Boot Camp Assistant may display an alert stating: “Your disk could not be partitioned. An error occurred while partitioning the disk. Please run First Aid from within Disk Utility to check and fix the error”.
Use Disk Utility to check for errors
If Disk Utility found no errors or repaired all errors, try again to use Boot Camp Assistant to install Windows.
If Boot Camp Assistant still produces the partitioning error, continue to the steps below.
Check for unallocated free space
Open Disk Utility, which is in the Utilities folder of your Applications folder.
In the Disk Utility sidebar, select the name of your internal disk, container or volume, such as Macintosh HD.
Click Partition in the toolbar.
If you see a message about Apple File System space sharing, click Partition to confirm you want to partition instead of add a volume.
If the pie chart displays a section labelled "Free space", click to select it. "Free space" should now also appear in the Partition Information shown on the right.
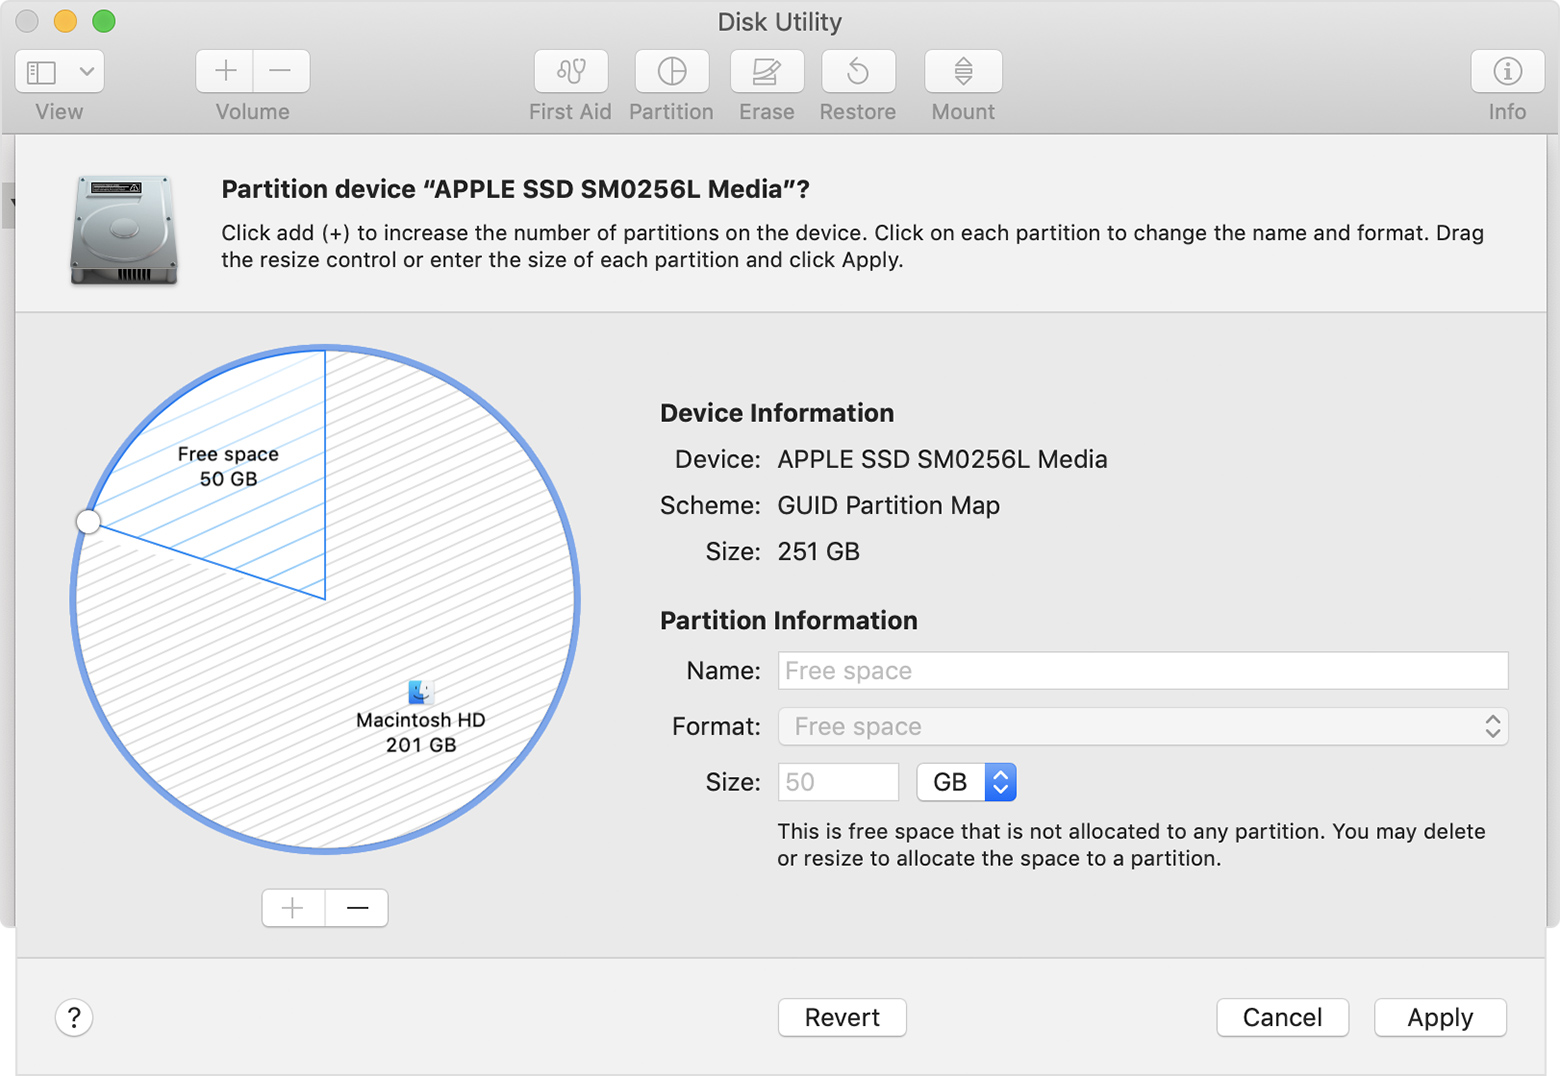
After selecting the "Free space" section of the chart, click the remove (–) button below the chart. Removing this unallocated free space makes that space available for you to use again. Then click Apply and quit Disk Utility.
Try again to use Boot Camp Assistant to install Windows.
If Boot Camp Assistant still produces the same partitioning error, continue to the steps below.
Turn off Time Machine temporarily
If you use Time Machine with macOS Mojave 10.14 or High Sierra 10.13, either upgrade to macOS Catalina 10.15 or later, or follow these steps:
Open Time Machine preferences from the Time Machine menu
 in the menu bar. Or choose System Preferences from the Apple menu , then click Time Machine.
Deselect "Back Up Automatically" to turn off Time Machine.
Wait a few minutes, then try again to use Boot Camp Assistant to install Windows.
After installation has been completed, you can turn on Time Machine again.
Learn more
Find out what to do if Boot Camp Assistant stops responding or says that Boot Camp installation failed.