Replace the power supply in your Mac Pro (2023)
Find out how to remove and replace the power supply in your Mac Pro.
Check required tools
Adjustable Torx screwdriver with 8IP x 89mm 1/4" bit
Phillips #1 screwdriver
If you need to order a replacement power supply, you can purchase it through the Self Service Repair process.
Remove the housing or top cover
Follow the steps to remove the housing or the top cover on your Mac Pro.
Mac Pro (2023)
Wait approximately 5–10 minutes for the computer to cool down.
Unplug all cables, except the power cable, from your Mac Pro.
Touch the metal housing on the outside of the Mac Pro to discharge any static electricity, then unplug the power cable.
Always discharge static before you touch parts or install components inside your Mac Pro. To avoid generating static, don’t move around the room until you’ve finished installing the power supply and have slid the housing back onto the computer.
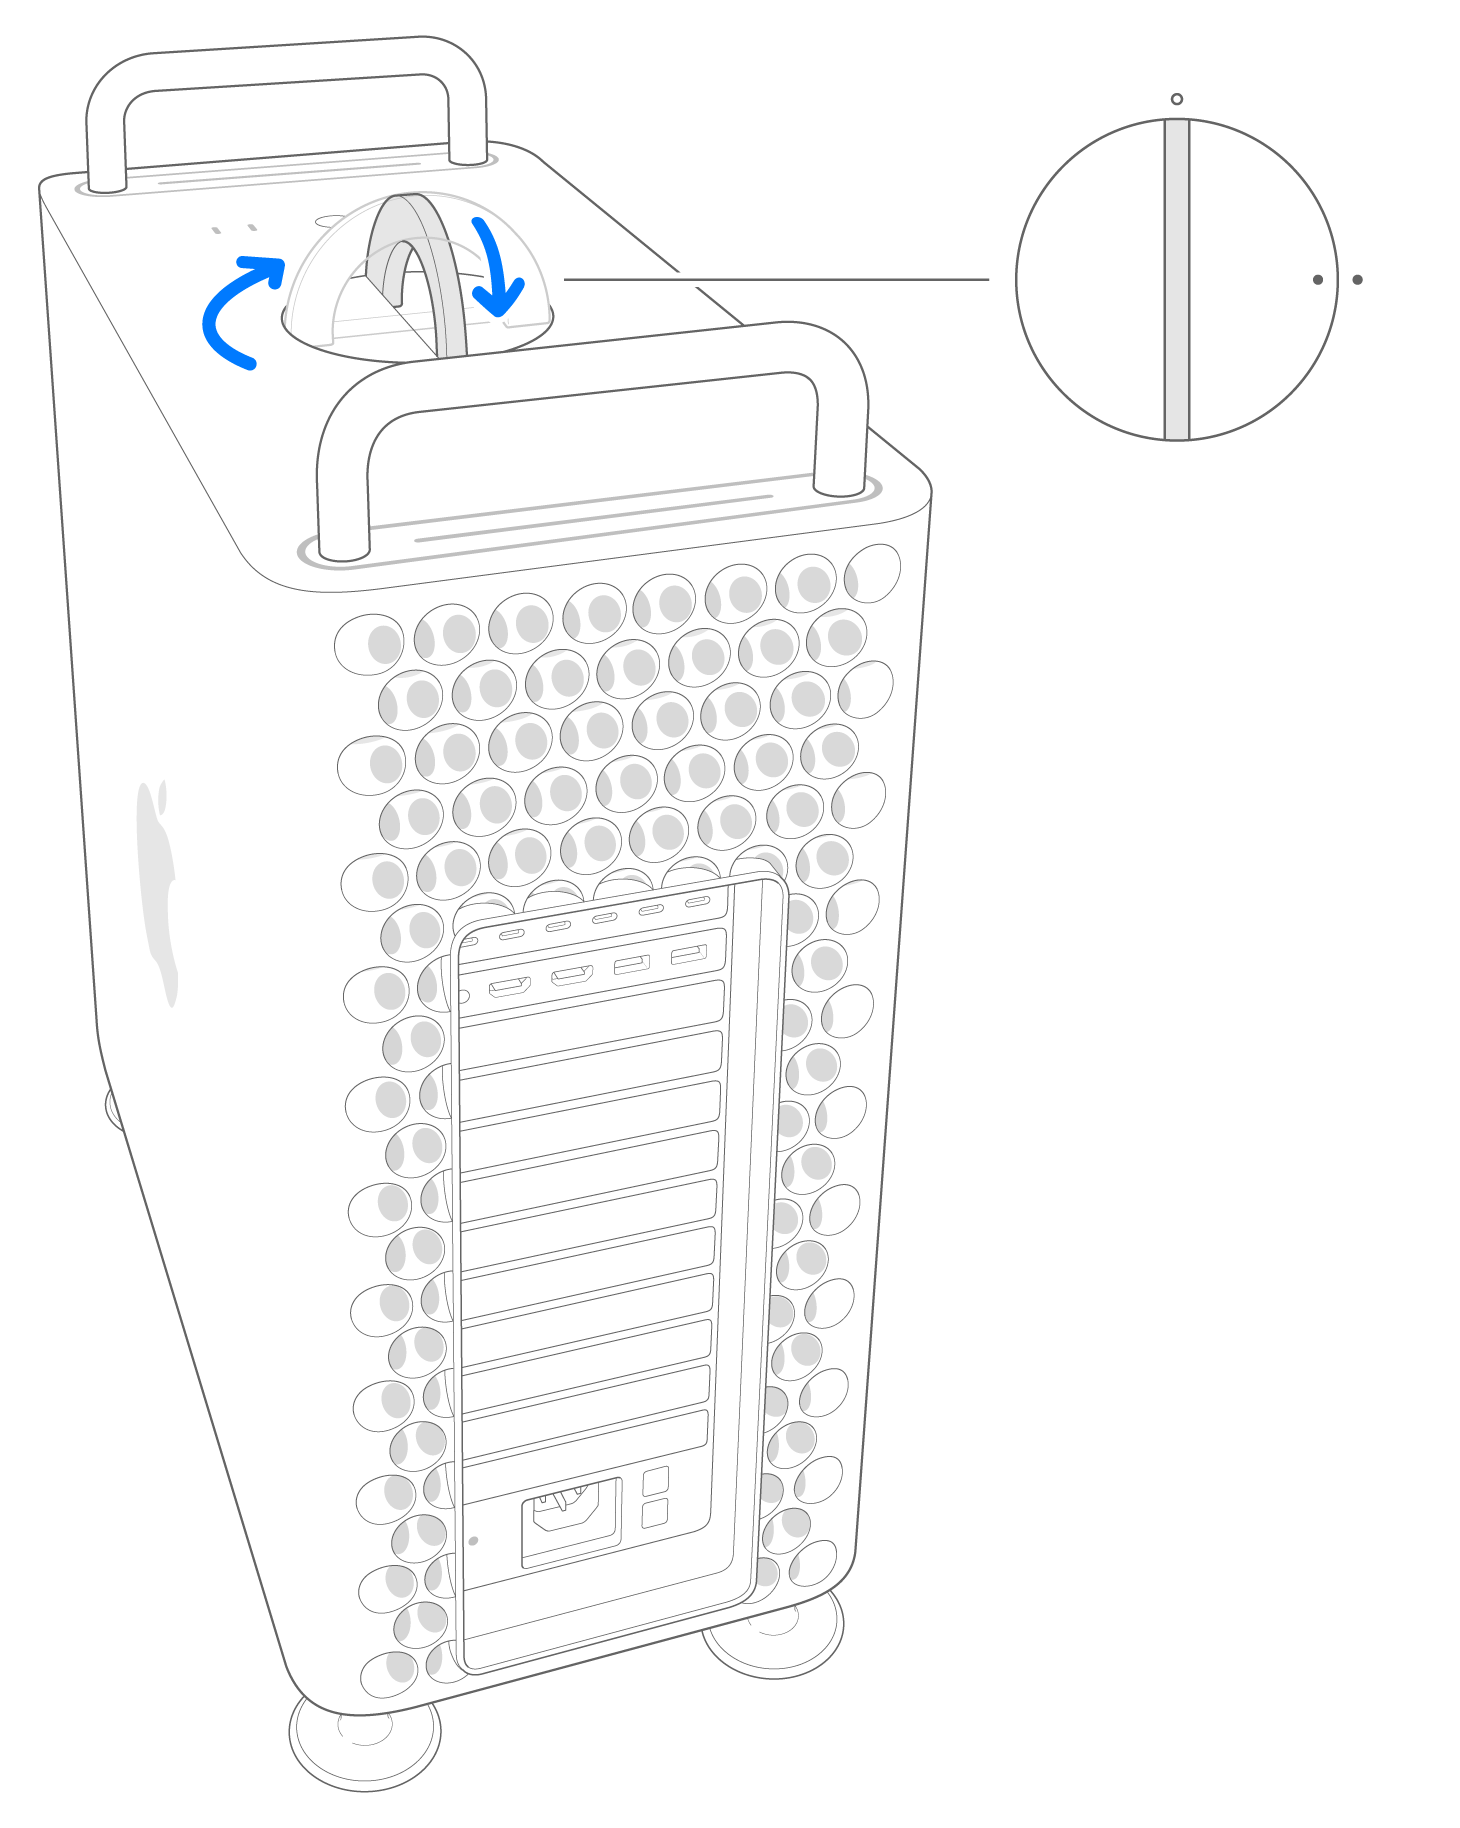
Flip the top latch up, then twist left to unlock the housing.

Lift the housing straight up and off the Mac Pro. Carefully set it aside.

Mac Pro (Rack, 2023)
Wait approximately 5–10 minutes for the computer to cool down.
Unplug all cables, except the power cable, from your Mac Pro.
Touch the metal housing on the outside of the Mac Pro to discharge any static electricity, then unplug the power cable.
Always discharge static before you touch parts or install components inside your Mac Pro. To avoid generating static, don’t move around the room until you’ve finished installing the power supply and have slid the top cover back onto the computer.
Slide the top cover release latches to the unlocked position, lift the top cover and pull it away from the front plate, then set it aside.

Remove the power supply
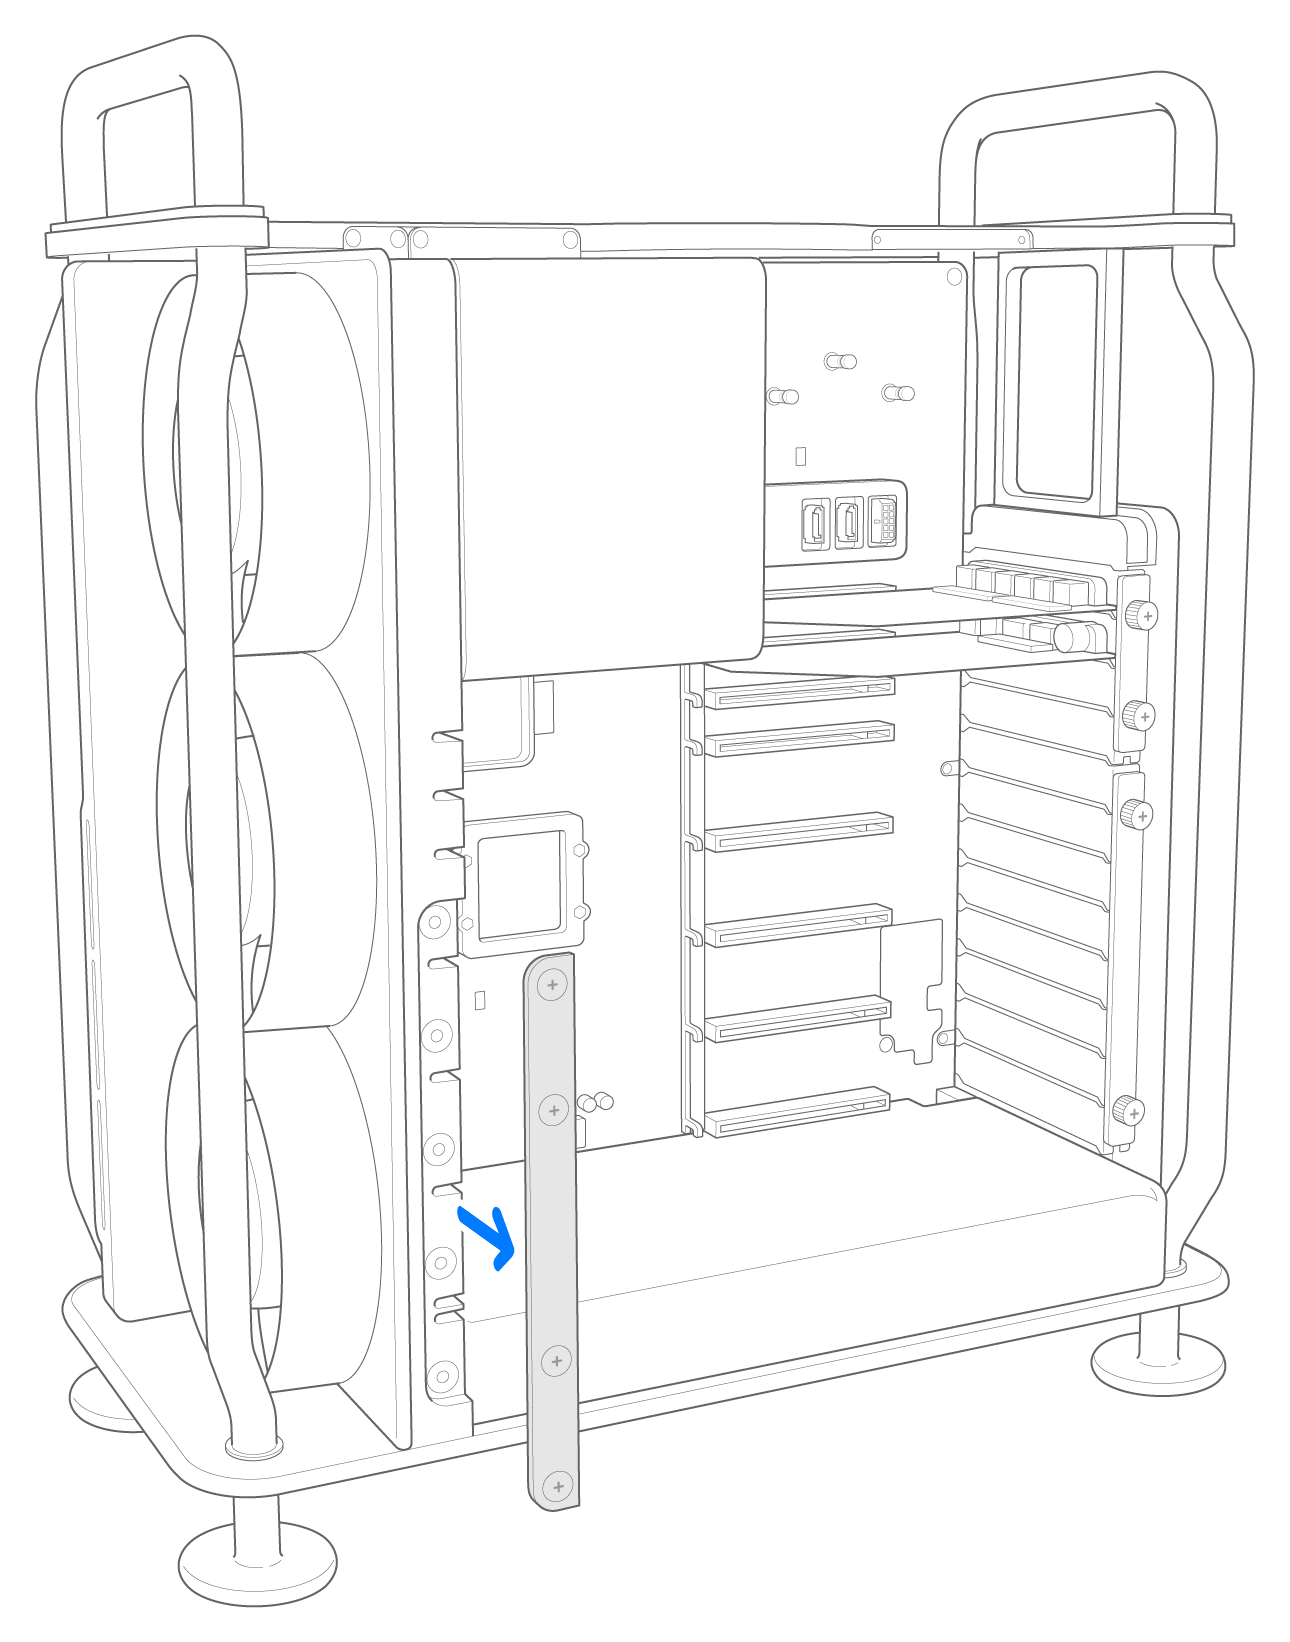
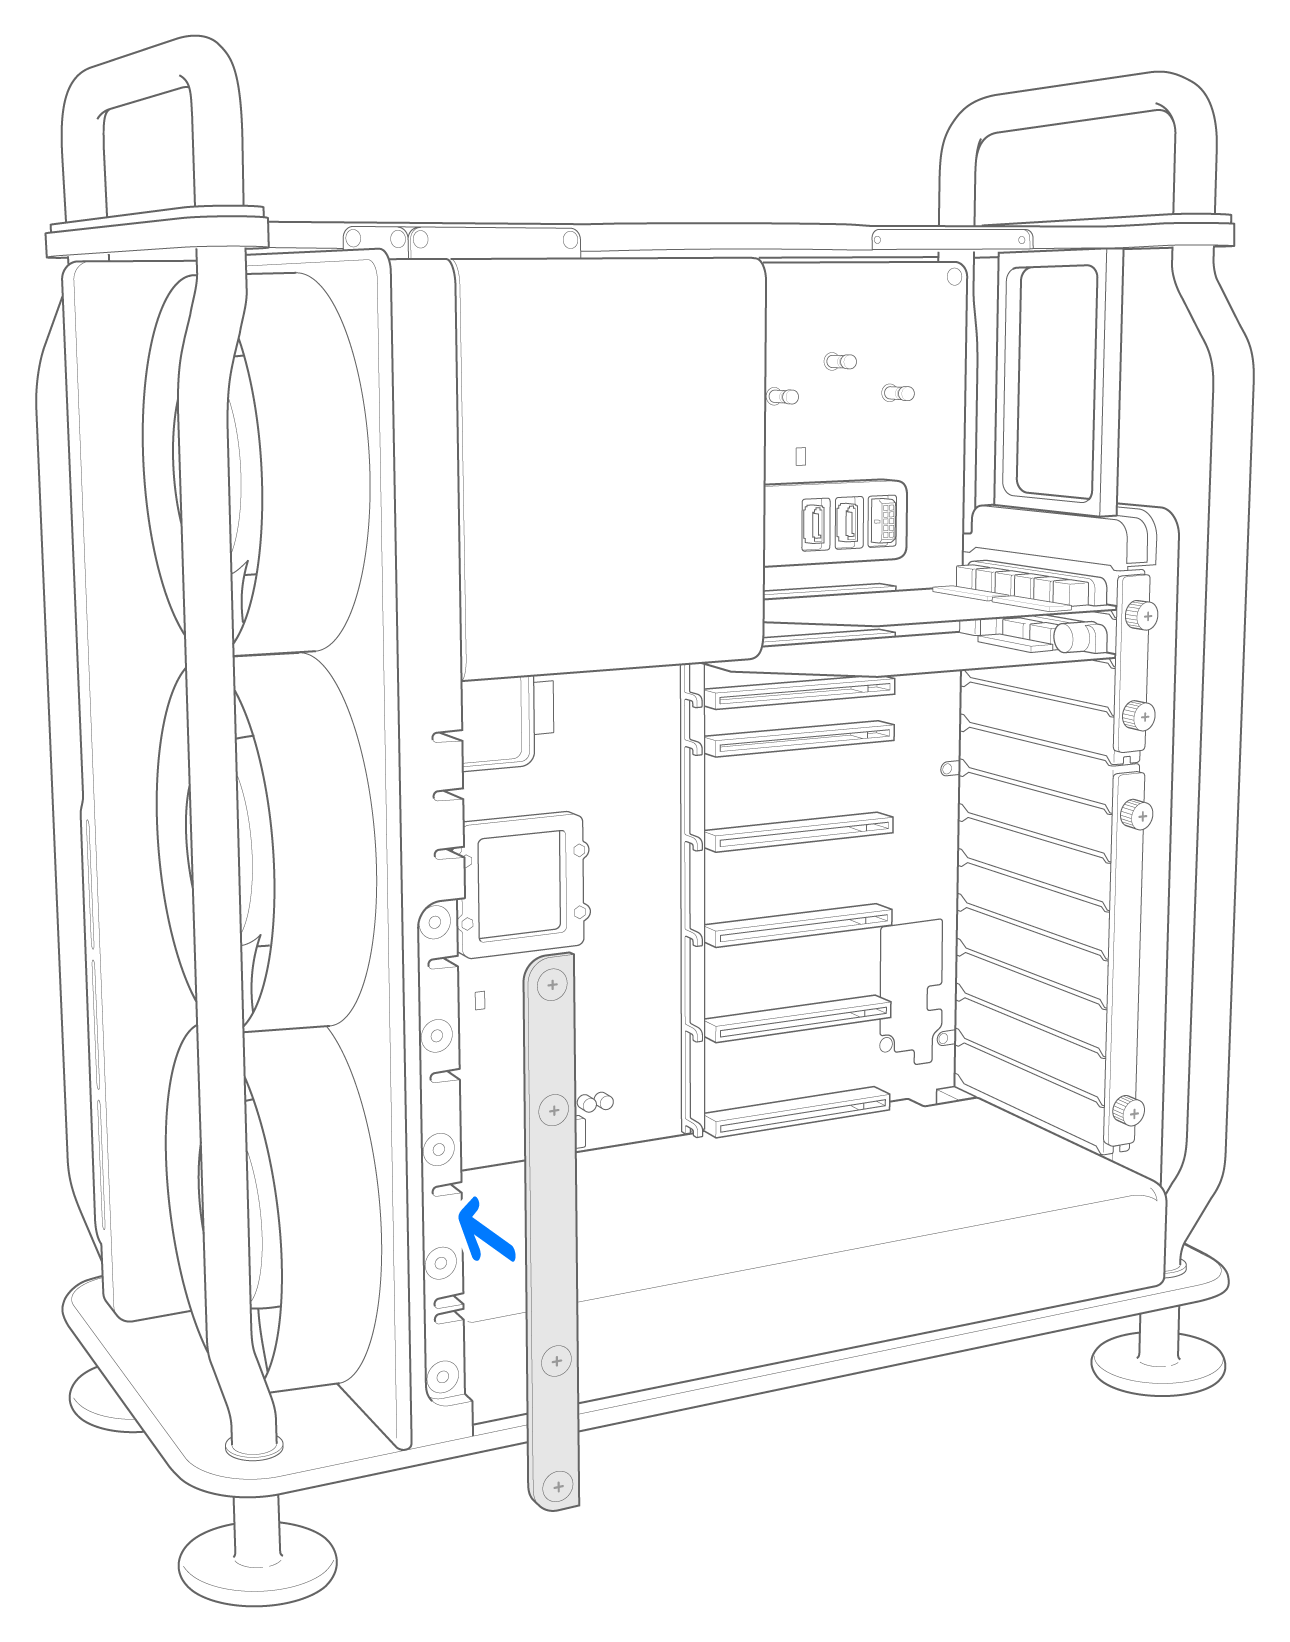
Unscrew all six Phillips #1 screws from clamp plate #3, then remove it.
The screws are captive and stay attached to the clamp plate.
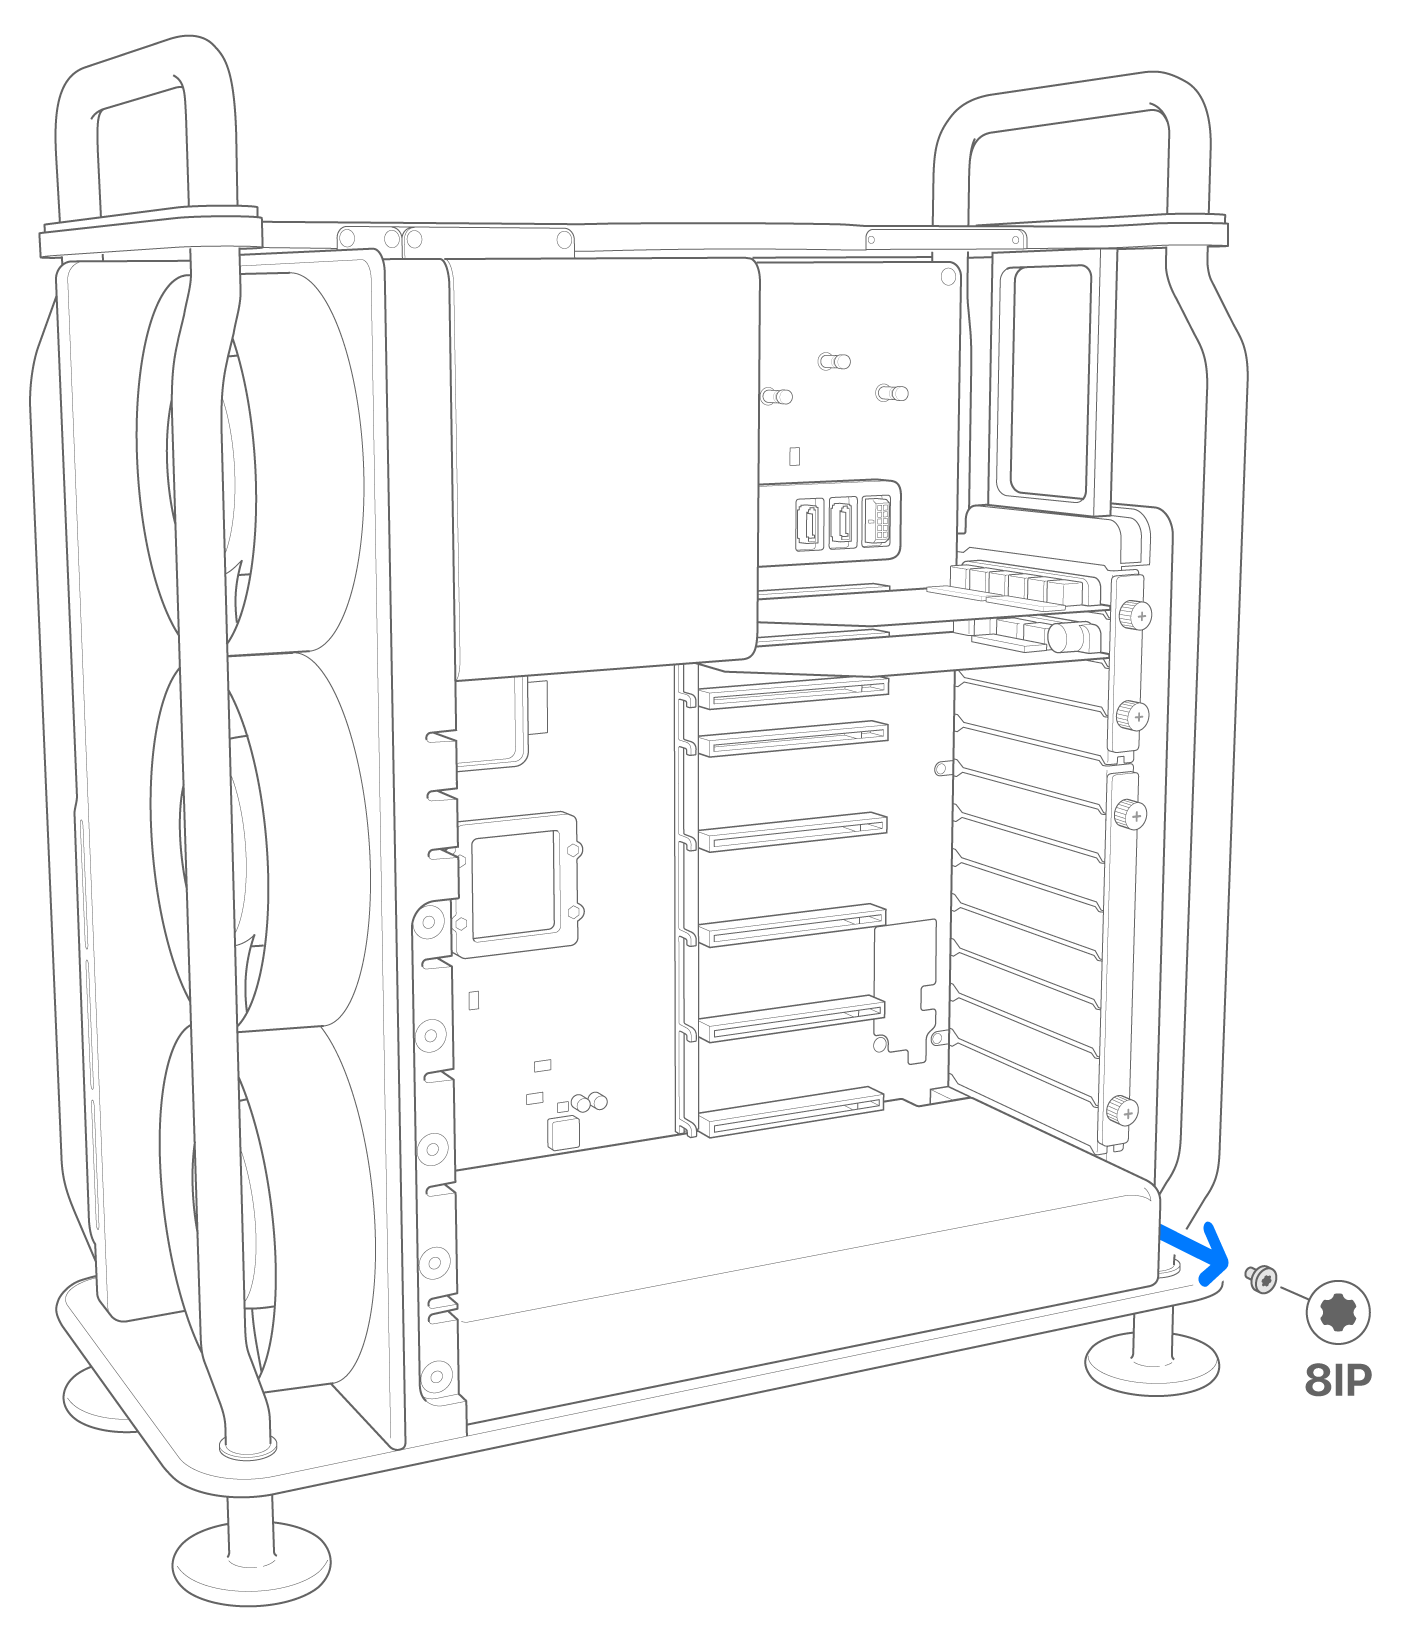
Remove one 8IP screw from the power supply grounding bracket.
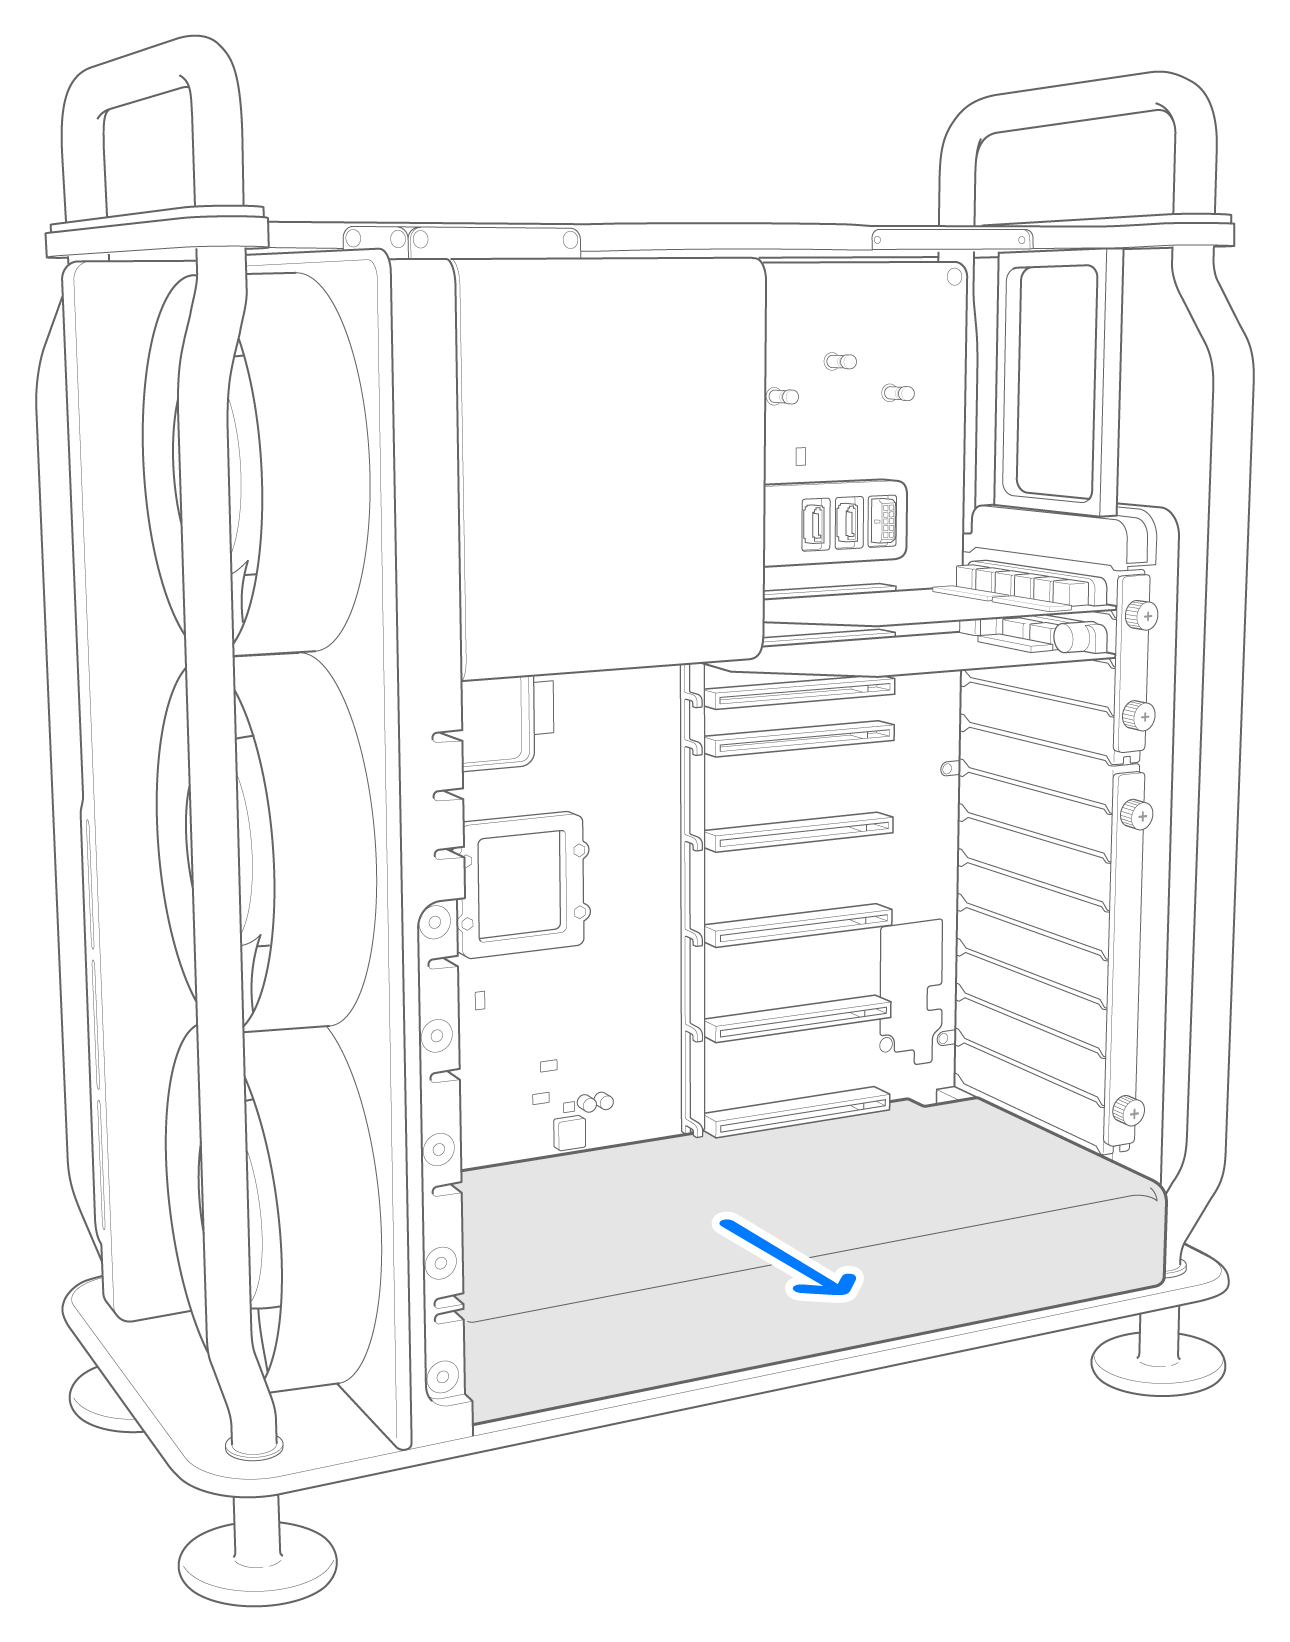
Grip both sides of the power supply and pull it out.
Install the new power supply
Insert the new power supply in the bottom slot.

Push firmly and evenly until the power supply is fully seated.
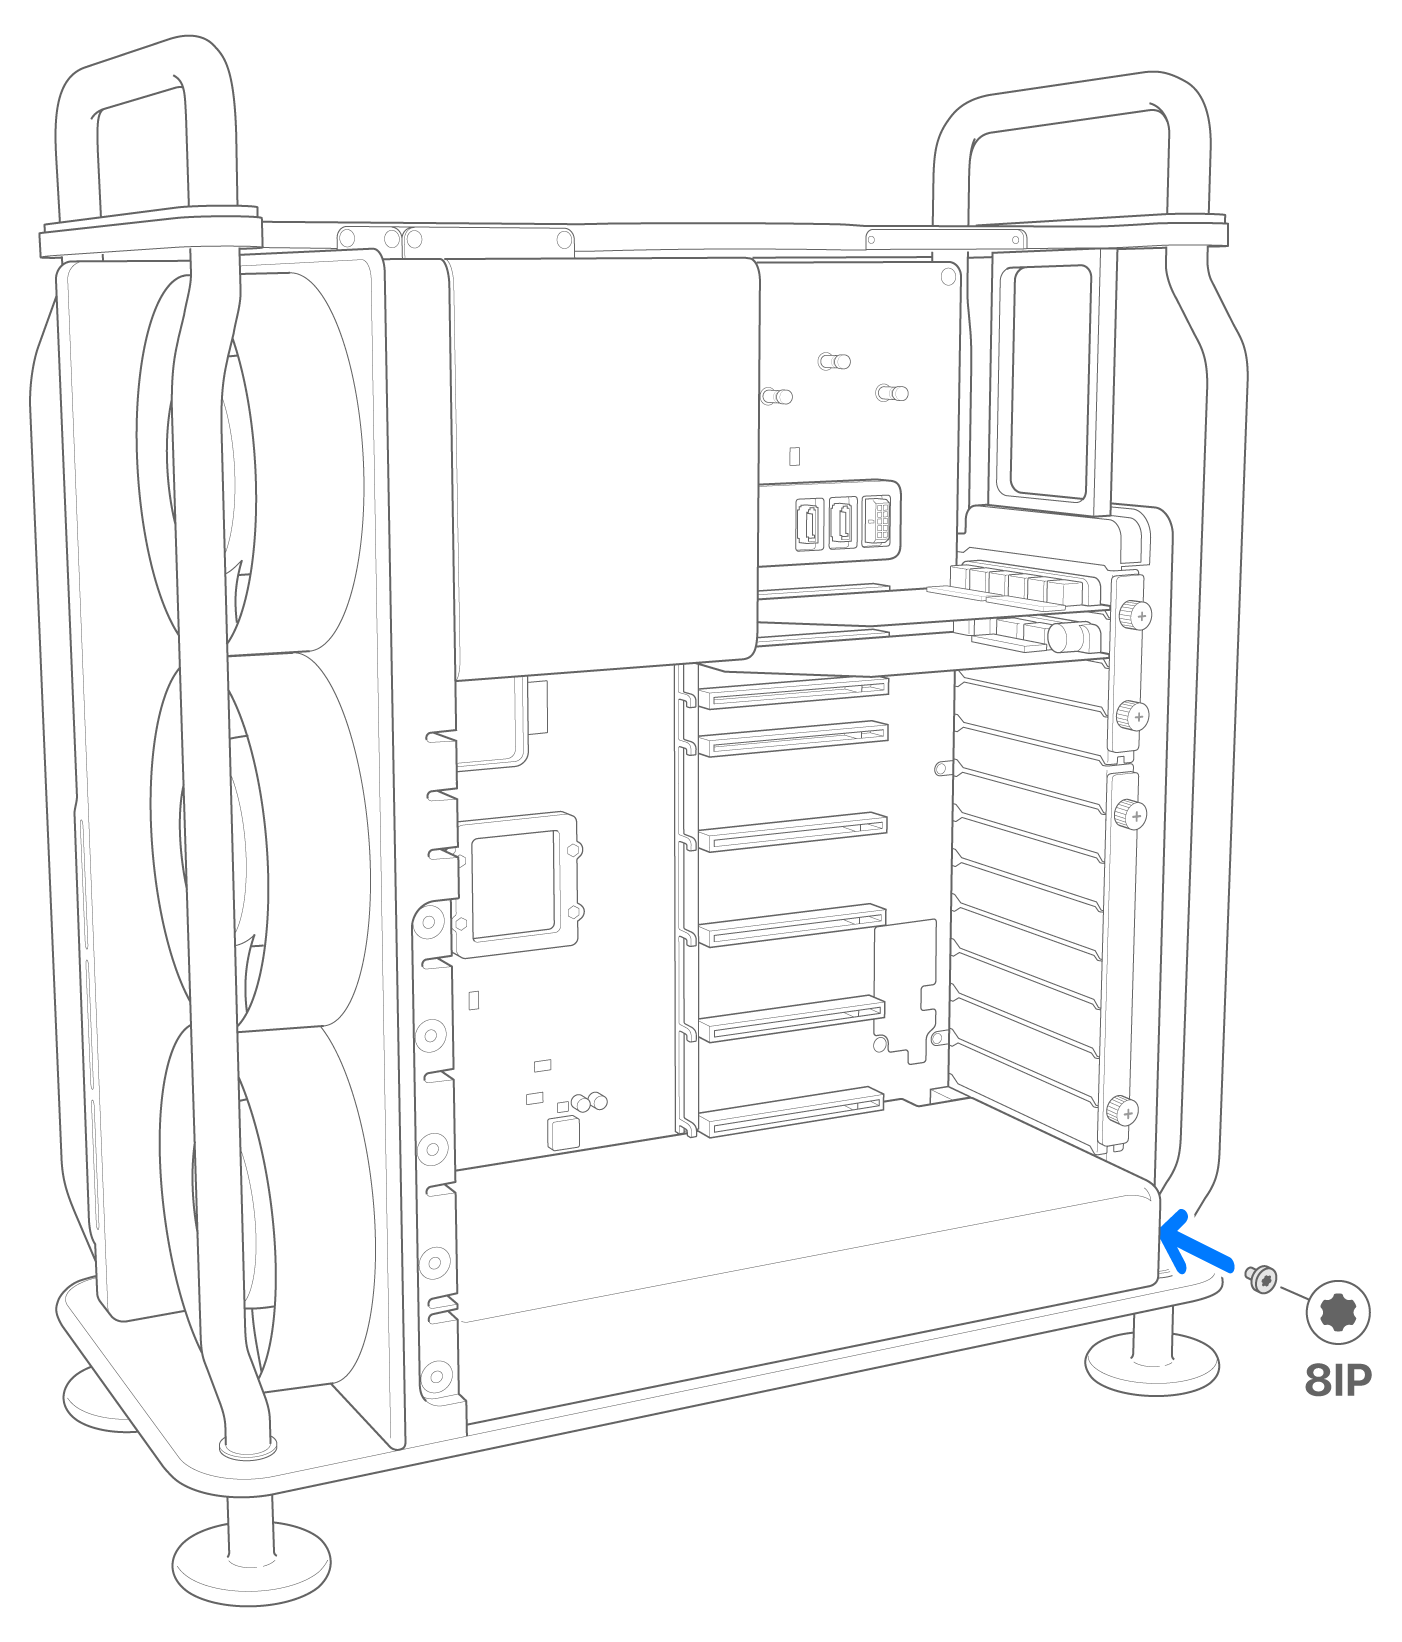
Reinstall the 8IP screw back into the power supply grounding bracket.
Reattach clamp plate #3, then fully tighten the six Phillips #1 screws.
Reinstall the housing or top cover
Follow the steps to reinstall the housing or top cover on your Mac Pro.
Mac Pro (2023)
Carefully lower the housing over the Mac Pro, being careful not to touch any of the circuit boards.

After the housing is fully seated, twist the top latch right and flip it down to lock it.
Connect the power cable, display and any other peripherals.
Mac Pro (Rack, 2023)
Align the edge of the top cover with the slot in the front plate, then press firmly near the release latches and listen for them clicking into place.

Connect the power cable, display and any other peripherals.
Send your original power supply back
If you’ve received a replacement part from Apple, follow the steps to send your original part back to Apple.