How to adjust an app's settings to appear below the camera area on your MacBook Air or MacBook Pro
You can adjust an app’s settings so that it uses the whole display or uses only the area below the camera housing.
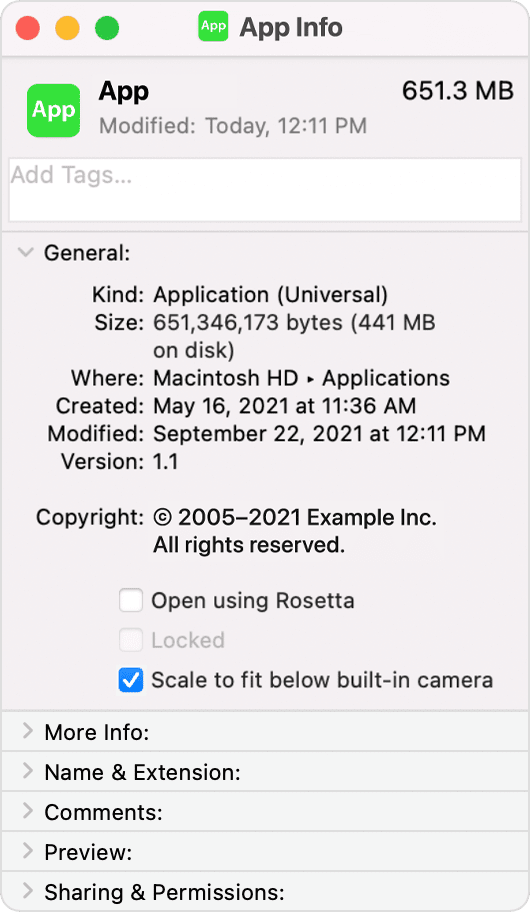
Your MacBook Air with Liquid Retina display or MacBook Pro with Liquid Retina XDR display features a camera housing built into the screen bezel. If app controls or menu bar items appear blocked or hidden behind the camera housing, you can turn on "Scale to fit below built-in camera" for the app to adjust the active area of your display. This ensures the menu bar and app windows appear below the built-in camera on your Mac and are always visible.
If you turn on "Scale to fit below built-in camera" for an app and the app has menu bar items or windows that would appear behind the camera housing, all open apps or apps that share the same space appear below the camera until you quit the app using the scaled setting.
Turn on 'Scale to fit below built-in camera' for an app
Quit the app.
Click the Finder icon in the Dock, then click Applications in the Finder sidebar.
Select the app, then choose File > Get Info, or press Command-I.
In the Info window that opens, select "Scale to fit below built-in camera."

Learn more
Apps can be updated to work better with this area of your screen. If a developer updates their app for compatibility with your Mac, the "Scale to fit below built-in camera" setting no longer appears. You can contact the developer of the app to learn whether an update is available or planned.
Information about products not manufactured by Apple, or independent websites not controlled or tested by Apple, is provided without recommendation or endorsement. Apple assumes no responsibility with regard to the selection, performance, or use of third-party websites or products. Apple makes no representations regarding third-party website accuracy or reliability. Contact the vendor for additional information.