Final Cut Pro User Guide
- Welcome
-
- What’s new in Final Cut Pro 10.6.2
- What’s new in Final Cut Pro 10.6
- What’s new in Final Cut Pro 10.5.3
- What’s new in Final Cut Pro 10.5
- What’s new in Final Cut Pro 10.4.9
- What’s new in Final Cut Pro 10.4.7
- What’s new in Final Cut Pro 10.4.6
- What’s new in Final Cut Pro 10.4.4
- What’s new in Final Cut Pro 10.4.1
- What’s new in Final Cut Pro 10.4
- What’s new in Final Cut Pro 10.3
- What’s new in Final Cut Pro 10.2
- What’s new in Final Cut Pro 10.1.2
- What’s new in Final Cut Pro 10.1
- What’s new in Final Cut Pro 10.0.6
- What’s new in Final Cut Pro 10.0.3
- What’s new in Final Cut Pro 10.0.1
-
- Intro to effects
-
- Intro to transitions
- How transitions are created
- Add transitions
- Set the default transition
- Delete transitions
- Adjust transitions in the timeline
- Adjust transitions in the inspector and viewer
- Merge jump cuts with the Flow transition
- Adjust transitions with multiple images
- Modify transitions in Motion
-
- Add storylines
- Use the precision editor
- Conform frame sizes and rates
- Use XML to transfer projects
-
- Glossary
- Copyright

Modify 3D text materials in Final Cut Pro
When you add a new 3D title, it appears with a default 3D material preset applied: a matte white plastic texture (Basic). Most of the other preset materials in Final Cut Pro are more complex, composed of multiple material layers—combinations of substance, paint, finish, and distress overlays that create a naturalistic 3D texture. For example, the Brushed Metal preset combines an Aluminum substance layer with a Brushed finish layer. The Golf Ball preset combines a Plastic substance layer with a Polish finish layer, a Dirt distress layer, and a Bumps distress layer (set to –500% to create a dimple effect).
You adjust each of these material layers in the Material section of the Text inspector. As you modify these settings, your 3D title is updated instantly in the viewer, allowing you to fine-tune the look you want to achieve.
Modify material layers used in a 3D texture
You can create a custom material by applying a preset material and then modifying it.
This example shows how to modify the Substance layer of a simple 3D texture.
In the Final Cut Pro timeline, select a 3D title and apply a preset material to it.
See Add preset materials to 3D text in Final Cut Pro.
The preview thumbnail of the preset you applied appears in the Text inspector, in the Material section of the 3D Text section.

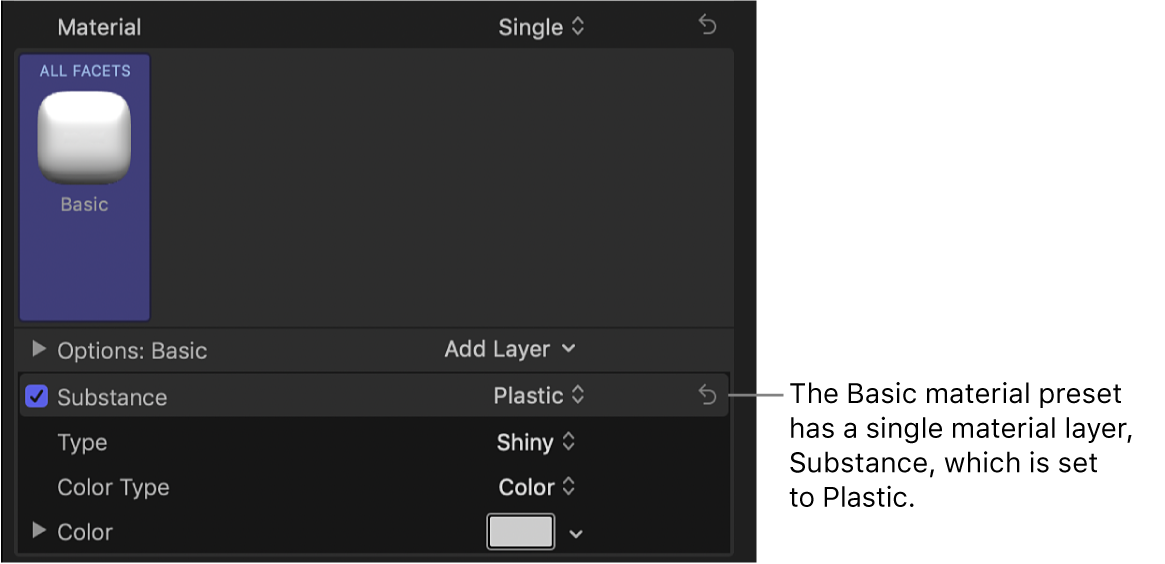
The material layers included in the preset appear below the preview thumbnail. For example, the Basic material preset has a single material layer, Substance, which is set to Plastic. Additional Substance settings specify the type of plastic (Shiny) as well as the color (White).
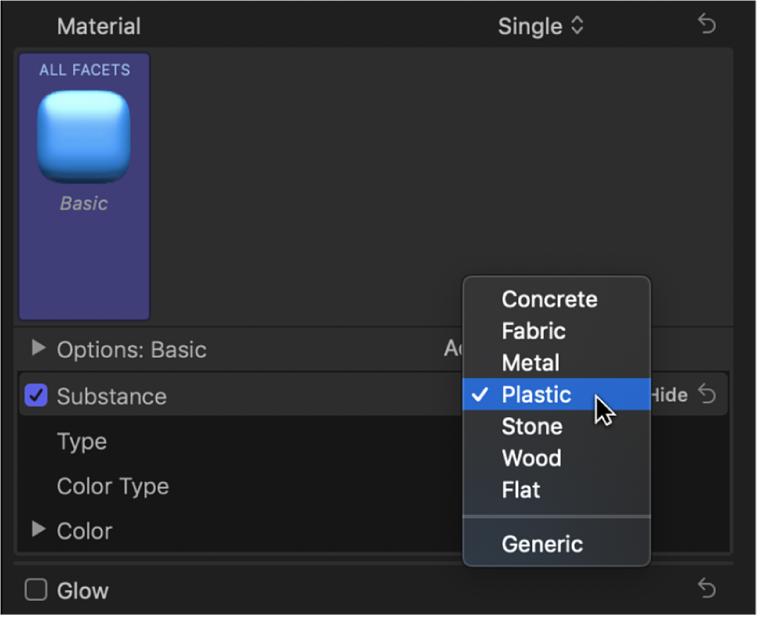
Click the Substance pop-up menu and choose a substance category.

Depending on the option you choose, additional controls may appear.
Click the Type pop-up menu (below the Substance pop-up menu) and choose a substance belonging to the category you chose above.
Depending on the option you choose, additional controls may appear.
Adjust other available Substance settings, such as Color, Brightness, Roughness, and so on.
As you make adjustments, the preview thumbnail is updated in the Material section, and the 3D title is updated in the viewer.
For more information about material layer controls, see Intro to Material controls in Final Cut Pro.
Rename a modified material
When you modify material layers, the preview thumbnail in the Text inspector is updated to show the new texture. However, the preset name under the preview thumbnail remains the same (“Basic” for titles added from the 3D category). You can rename the material to better describe the modified material.
In the Final Cut Pro timeline, select a 3D title with a modified preset material.
In the Material section of the 3D Text section of the Text inspector, double-click the name of the material (beneath the preview thumbnail).
The material is renamed for the selected 3D title. Other instances of the preset are not affected.
Type a new name, and press Return.
Restore a preset material’s original settings
In the Final Cut Pro timeline, select a 3D title with a modified preset material.
In the Material section of the 3D Text section of the Text inspector, click the preview thumbnail and choose a preset from the pop-up menu.
The original settings stored in the preset are applied to the selected facet. Other customized instances of the preset are not affected.
You can also save any changes you’ve made as a new custom material to be shared or reused. See Save modified 3D text materials in Final Cut Pro.
Download this guide: Apple Books | PDF