
Add a diagram on a Freeform board on Mac
You can connect shapes and other items with lines to create a diagram or flowchart on your Freeform board.
Add a diagram
Go to the Freeform app
on your Mac.To use connection lines, click
 or choose View > Show Connectors. (When connectors are in use, the button changes to
  .)
.)Add any type of item—a text box, shape (except a line), photo, video, link, sticky note, or other file.
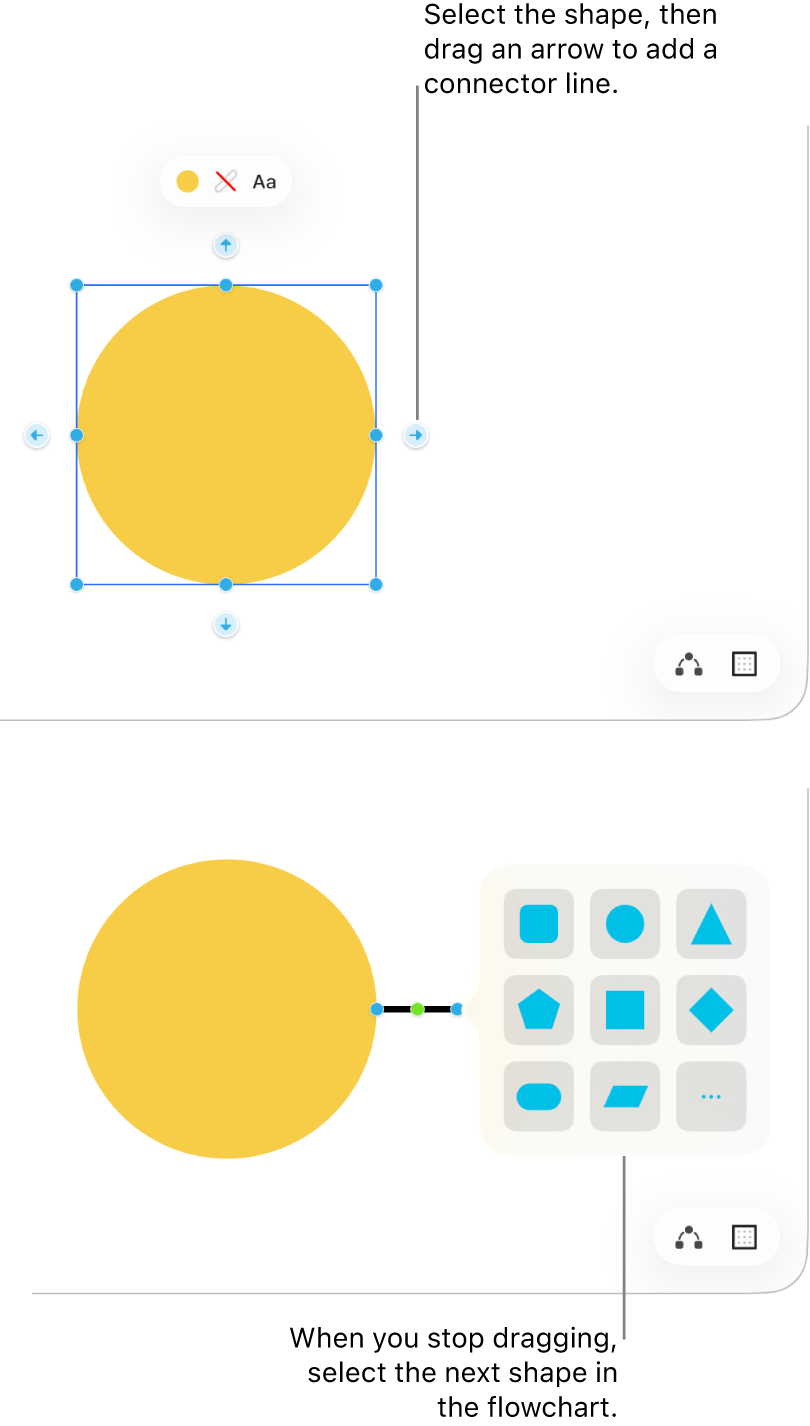
Select the item you added, then drag one of the arrows up, down, left, or right to add a connection line.
When you stop dragging the connector, the shapes library appears, and you can select the next shape for your diagram. (Click
 to open the full shapes library.)
You can also drag a connector to another item that’s already on the board, and the line is automatically added between the two items.
Repeat steps 4, 5, and 6 until your diagram is complete.

Connect two items with a line
After you add two items in a Freeform board, you can add a line between them.
Select two items on your board.
Do one of the following:
Control-click your selection to open a menu, then select Add Connection Line.
Select Insert > Connection Line in the menu bar.
Click
 , then select the connection line.
Change connection points
After you add connection lines to a Freeform board, you can change how they connect.
Click to select a connection line.
Click a blue dot connected to the item, then drag it to a new connection point.
Connection points appear at the center, top, bottom, and sides of your item. A filled circle appears when a connection is possible elsewhere—either in or near the item.
Tip: To quickly duplicate a shape (or other item) and add a connection line, select the shape, then click and hold the connector arrow on the side where you want to add the line and shape. As you hold the arrow, a preview of the shape and line appears, and when you let go, they’re placed on the board.
Continue to build your board by adding text, sticky notes, shapes, lines, photos, videos, tables, links, and other files.