Edit and play single samples with Quick Sampler in Logic Pro for Mac
Transform audio into playable instruments: load, slice and customise samples with Quick Sampler's flexible playback modes and Drum Machine Designer integration
Load an audio file into Quick Sampler
In a project, choose Track > New Software Instrument Track.
Click the Instrument slot in the new channel strip, then choose Quick Sampler from the pop-up menu.
To open the Quick Sampler window, click Quick Sampler in the Instrument slot.
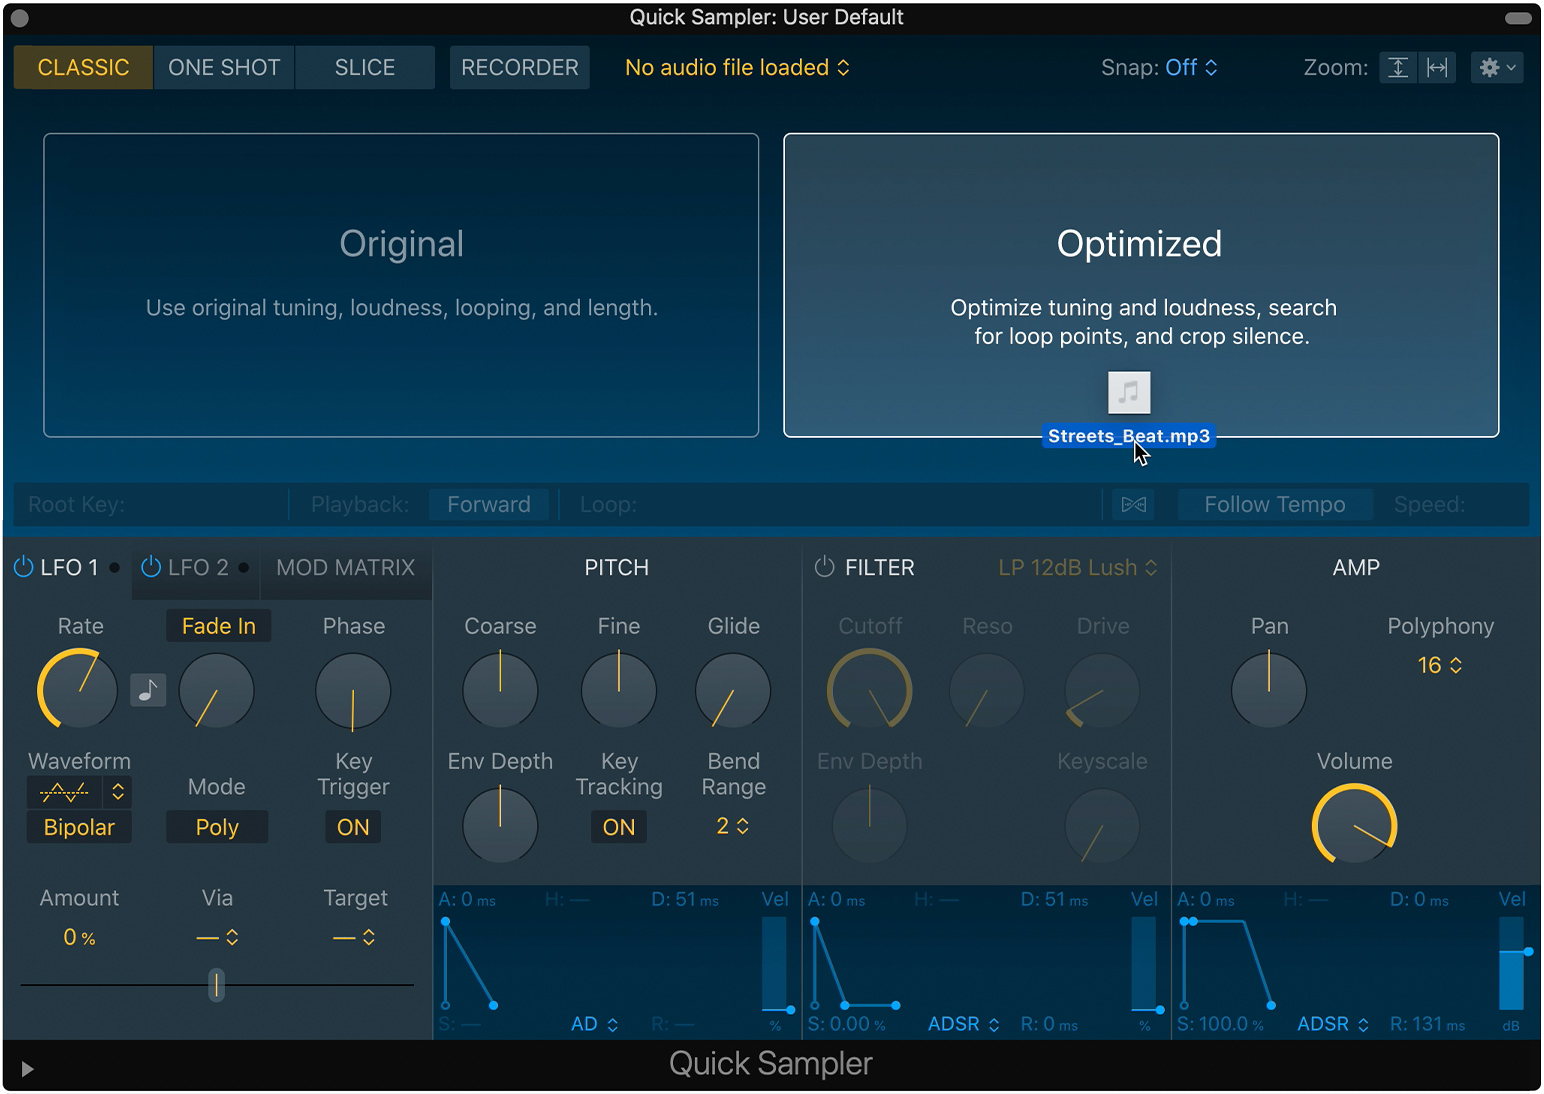
Drag a file from the Logic Pro files browser, Loops browser, a region from any track or from the Finder into one of these areas of the Quick Sampler waveform display:

If you want Quick Sampler to automatically set the tuning, loudness, length and loop points of the sample, choose Optimised.
If you want to keep the original tuning, loudness and length of the sample, choose Original.
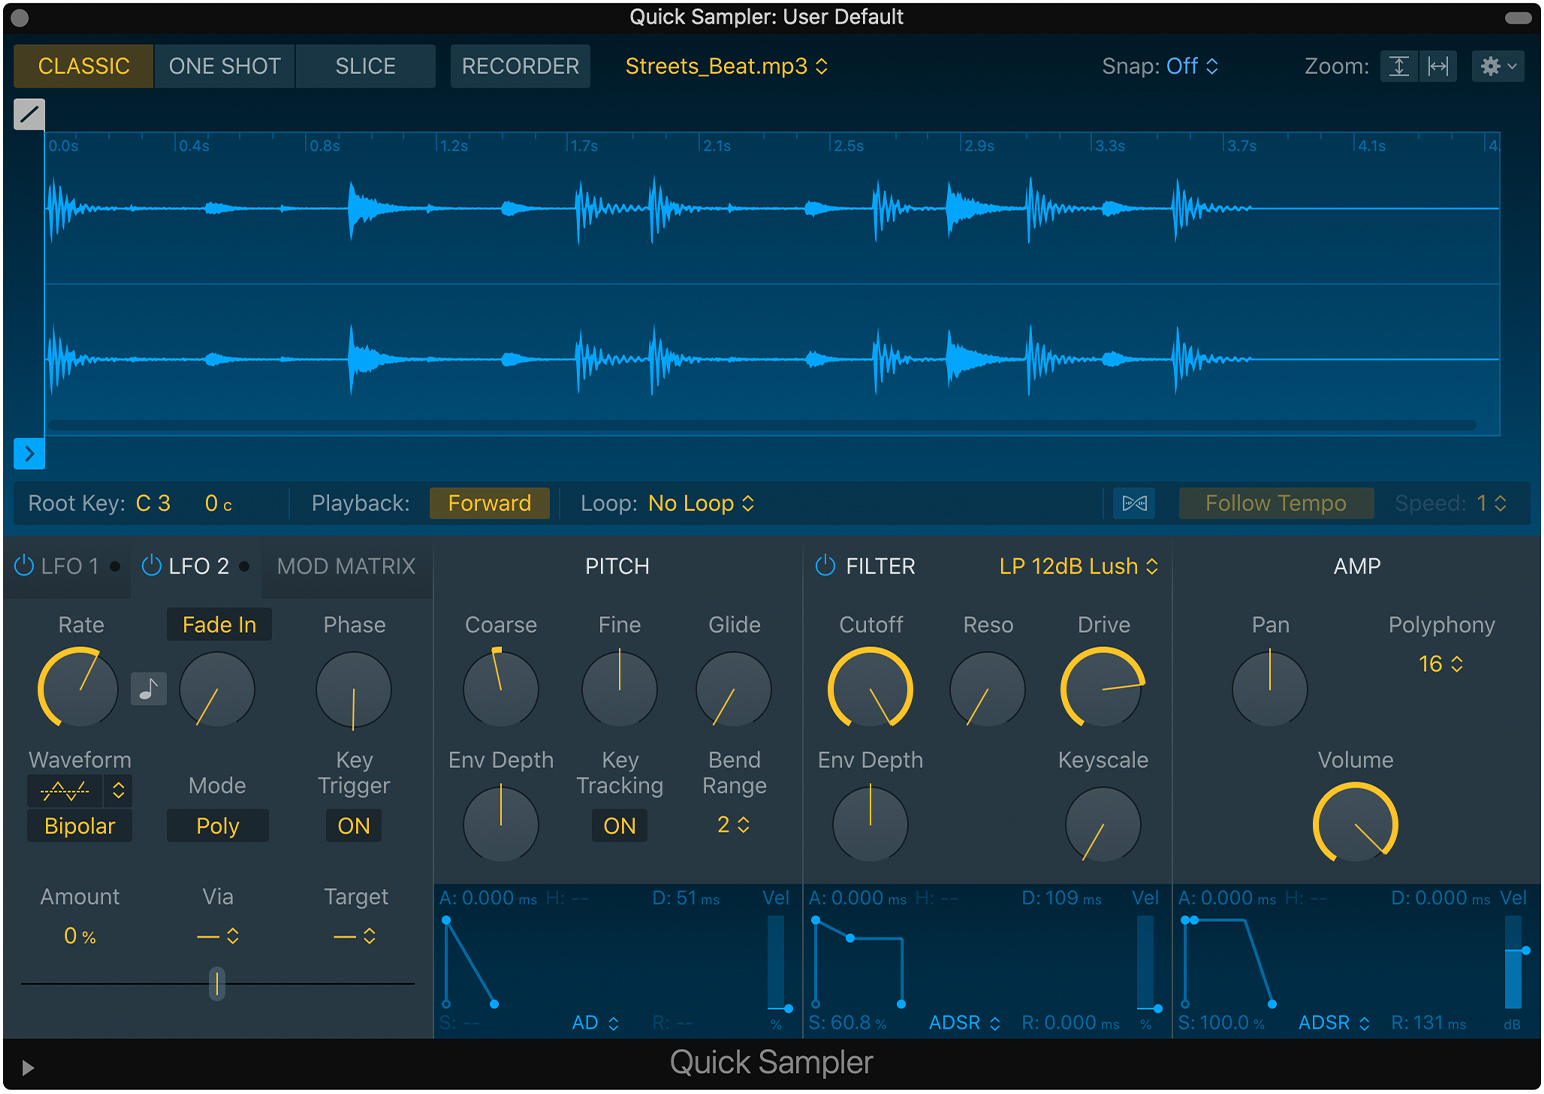
To listen to your sample, hover your pointer over the root key display at the bottom left-hand side of the waveform display, then click the . You can also play the Quick Sampler with musical typing or a connected USB or MIDI keyboard.
The sample is mapped to keys above and below C3, the default root key. Notes below the root key play the sample at a lower pitch and slower speed, while notes above play the sample at a higher pitch and faster speed.
Find out how to record audio directly into Quick Sampler
Choose the sample playback mode
After you’ve added the sample to Quick Sampler, you can choose the playback mode. Click one of these options above the waveform display:

To play a sound across the keyboard range or if you want to loop a sample, choose Classic mode. The sample plays while you hold a key and stops when you release.
To play a sample from start to end, whether a key is held or not, use One Shot mode. A simple note trigger will play the entire sample. Use this for triggering single drum sounds.
To divide a sample into individual hits, use Slice mode. Slice mode analyses the sample and divides it into slices based on the transients in the sample. The slices are then mapped to keyboard keys so you can play each slice independently. You can also create a Drum Machine Designer track from a sliced sample, where individual slices are loaded onto pads to provide maximum control of playback and plug-in effects.
Use Flex mode
Click the to turn on Flex mode. When Flex mode is on, your sample plays at the original length and speed of the source file — even if you play above or below the root note of the sample. Use Flex mode and Follow Tempo with a melodic phrase or drum loop to transpose the pitch in real time while matching the current project tempo.
After enabling Flex mode and Follow Tempo, individual slices stretch or contract depending on the original tempo of the loop and the current project tempo. Sampler stretches slices so that there are no gaps between slices. This is especially useful when you want to take a fast loop and play it at a much slower tempo.
Edit the sample
You can use the Quick Sampler waveform display to set sample start and end points, set loop points, set fade in and fade out points, and more.
To change the sound of your sample, you can use the Quick Sampler’s two LFO (low-frequency oscillators), Pitch envelope, Filter envelope and Amplitude envelope.
Create a Drum Machine Designer track from a sliced sample
You can quickly add a Drum Machine Designer track to your project based on a sliced sample.
Add a sample to Quick Sampler, then click Slice.
Adjust the slices in the Sampler waveform display.
Click the (or Control-click the Sampler waveform display), then choose Create Drum Machine Designer Track.
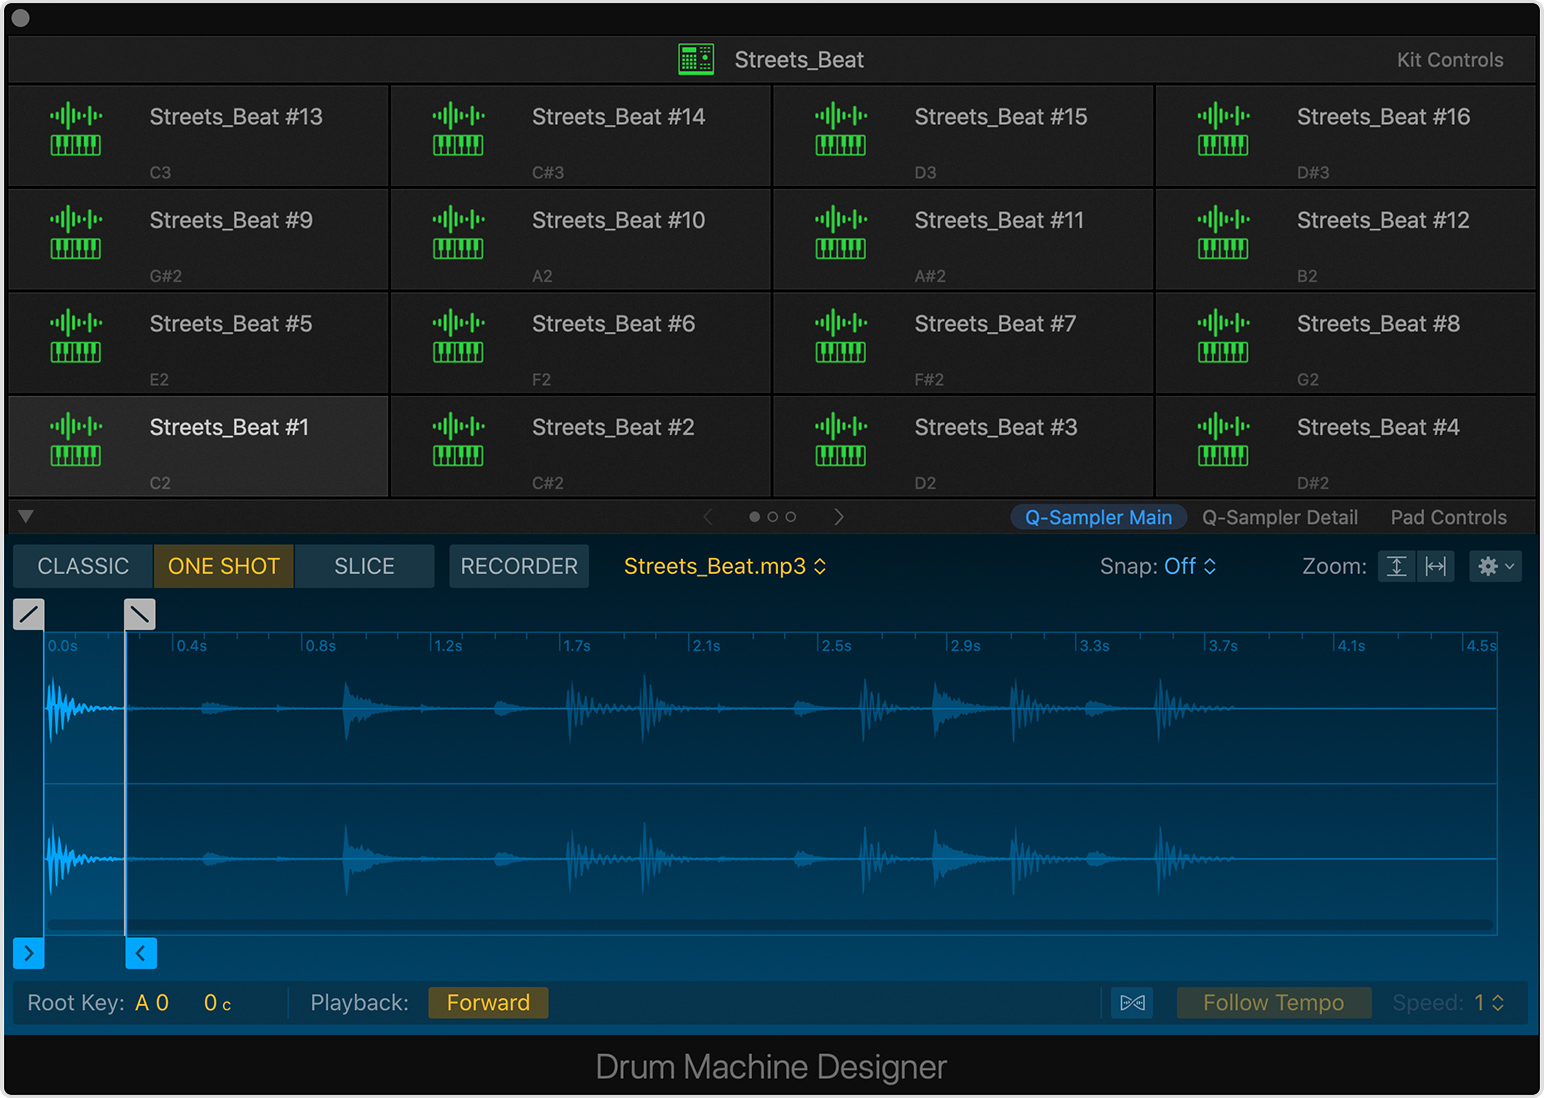
Logic Pro automatically creates a new Drum Machine Designer track. Each sample slice is mapped to a pad in the Drum Machine Designer. Each pad is assigned its own MIDI note.

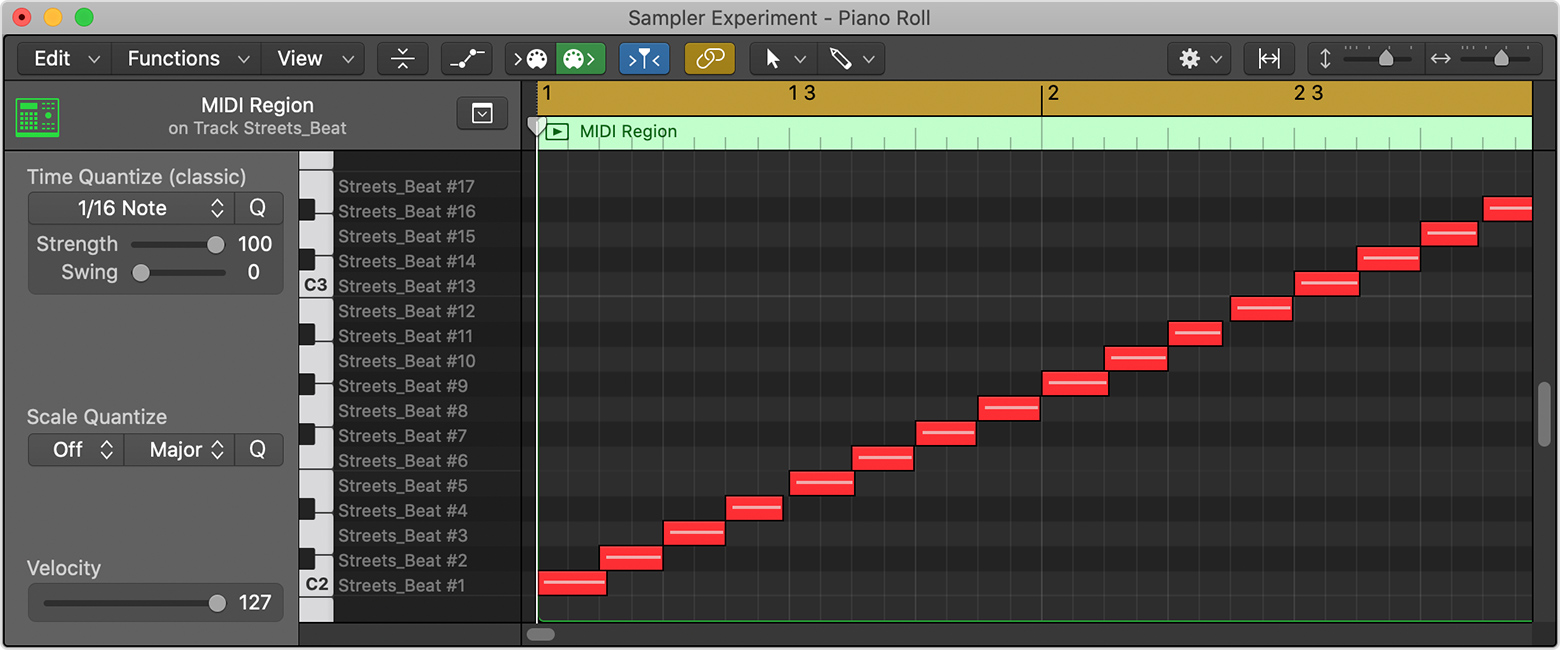
A new MIDI region is also created and placed at the beginning of the project in the tracks area. The region contains MIDI notes of each slice placed sequentially in ascending order, so when you play the project back, it plays the sample back as it sounded in Quick Sampler. You can quantize the notes, add or remove notes and make any other edits as you would to any MIDI region in the Piano Roll Editor.

You can also drag audio files to the track header in the main window to quickly create a Drum Machine Designer track as well as other sample-based software instrument tracks.
Edit samples in the Drum Machine Designer
You can edit each sample slice directly within the Drum Machine Designer. Click a pad in the drum grid to see the sample in the waveform display, below the drum grid. Change the playback mode, adjust the start and end point of the sample, adjust the fade in and fade out, and more.
Additionally, you can access of all Quick Sampler controls, which are separated into two page views in the Drum Machine Designer:
Click Q-Sampler Main to see and edit the sample in the Quick Sampler waveform display.
Click Q-Sampler Detail to change the sound of your sample with the Quick Sampler’s two LFO (low-frequency oscillators), Pitch envelope, Filter envelope and Amplitude envelope.
Create a MIDI region of a sample
To create a MIDI region of a sample:
In Quick Sampler, click Slice.
Drag from the lower portion of the waveform display to the Sampler track lane in the Tracks area or to a cell of the Sampler track in the Live Loops grid.
You can also copy and paste the MIDI region:
Click the , then choose Copy MIDI Pattern.
You can paste the MIDI region into the Tracks area or a Live Loops cell:
In the Tracks area, select the Sampler track, move the playhead where you want to place the MIDI region, then press Control-V.
In the Live Loops grid, select an empty cell of the Sampler track, then press Control-V.
The pasted region contains MIDI notes of each slice placed sequentially in ascending order, so when you play the project back, it plays the sample back as it sounded in Quick Sampler. But you can quantise the notes, add or remove notes, and make any other edits as you would to any MIDI region in the Piano Roll Editor.