Organize reminders on your iPhone or iPad
Use lists and tags in the Reminders app to keep your reminders organized. Do more with tools like Grocery Lists to automatically categorize your shopping items, or templates to save and re-use your lists.
Create, edit, and group reminder lists
Add lists to manage different aspects of your life, like work or school, or even create a grocery list that categorizes your items.
Create a list
Open the Reminders app, then tap Add List. If asked, choose the account you want to use.
Type a name for the list.
Choose a color and an icon or an emoji to customize the list and make it easier to recognize at a glance. You can also make your list into a Smart List.
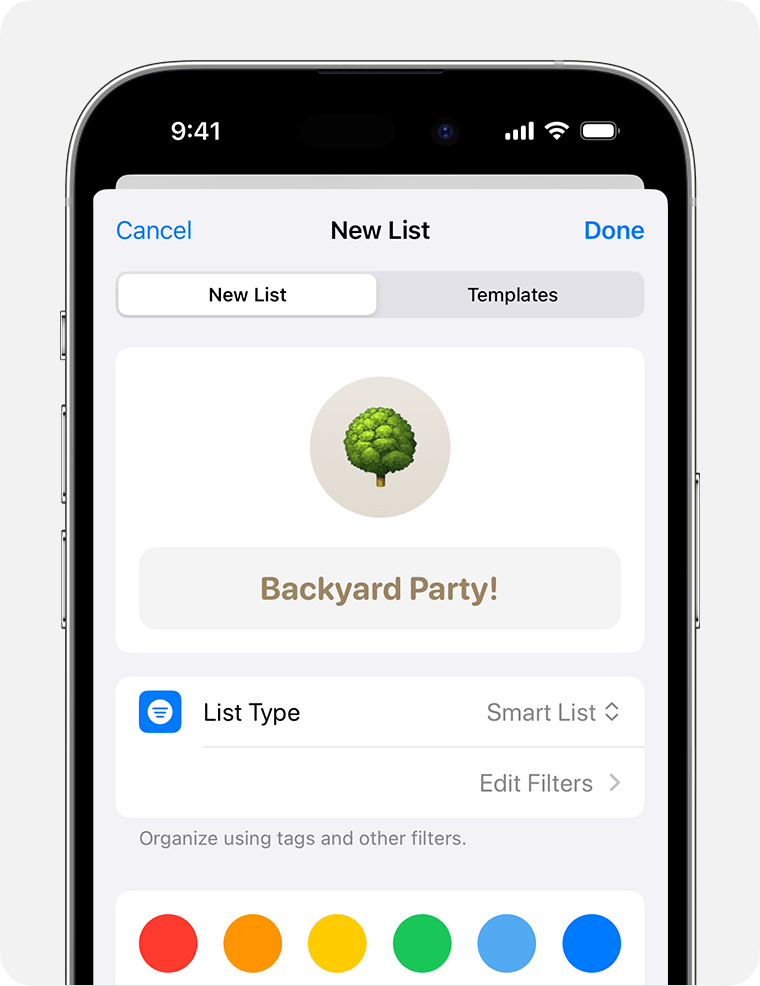
Tap Done.
Icons are available only for lists that you've created in your iCloud account.
Edit a list
Tap the list that you want to edit, then tap the .
Tap Show List Info.
Change the list's name, color, or icon.
Tap Done.
Group lists
Lists can be organized into groups. For example, you can create a group named Work that contains all of your work-related lists.
Tap and hold a list. Then drag the list onto another list.
Give the new group a name.
Tap Create.
Move a reminder to a different list
Tap a list, then tap the reminder that you want to move.
Tap the Edit .
Tap List, then choose the list that you want to move the reminder to.
Tap Done.
You can also drag a reminder to a different list:
Tap and hold the reminder with one finger.
While holding the reminder, tap the Lists button to go back to your lists.*
Drop the reminder on the list that you want to move it to.
To move multiple reminders, tap one and hold it, then use another finger to tap the others that you want to include.
* If you're using an iPad, your lists remain visible, so you can just drag reminders between lists.
Change the order of reminders in a list
Tap and hold a reminder, then drag it to where you want it to appear within the list. Be sure to place it between reminders; if you drag it onto a reminder, it becomes a subtask.
If the reminder you're dragging has subtasks, those subtasks move with it.
Create and use list templates
In iOS 16, iPadOS 16, and later, you can save a list as a template and use it for routines, packing lists, and more. You can share your template and download templates that others share with you.
Turn a list into a template
In the Reminders app, open the list that you want to use as a template.
Tap the .
Tap Save as Template.
Choose a name for your template, then tap Save.
After you make a template, any changes that you make to that list don’t affect the template.
Learn how to share your templates with others. To download and use a template, you need to use Reminders with iOS 16, iPadOS 16, macOS Ventura, or later.
Edit your templates
In the Reminders app, tap the .
Tap Templates.
Tap the on the template that you want to edit.
Tap Edit Template to make changes. Or tap Delete Template to remove the template.
Tap Done or Delete.
When you edit a template that has been shared, anyone that you shared the template with needs to download it again to get the updates. If you delete a template, previously downloaded versions of that template aren't affected.
Create a list from your templates
In the Reminders app, tap the .
Tap Templates.
Tap the template that you want to use.
Enter a name for your new list, then tap Create.
Organize lists with tags
Tags let you quickly and automatically organize reminders based on keywords. For example, create a reminder to "Pick up plant food" with tags like #Errands, #Gardening, or #Shopping. You can also use tags together with existing lists to search and filter your reminders across multiple lists.
Create a tag
When creating or editing a reminder, tap the in the quick toolbar.
Type a keyword. A tag can only be a single word, but you can use hyphens and underscores to make longer tag names.
You can also add a tag directly in the reminder by typing the # sign. Look out for tag suggestions, including those used in the Notes app, above the keyboard as you type.
Tags are available only for reminders that you've created in your iCloud account.
View reminders with certain tags using the tag browser
Any tag you create is automatically added as a button in the tag browser, located at the bottom of your lists view.
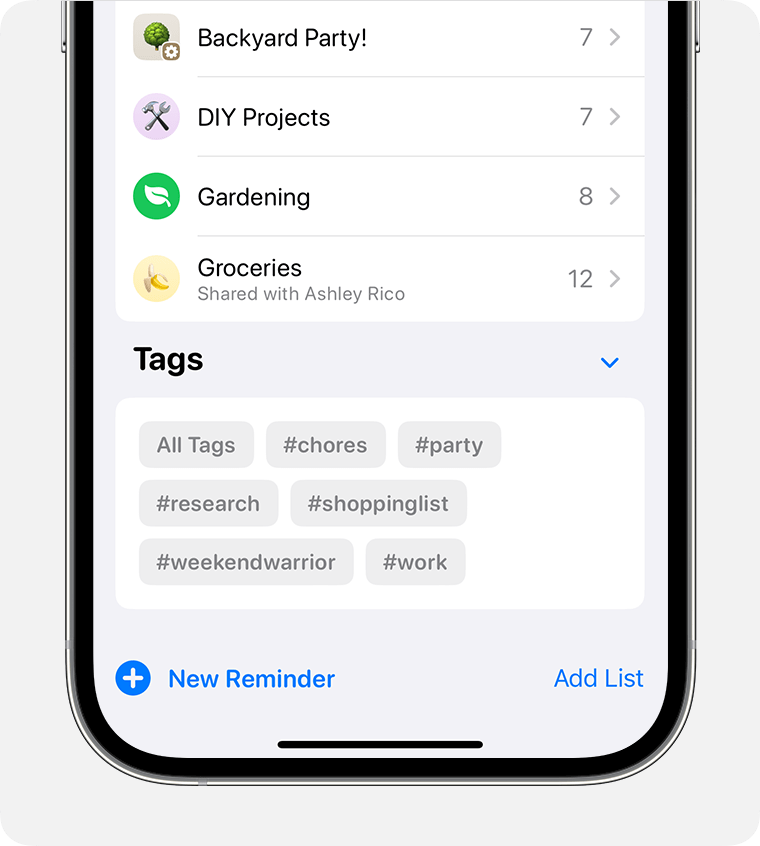
Just tap one or more tag buttons in the Tags section to view tagged reminders across all of your lists. If you select more than one tag, you'll see only reminders that include all of the selected tags.
The tag browser shows all tags currently applied to your reminders. If a tag is no longer being used, you won't see it in the tag browser.
Add a tag to multiple reminders at once
Open a list, then tap the .
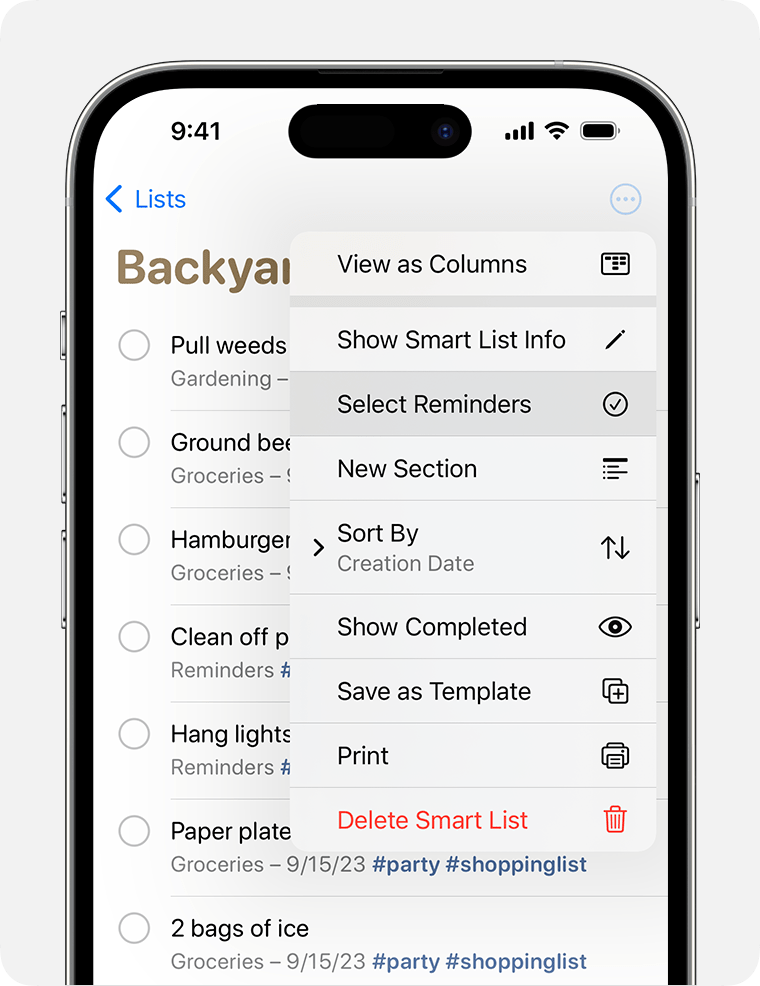
Tap Select Reminders, then select the reminders you want to tag.
Tap the More , then tap Add Tag.
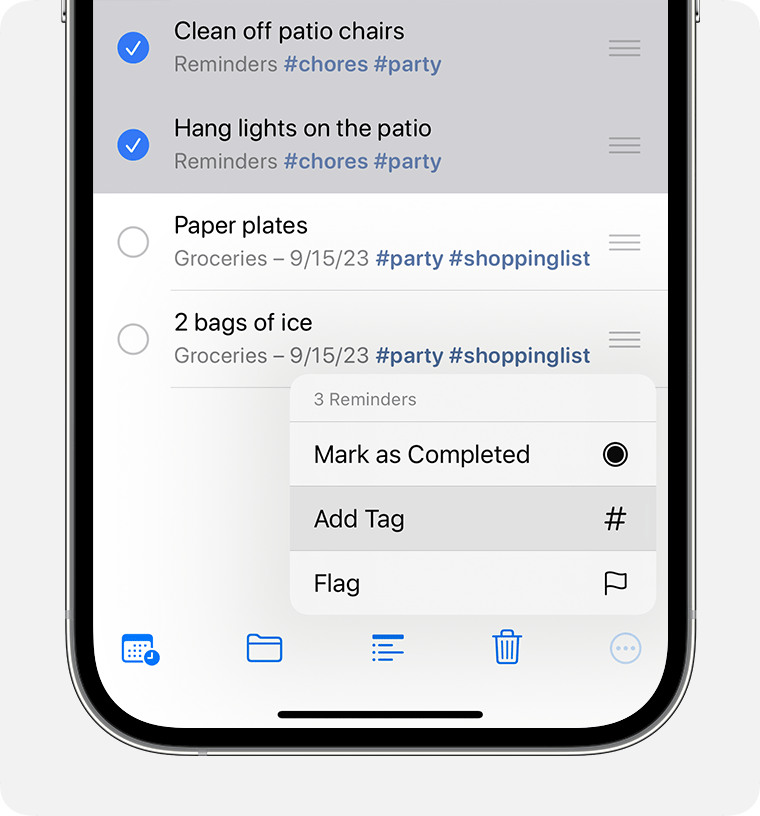
Choose the tag or tags you want to add, then tap Apply.
Remove a tag from a reminder
Touch and hold a tag in a reminder.
Tap the delete key on your keyboard.
Delete or rename a tag
In the tag browser at the bottom of your lists view, tap the tag you want to delete or rename.
Tap the .
Tap Delete Tag or Rename Tag.
Tap Delete to confirm, or type a new name and tap OK to confirm.
If you create a tag on a device with iOS 15 or iPadOS 15 or later, it'll show up as a tag in Reminders on your other Apple devices using iOS 15, iPadOS 15, or macOS Monterey or later. If your other devices are using an older software version, you won't see the tag unless it's part of the reminder's title or note, where you'll see the tag as plain text.
When you share a tagged Reminder with someone who's using iOS 15, iPadOS 15, or macOS Monterey or later, they'll see the tagged word, but it won't be an actual tag until they convert it to a tag. If you try to share a tagged note with someone who's using an older software version, they won't see the tag at all unless it's in the reminder's title or note, where they'll see the tag as plain text.
Use Smart Lists
The Reminders app's built-in Smart Lists give you a quick view of all your reminders from across your lists. You can even create your own custom Smart Lists to automatically collect reminders based on rules you set. Reminders that match the tags and filter requirements of a Smart List are automatically added to that list.
Smart Lists are available only for lists that you've created in your iCloud account.
View reminders in curated Smart Lists
The main screen of the Reminders app shows built-in Smart Lists that automatically organize your reminders into quick views:
Today shows all of your reminders that you marked as being due today. It also shows reminders that are overdue.
Scheduled shows all of your reminders that have a due date—past, today, and in the future.
Flagged shows all of your reminders that you assigned a flag to.
All shows every reminder, organized by list.
Smart Lists include reminders from all of your custom lists. In the Scheduled, All, and Flagged Smart Lists, you can tap the and select Show Completed to include your completed reminders.
You might also see Assigned to Me and Siri Suggestions smart lists. Assigned to Me shows all of your reminders in shared lists that are assigned to you. Siri Suggestions shows suggested reminders for you to create based on your Mail and Messages.
Create a custom Smart List
Tap Add List in the Reminders app's main screen.
If asked, select your iCloud account. Type a name for the list, then tap Make into Smart List.

Choose tags that you want to use for this list. You can also tap any of the following filters to set them.
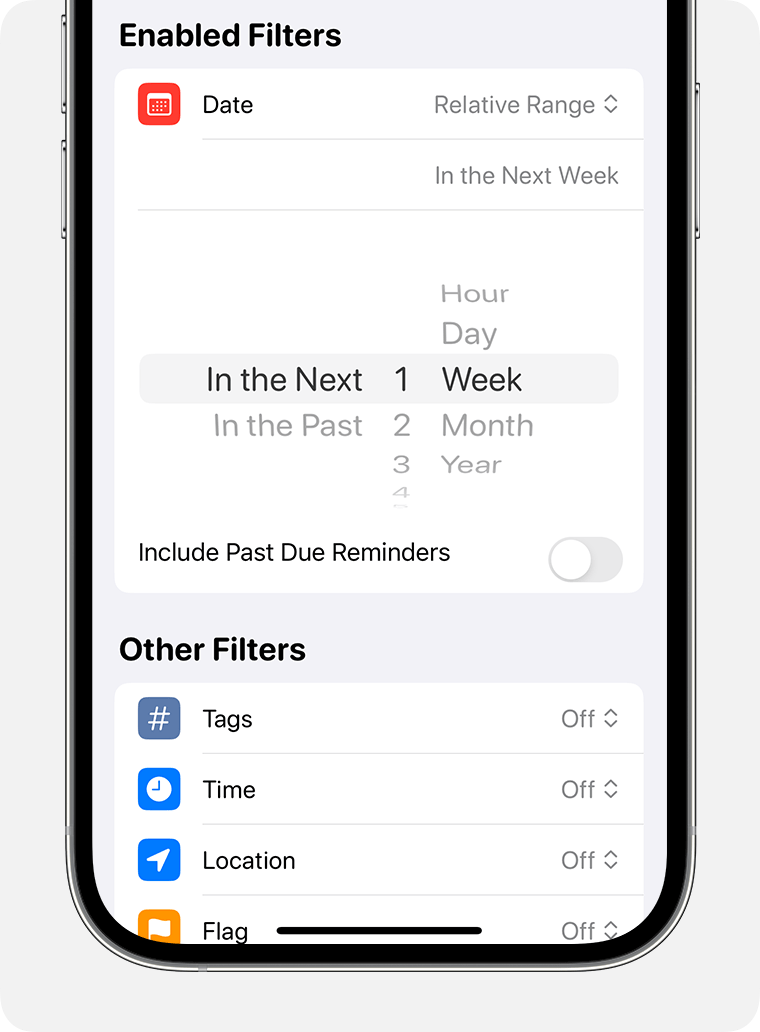
Date: Add reminders to the list that are due in a specified range, where you select the dates, or a relative range, like in the next week or in the past two months.
Time: Add reminders to the list that are due at certain times, like morning, afternoon, evening, or night.
Location: Add reminders to the list that match a specific location.
Flag: Add reminders to the list that are flagged.
Priority: Add reminders to the list that have the same priority—high, medium, or low.
Choose a color and an icon or an emoji to customize the list and make it easier to recognize at a glance.
Tap Done.
You can also make regular lists1 into Smart Lists:
Tap the while viewing a reminder list.
Tap Show List Info.
Scroll down below the icons, then tap Convert to Smart List.2
1. You can't convert a shared list into a Smart List.
2. Once you convert a regular list into a Smart List, you can't convert it back into a regular list.
