Use video effects and mic modes during video calls on Mac
macOS includes a variety of video and audio features that you can use in FaceTime and other videoconferencing apps.
Reactions
Requires macOS Sonoma 14 or later on a Mac with Apple silicon, or macOS Sonoma 14 or later on a Mac using Continuity Camera with iPhone 12 or later
Reactions fill your video frame with a 3D effect expressing how you feel. To turn this feature on or off, choose Reactions from the Video menu![]() that appears in the menu bar when a video call is in progress.
that appears in the menu bar when a video call is in progress.
To show a reaction:
Make the appropriate hand gesture in view of the camera and away from your face. Hold the gesture until you see the effect.
Or click the arrow
 next to Reactions in the Video menu
 , then click a reaction button in the submenu.

Hearts
To show red hearts, use two hands to make a heart sign. Or click the Hearts button![]() in the Reactions submenu.
in the Reactions submenu.

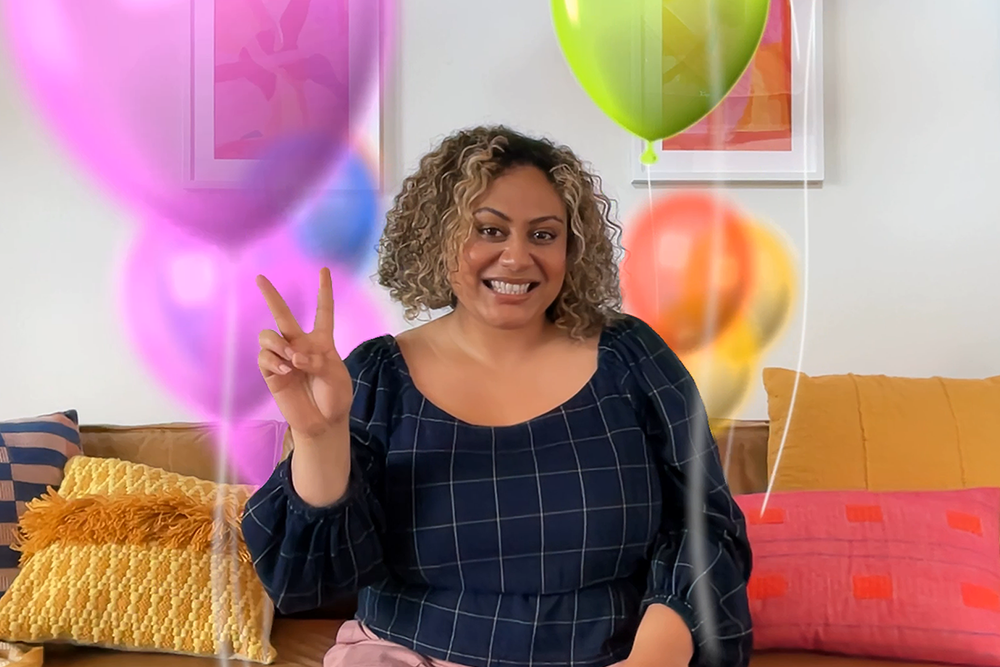
Balloons
To show balloons, make a victory sign (peace sign). Or click the Balloons button![]() in the Reactions submenu.
in the Reactions submenu.
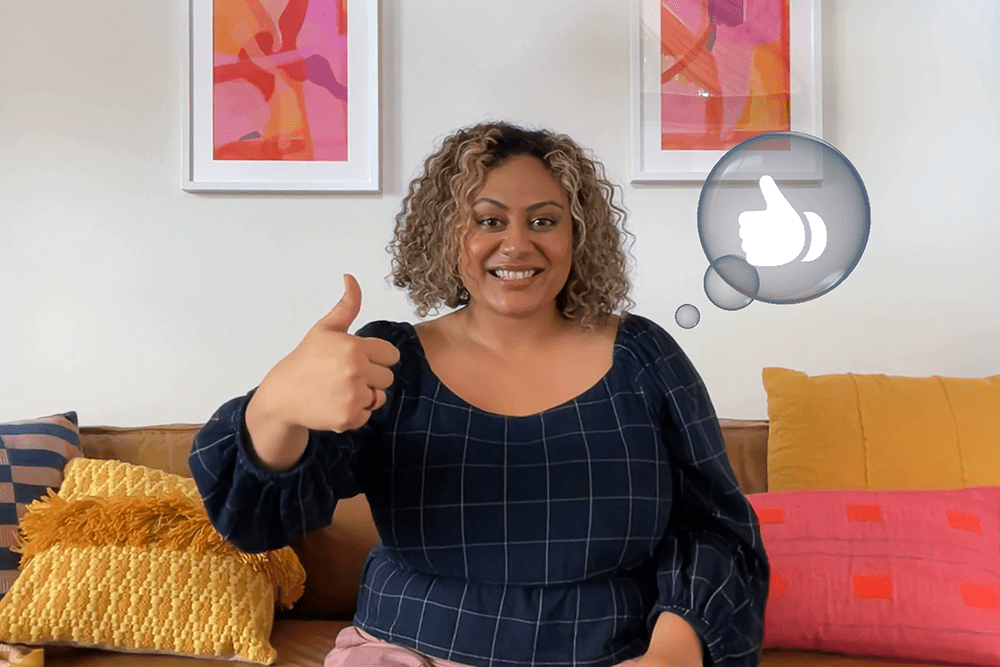
Thumbs Up
To show a thumbs up emoji, hold one thumb up. Or click the Thumbs Up button![]() in the Reactions submenu.
in the Reactions submenu.
Thumbs Down
To show a thumbs down emoji, hold one thumb down. Or click the Thumbs Down button![]() in the Reactions submenu.
in the Reactions submenu.

Rain
To show stormy rain, hold both of your thumbs down. Or click the Rain button![]() in the Reactions submenu.
in the Reactions submenu.

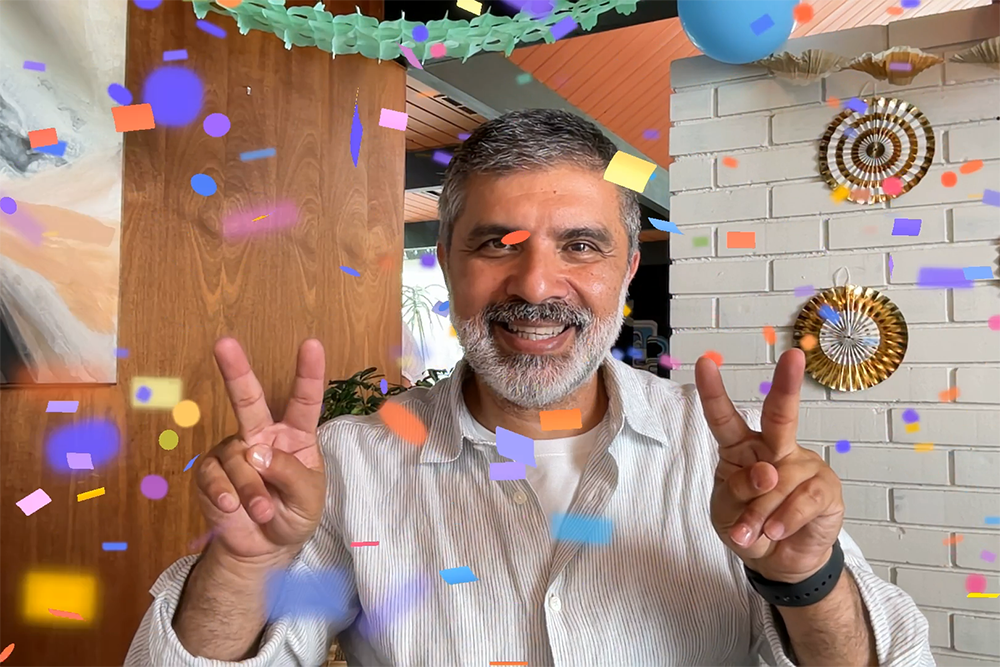
Confetti
To show confetti, make two victory signs (peace signs). Or click the Confetti button![]() in the Reactions submenu.
in the Reactions submenu.
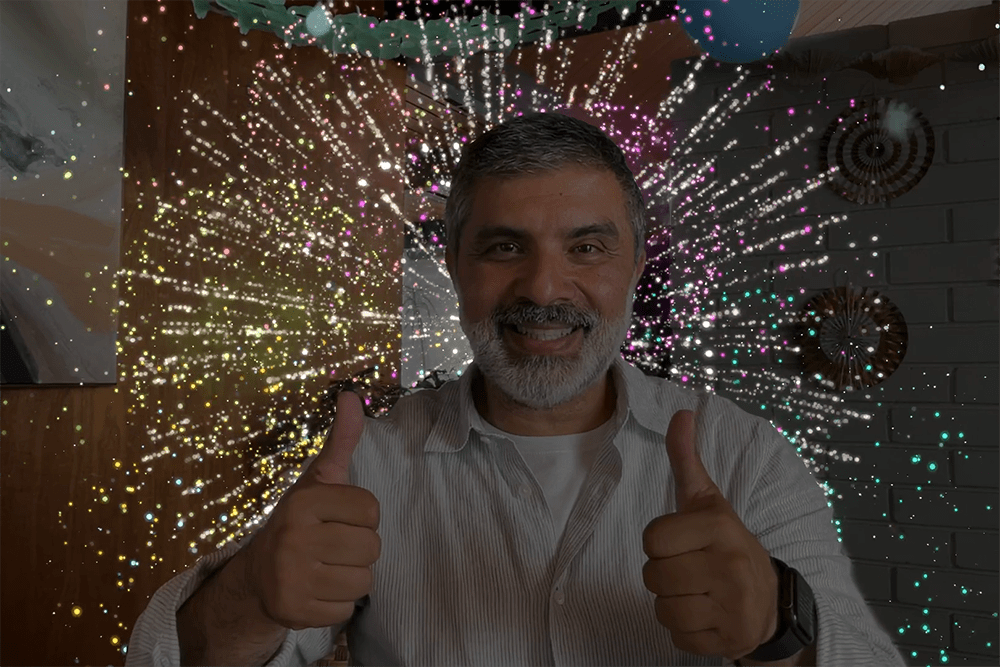
Fireworks
To show fireworks, hold both of your thumbs up. Or click the Fireworks button![]() in the Reactions submenu.
in the Reactions submenu.
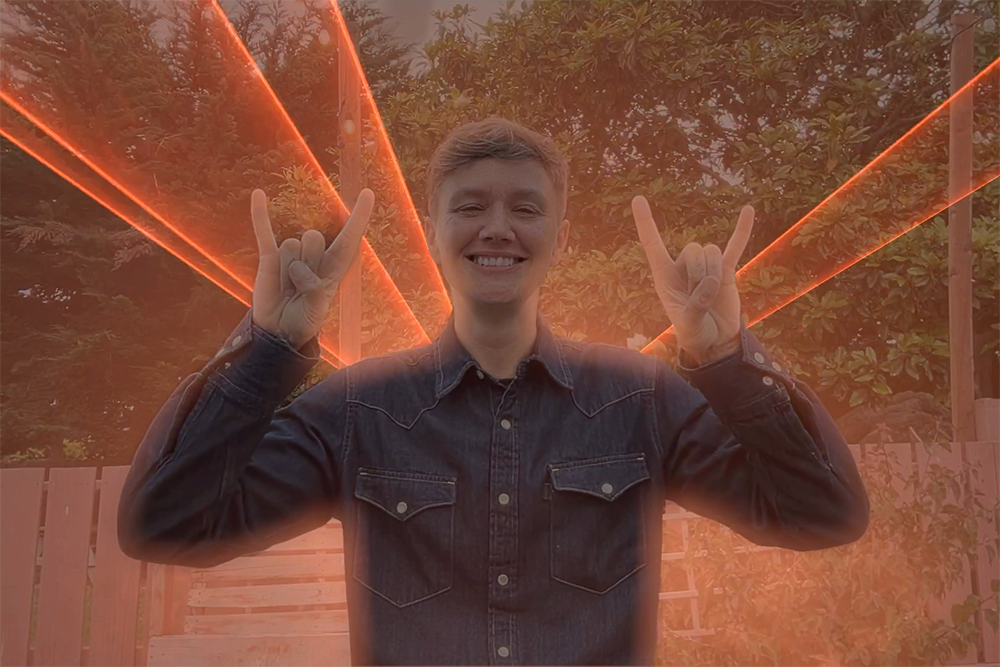
Lasers
To show laser beams, make the sign of the horns 🤘 on each hand. Or click the Lasers button![]() in the Reactions submenu.
in the Reactions submenu.
Presenter Overlay
Requires macOS Sonoma 14 or later on a Mac with Apple silicon
Presenter Overlay elevates your presence by including you on top of the screen that you’re sharing when on a video call.
Presenter Overlay: Large
The large overlay keeps you prominent while the screen you’re sharing is framed next to you. By default, your room appears in the background (virtual backgrounds are disabled), and you can walk, talk, and move in front of the screen. It works even when you're using Center Stage.
Use the screen-sharing feature of your video app to share a screen.
From the screen-sharing menu
 in the menu bar, click Presenter Overlay, then click Large
 .
. Use the video preview in this menu to:
Confirm that the effect is working.
Move the shared screen to the other side of you: Move your pointer over the video preview, then click the button with the horizontal opposing arrows
 in the corner of the preview.
Make the shared screen fill the entire background behind you: Move your pointer over the video preview, then click the button with the diagonal opposing arrows
 in the corner of the preview.

Presenter Overlay: Small
The small overlay shows your face in a movable bubble, which gives more space to the screen you're sharing. You can point to important details.
Use the screen-sharing feature of your video app to share a screen.
From the screen-sharing menu
in the menu bar, click Small .
.To move the bubble, drag it to any position in your shared screen (not in the video preview window).

To more quickly turn Presenter Overlay on or off, you can set up a keyboard shortcut: Choose Apple menu > System Settings, click Keyboard in the sidebar, then click Keyboard Shortcuts on the right. Click Presenter Overlay, then assign keyboard shortcuts on the right.
Center Stage
Use Center Stage to keep you centered in the camera frame
Portrait Mode
Requires a Mac laptop with Apple silicon using the built-in camera, or a Mac using Continuity Camera with iPhone XR or later
Portrait mode blurs the background to keep the focus on you.
In macOS Sonoma or later, choose Portrait from the Video menu
that appears in the menu bar when a video call is in progress. To change the amount of background blur, click the arrow next to Portrait, then use the slider.In macOS Ventura, click Control Center
 in the menu bar, click Video Effects, then click Portrait.
Studio Light
Requires macOS Sonoma 14 or later on a Mac laptop with Apple silicon using the built-in camera, or macOS Ventura 13 or later on a Mac using Continuity Camera with Phone 12 or later
Studio light dims the background and illuminates your face, without relying on external lighting. Studio Light is great for difficult lighting situations, like backlit scenes in front of a window.
In macOS Sonoma or later, choose Studio Light from the Video menu
that appears in the menu bar when a video call is in progress. To adjust the intensity of this effect, click the arrow next to Studio Light, then use the slider.In macOS Ventura, click Control Center
 in the menu bar, click Video Effects, then click Studio Light.
Edge Light
Use Edge Light to illuminate your face during video calls
Background replacement
Requires macOS Sequoia 15 or later on a Mac with Apple silicon, or macOS Sequoia 15 or later on a Mac using Continuity Camera with iOS 18 or later on an iPhone 12 or later
Use a virtual background to enhance your privacy, present a more professional appearance, or suit the occasion.
From the Video menu
that appears in the menu bar when a video call is in progress, choose Background. Next to Background in the menu, click the background preview to choose a color, built-in image, or image of your own.
Virtual backgrounds are disabled when using the large Presenter Overlay.
Desk View
Use Desk View to show your face and desk on camera
Manual framing adjustment
Requires macOS Sonoma 14 or later and any of these devices: a Mac using the built-in camera of an Apple Studio Display, a MacBook Pro introduced in 2024 or later using its built-in camera, an iMac introduced in 2024 or later using its built-in camera, or a Mac using Continuity Camera with iPhone XR or later
If you’re using Center Stage, make sure that it’s turned off (dimmed) in the Video menu
.Move your pointer over the video preview in the Video menu
, then make these adjustments:Zoom: The zoom control is a series of tick marks showing the zoom level, from 3x zoomed in to 0.5x zoomed out. Drag the control left or right to adjust zoom.
Pan: When zoomed in, drag the image within the preview window to change its position in the frame.
Recenter: Click the Recenter button to position your face in the center of the frame.

Mic modes
In macOS Sonoma 14 or later, click Mic Mode from the Video menu![]() or Audio menu
or Audio menu![]() that appears in the menu bar when a video call is in progress. Then choose a mic mode. In macOS Ventura 13 or macOS Monterey 12, click Control Center
that appears in the menu bar when a video call is in progress. Then choose a mic mode. In macOS Ventura 13 or macOS Monterey 12, click Control Center![]() in the menu bar, then click Mic Mode. Choose from the following mic modes:
in the menu bar, then click Mic Mode. Choose from the following mic modes:
Voice Isolation
Voice Isolation![]() gives priority to your voice and minimizes the sounds of traffic, dogs barking, and other background noise around you.
gives priority to your voice and minimizes the sounds of traffic, dogs barking, and other background noise around you.
Wide Spectrum
Wide Spectrum![]() captures your voice as well as the sound around you, such as the sound of music or nature.
captures your voice as well as the sound around you, such as the sound of music or nature.
Spatial Audio
Spatial Audio makes the voices you hear sound like they're coming from the direction in which each person is positioned on the screen. It's available on these Mac models when using an app that supports Spatial Audio:
Mac models with Apple silicon, if using the internal speakers, wired headphones, or AirPods
Intel-based Mac laptop models introduced in 2018 later, if using the internal speakers or wired headphones
Intel-based iMac models introduced in 2018 or later, if using wired headphones
Learn what to do if Spatial Audio is unavailable in FaceTime while using your keyboard, mouse, or trackpad.
Need more help?
Tell us more about what's happening, and we’ll suggest what you can do next.