Motion User Guide
- Welcome
- What’s new
-
- Intro to basic compositing
-
- Intro to transforming layers
-
- Intro to transforming layers in the canvas
- Transform layer properties in the canvas
- Transform tools
- Change layer position, scale, or rotation
- Move a layer’s anchor point
- Add a drop shadow to a layer
- Distort or shear a layer
- Crop a layer
- Modify shape or mask points
- Transform text glyphs and other object attributes
- Align layers in the canvas
- Transform layers in the HUD
- Transform 2D layers in 3D space
-
- Intro to behaviors
- Behaviors versus keyframes
-
- Intro to behavior types
-
- Intro to Parameter behaviors
- Audio behavior
- Average behavior
- Clamp behavior
- Custom behavior
- Add a Custom behavior
- Exponential behavior
- Link behavior
- Logarithmic behavior
- MIDI behavior
- Add a MIDI behavior
- Negate behavior
- Oscillate behavior
- Create a decaying oscillation
- Overshoot behavior
- Quantize behavior
- Ramp behavior
- Randomize behavior
- Rate behavior
- Reverse behavior
- Stop behavior
- Track behavior
- Wriggle behavior
-
- Intro to Simulation behaviors
- Align to Motion behavior
- Attracted To behavior
- Attractor behavior
- Drag behavior
- Drift Attracted To behavior
- Drift Attractor behavior
- Edge Collision behavior
- Gravity behavior
- Orbit Around behavior
- Random Motion behavior
- Repel behavior
- Repel From behavior
- Rotational Drag behavior
- Spring behavior
- Vortex behavior
- Wind behavior
- Additional behaviors
-
- Intro to using generators
- Add a generator
-
- Intro to image generators
- Caustics generator
- Cellular generator
- Checkerboard generator
- Clouds generator
- Color Solid generator
- Concentric Polka Dots generator
- Concentric Shapes generator
- Gradient generator
- Grid generator
- Japanese Pattern generator
- Lens Flare generator
- Manga Lines generator
- Membrane generator
- Noise generator
- One Color Ray generator
- Op Art 1 generator
- Op Art 2 generator
- Op Art 3 generator
- Overlapping Circles generator
- Radial Bars generator
- Soft Gradient generator
- Spirals generator
- Spiral Drawing generator
- Use Spiral Drawing onscreen controls
- Star generator
- Stripes generator
- Sunburst generator
- Truchet Tiles generator
- Two Color Ray generator
- Save a modified generator
-
- Intro to filters
- Browse and preview filters
- Apply or remove filters
-
- Intro to filter types
-
- Intro to Color filters
- Brightness filter
- Channel Mixer filter
- Color Balance filter
- Example: Color-balance two layers
- Color Curves filter
- Use the Color Curves filter
- Color Reduce filter
- Color Wheels filter
- Use the Color Wheels filter
- Colorize filter
- Contrast filter
- Custom LUT filter
- Use the Custom LUT filter
- Gamma filter
- Gradient Colorize filter
- HDR Tools filter
- Hue/Saturation filter
- Hue/Saturation Curves filter
- Use the Hue/Saturation Curves filter
- Levels filter
- Negative filter
- OpenEXR Tone Map filter
- Sepia filter
- Threshold filter
- Tint filter
-
- Intro to Distortion filters
- Black Hole filter
- Bulge filter
- Bump Map filter
- Disc Warp filter
- Droplet filter
- Earthquake filter
- Fisheye filter
- Flop filter
- Fun House filter
- Glass Block filter
- Glass Distortion
- Insect Eye filter
- Mirror filter
- Page Curl filter
- Poke filter
- Polar filter
- Refraction filter
- Ring Lens filter
- Ripple filter
- Scrape filter
- Sphere filter
- Starburst filter
- Stripes filter
- Target filter
- Tiny Planet filter
- Twirl filter
- Underwater filter
- Wave filter
-
- Intro to Stylize filters
- Add Noise filter
- Bad Film filter
- Bad TV filter
- Circle Screen filter
- Circles filter
- Color Emboss filter
- Comic filter
- Crystallize filter
- Edges filter
- Extrude filter
- Fill filter
- Halftone filter
- Hatched Screen filter
- Highpass filter
- Indent filter
- Line Art filter
- Line Screen filter
- MinMax filter
- Noise Dissolve filter
- Pixellate filter
- Posterize filter
- Relief filter
- Slit Scan filter
- Slit Tunnel filter
- Texture Screen filter
- Vignette filter
- Wavy Screen filter
- Publish filter parameters to Final Cut Pro
- Using filters on alpha channels
- Filter performance
- Save custom filters
-
- Intro to 360-degree video
- 360-degree projects
- Create 360-degree projects
- Add 360-degree video to a project
- Create a tiny planet effect
- Reorient 360-degree media
- Creating 360-degree templates for Final Cut Pro
- 360-degree-aware filters and generators
- Export and share 360-degree projects
- Guidelines for better 360-degree projects
-
- Intro to tracking
- How does motion tracking work?
- Motion tracking behavior types
- Analyze motion in a clip
- Stabilize a shaky clip
- Unstabilize a clip
- Use a range of frames for analysis
- Load existing tracking data
- Track shapes, masks, and paint strokes
- Track a filter’s position parameter
- Adjust onscreen trackers
- Save tracks to the Library
-
- Intro to preferences and shortcuts
-
- Intro to Keyboard shortcuts
- Use function keys
- General keyboard shortcuts
- Audio list keyboard shortcuts
-
- Tools keyboard shortcuts
- Transform tool keyboard shortcuts
- Select/Transform tool keyboard shortcuts
- Crop tool keyboard shortcuts
- Edit Points tool keyboard shortcuts
- Edit shape tools keyboard shortcuts
- Pan and Zoom tools keyboard shortcuts
- Shape tools keyboard shortcuts
- Bezier tool keyboard shortcuts
- B-Spline tool keyboard shortcuts
- Paint Stroke tool keyboard shortcuts
- Text tool keyboard shortcuts
- Shape mask tools keyboard shortcuts
- Bezier Mask tool keyboard shortcuts
- B-Spline Mask tool keyboard shortcuts
- Transport control keyboard shortcuts
- View option keyboard shortcuts
- HUD keyboard shortcuts
- Inspector keyboard shortcuts
- Keyframe Editor keyboard shortcuts
- Layers keyboard shortcuts
- Library keyboard shortcuts
- Media list keyboard shortcuts
- Timeline keyboard shortcuts
- Keyframing keyboard shortcuts
- Shape and Mask keyboard shortcuts
- 3D keyboard shortcuts
- Miscellaneous keyboard shortcuts
- Touch Bar shortcuts
- Move assets to another computer
- Work with GPUs
- Copyright

3D text Paint controls in Motion
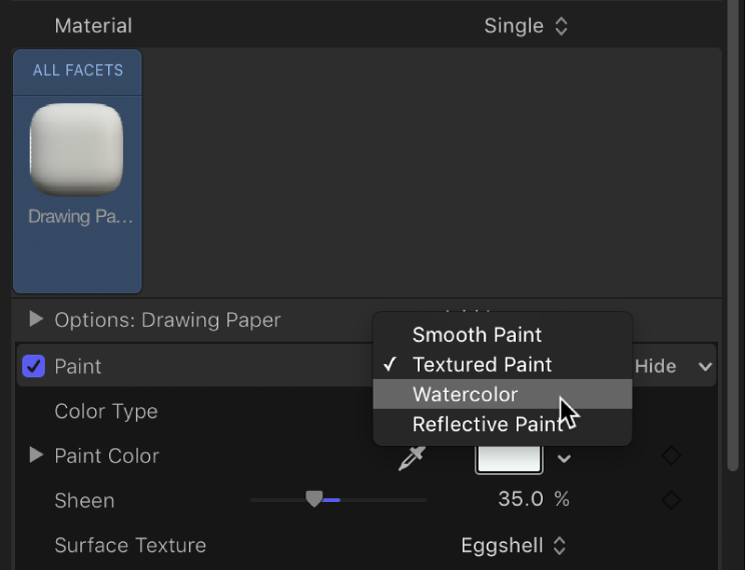
Use the Paint controls in the Appearance pane of the Text Inspector to simulate a coat of paint on the 3D text object. Depending on the option you choose in the Paint pop-up menu (at the top of the Paint section of the Appearance pane), different parameter controls become available.
Paint: A pop-up menu to set a paint type: Smooth Paint, Textured Paint, Watercolor, or Reflective Paint.
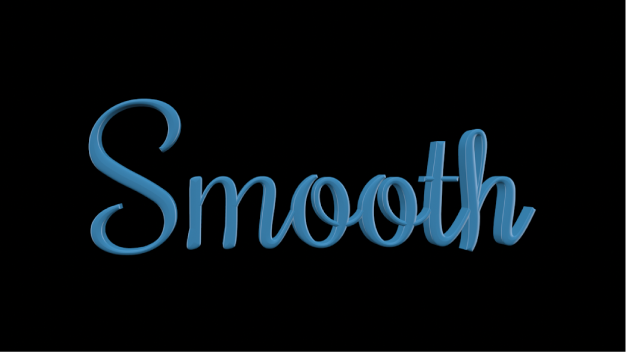
When Paint is set to Smooth Paint
Color Type: A pop-up menu to choose whether the paint is a solid color or a gradient. For information on using gradients, see Intro to using the gradient editor in Motion.
Paint Color: A color control (available when Color Type is set to Color) to set the color of the paint.
Paint Gradient: A gradient control (available when Color Type is set to Gradient) to set a preset gradient or create a custom gradient.
Sheen: A slider to adjust the apparent shininess of the paint surface.
Opacity: A slider to adjust the visibility of the paint. Drag to the left to make the paint more transparent; drag to the right to make it more opaque.
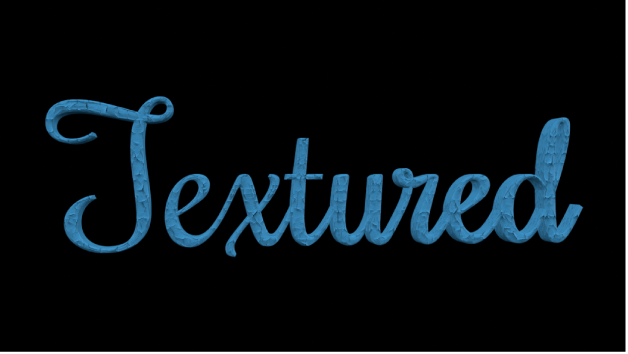
When Paint is set to Textured Paint
Color Type: A pop-up menu to choose whether the paint is a solid color or a gradient. For information on using gradients, see Intro to using the gradient editor in Motion.
Paint Color: A color control (available when Color Type is set to Color) to set the color of the paint.
Paint Gradient: A gradient control (available when Color Type is set to Gradient) to set a preset gradient or create a custom gradient.
Sheen: A slider to adjust the apparent shininess of the paint surface.
Surface Texture: A pop-up menu to apply a texture.
Texture Depth: A slider to adjust the visibility of the texture on the surface of the 3D text object.
Opacity: A slider to adjust the visibility of the paint. Drag to the left to make the paint more transparent; drag to the right to make it more opaque.
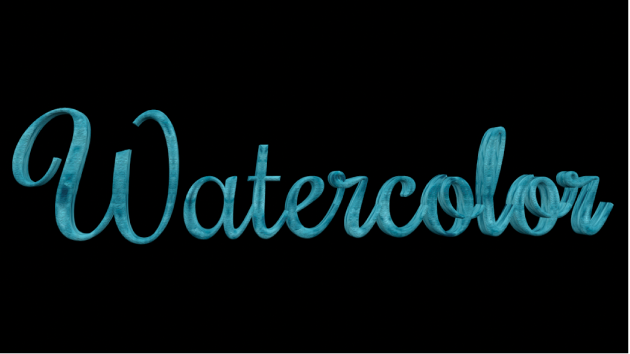
When Paint is set to Watercolor
Paint Color: A color control (available when Color Type is set to Color) to set the color of the paint.
Sheen: A slider to adjust the apparent shininess of the paint surface.
Opacity: A slider to adjust the visibility of the paint. Drag to the left to make the paint more transparent, or drag to the right to make it more opaque.
Placement: A group of controls (available when you click the disclosure triangle) to set how the watercolor pattern is applied to the text object. For details, see 3D text Placement controls in Motion.
When Paint is set to Reflective Paint
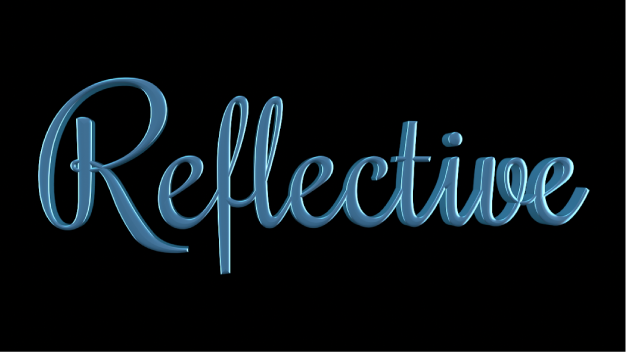
Paint Job: A pop-up menu to select the type of reflective paint (Velvet, Pearl, Electric, and so on)
Paint Color: A color control to set the color of the reflective paint.
Second Color: Some Paint Job types use a second color. Use this color control to set that second color.
Sheen: A slider to adjust the apparent shininess of the paint surface.
Diffuse Brightness: A slider (available when Paint Job is set to Custom) to set the amount of color reflected by the text object.
Specular Brightness: A slider (available when Paint Job is set to Custom) to set the amount of light reflected by the text object.
Shininess: A slider (available when Paint Job is set to Custom) to set how mirror-like the surface appears.
Face Opacity: A slider (available when Paint Job is set to Custom) to set how transparent the paint effect is on surfaces that are more perpendicular to the camera.
Edge Opacity: A slider (available when Paint Job is set to Custom) to set how transparent the paint effect appears on surfaces that are more parallel to the camera.
Opacity: A slider to adjust the visibility of the paint. Drag to the left to make the paint more transparent; drag to the right to make it more opaque.
Fresnel: A slider (available when Paint Job is set to Custom) to set the amount that a change in viewing angle impacts the reflectiveness of the object. A high Fresnel value means that there’s a strong change in reflectivity as the viewing angle changes; a low Fresnel value means that the reflectivity remains relatively consistent regardless of viewing angle.