Learn how to send your Apple Vision Pro battery, power cable, Audio Strap, or Enclosure to Apple
Prepare your Apple Vision Pro battery, power cable, Audio Strap, or Enclosure for packing and shipping.
After you’ve contacted Apple for service, you’ll receive a replacement product with instructions to return your original product to Apple.
Prepare your Apple Vision Pro battery
Turn the power cable counterclockwise to remove it from the Audio Strap.
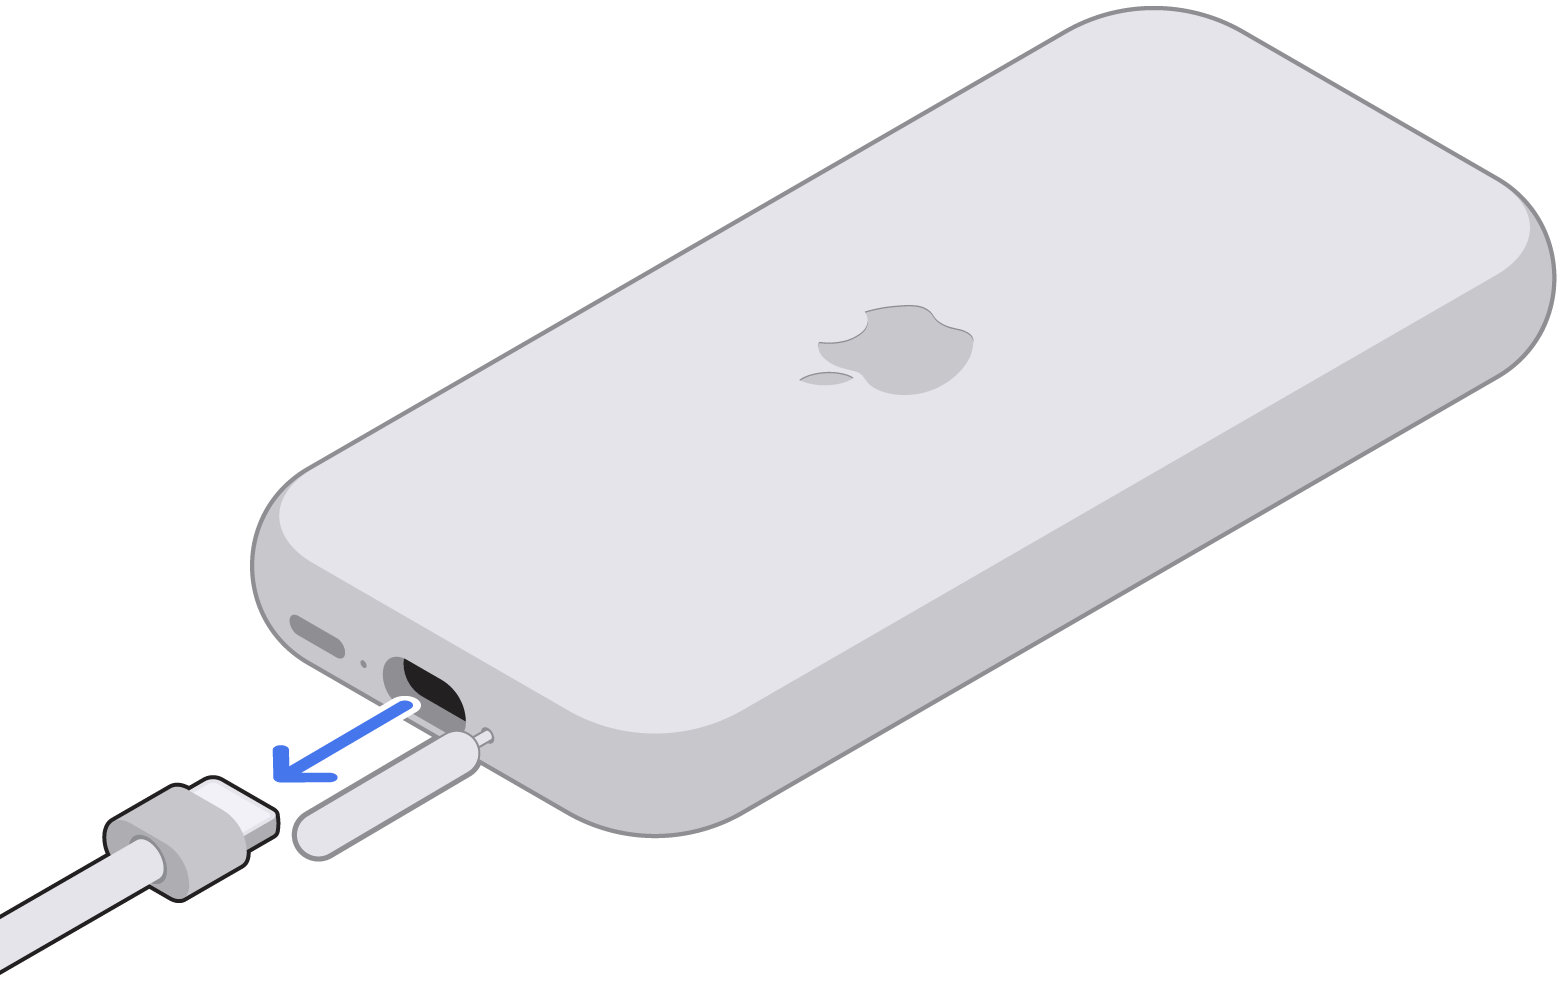
Unplug the USB-C Charge Cable from the battery.
Use the extraction tool included in the box to separate the power cable from the battery:
The eject hole is located on the opposite side of the plug as the LED indicator. Insert the tool into the hole.
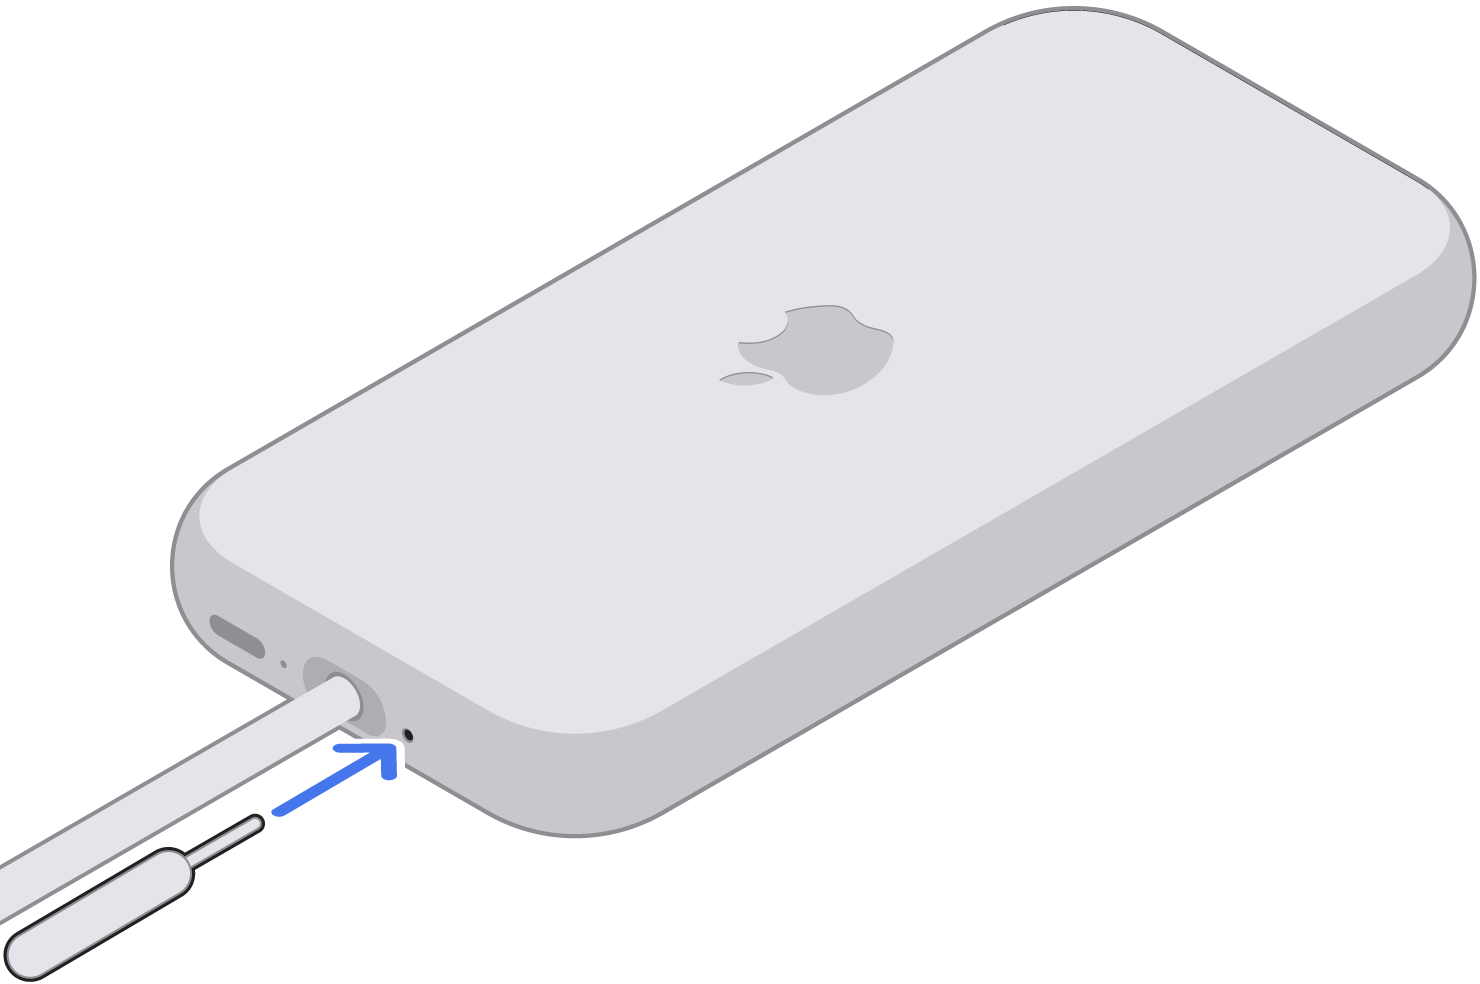
While pushing the extraction tool into the eject hole, pull the cable out. Remove the tool.
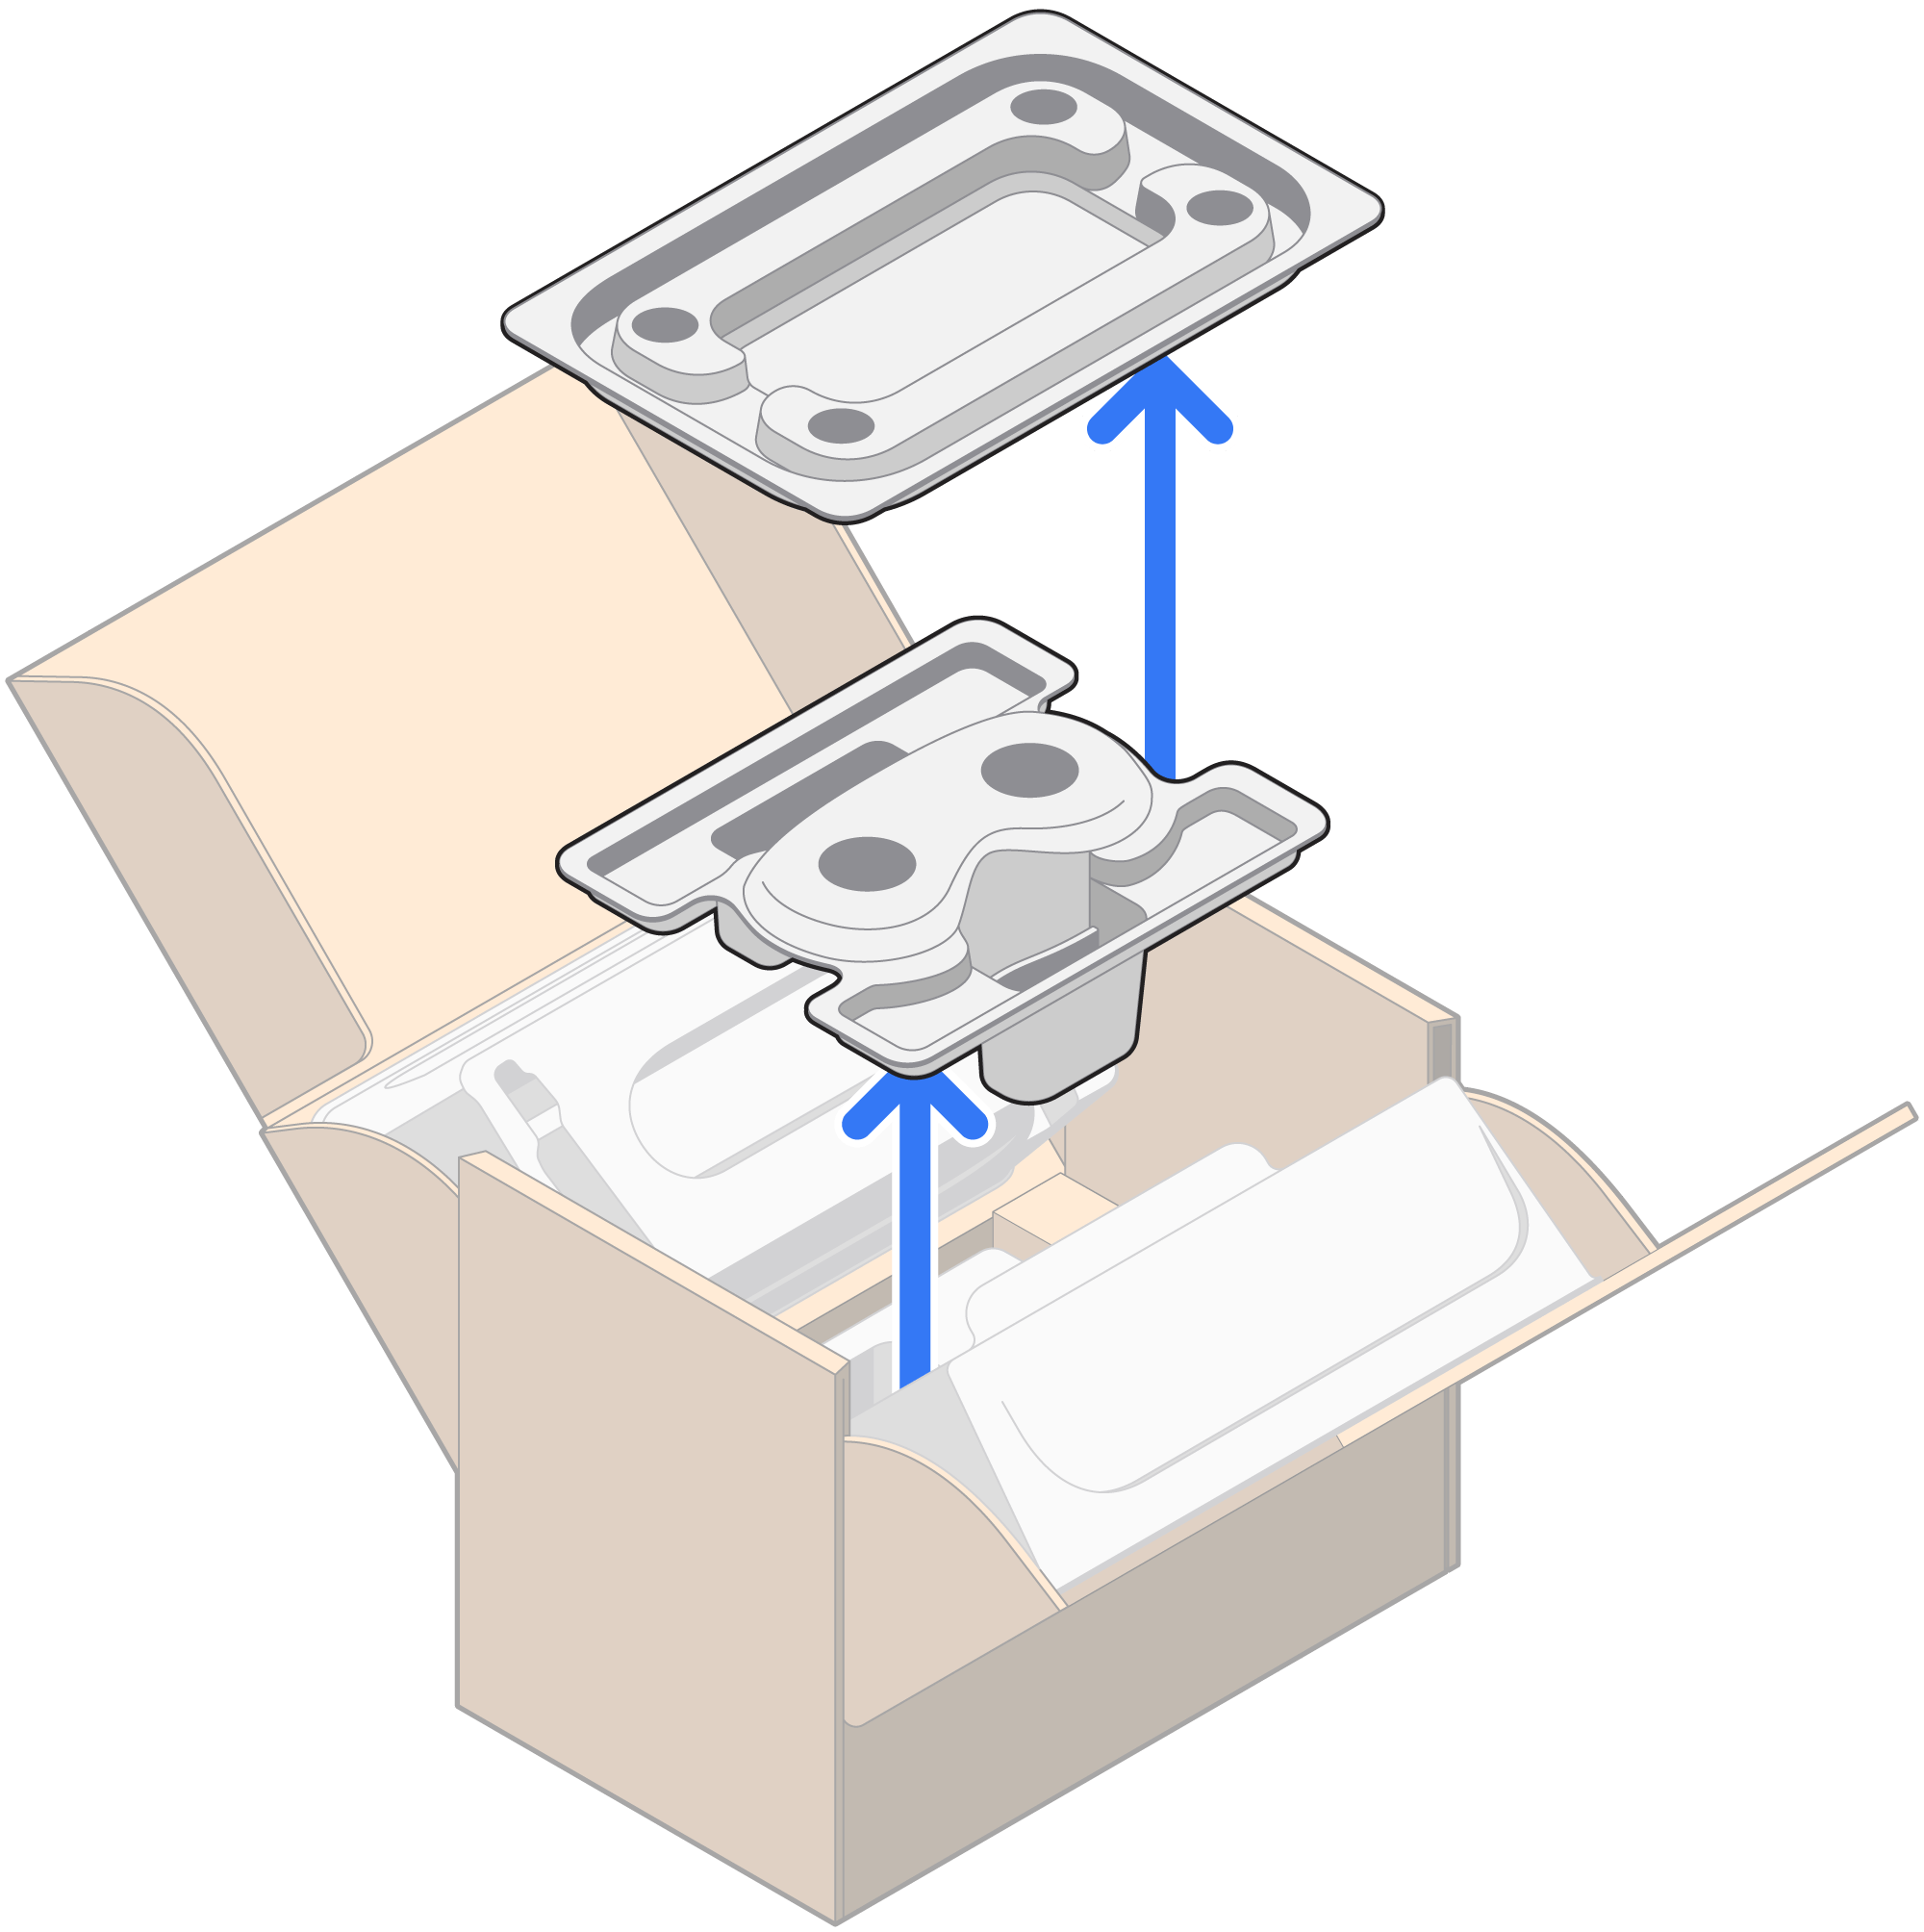
Place the battery in the tray. Do not include the USB-C Charge Cable or power cable.
Put the small box into the large shipping box and close it.
Seal the box with tape and mail the box to Apple.* Please make sure the battery sticker pasted on the outside of the box is not obstructed.
* Apple is not responsible for any damage during shipping.
Prepare your Apple Vision Pro power cable
Turn the power cable counterclockwise to remove it from the Audio Strap.
Unplug the USB-C Charge Cable from the battery.
Use the ejector tool included in the box to separate the power cable from the battery:
The eject hole is located on the opposite side of the plug as the LED indicator. Insert the tool into the hole.
While pushing the extraction tool into the eject hole, pull the cable out. Remove the tool.
Put the power cable into the small box.
Put the small box into the large shipping box and close it.
Seal the box with tape and mail the box to Apple.* If there is a battery sticker pasted on the outside of the box, please make sure the battery sticker is not obstructed.
* Apple is not responsible for any damage during shipping.
Prepare your Apple Vision Pro Audio Strap
Place Apple Vision Pro inside its cover.
Turn the power cable counterclockwise to remove it from the Audio Strap.
Remove the head band from your Vision Pro. If you include extra items in the box, we won't be able to return them to you.
Pull the Light Seal and Light Seal Cushion straight off the Enclosure.
If you have ZEISS Optical Inserts, remove your ZEISS Optical Inserts and place them in a safe location.
Place the Enclosure cover glass side-down on a flat surface.
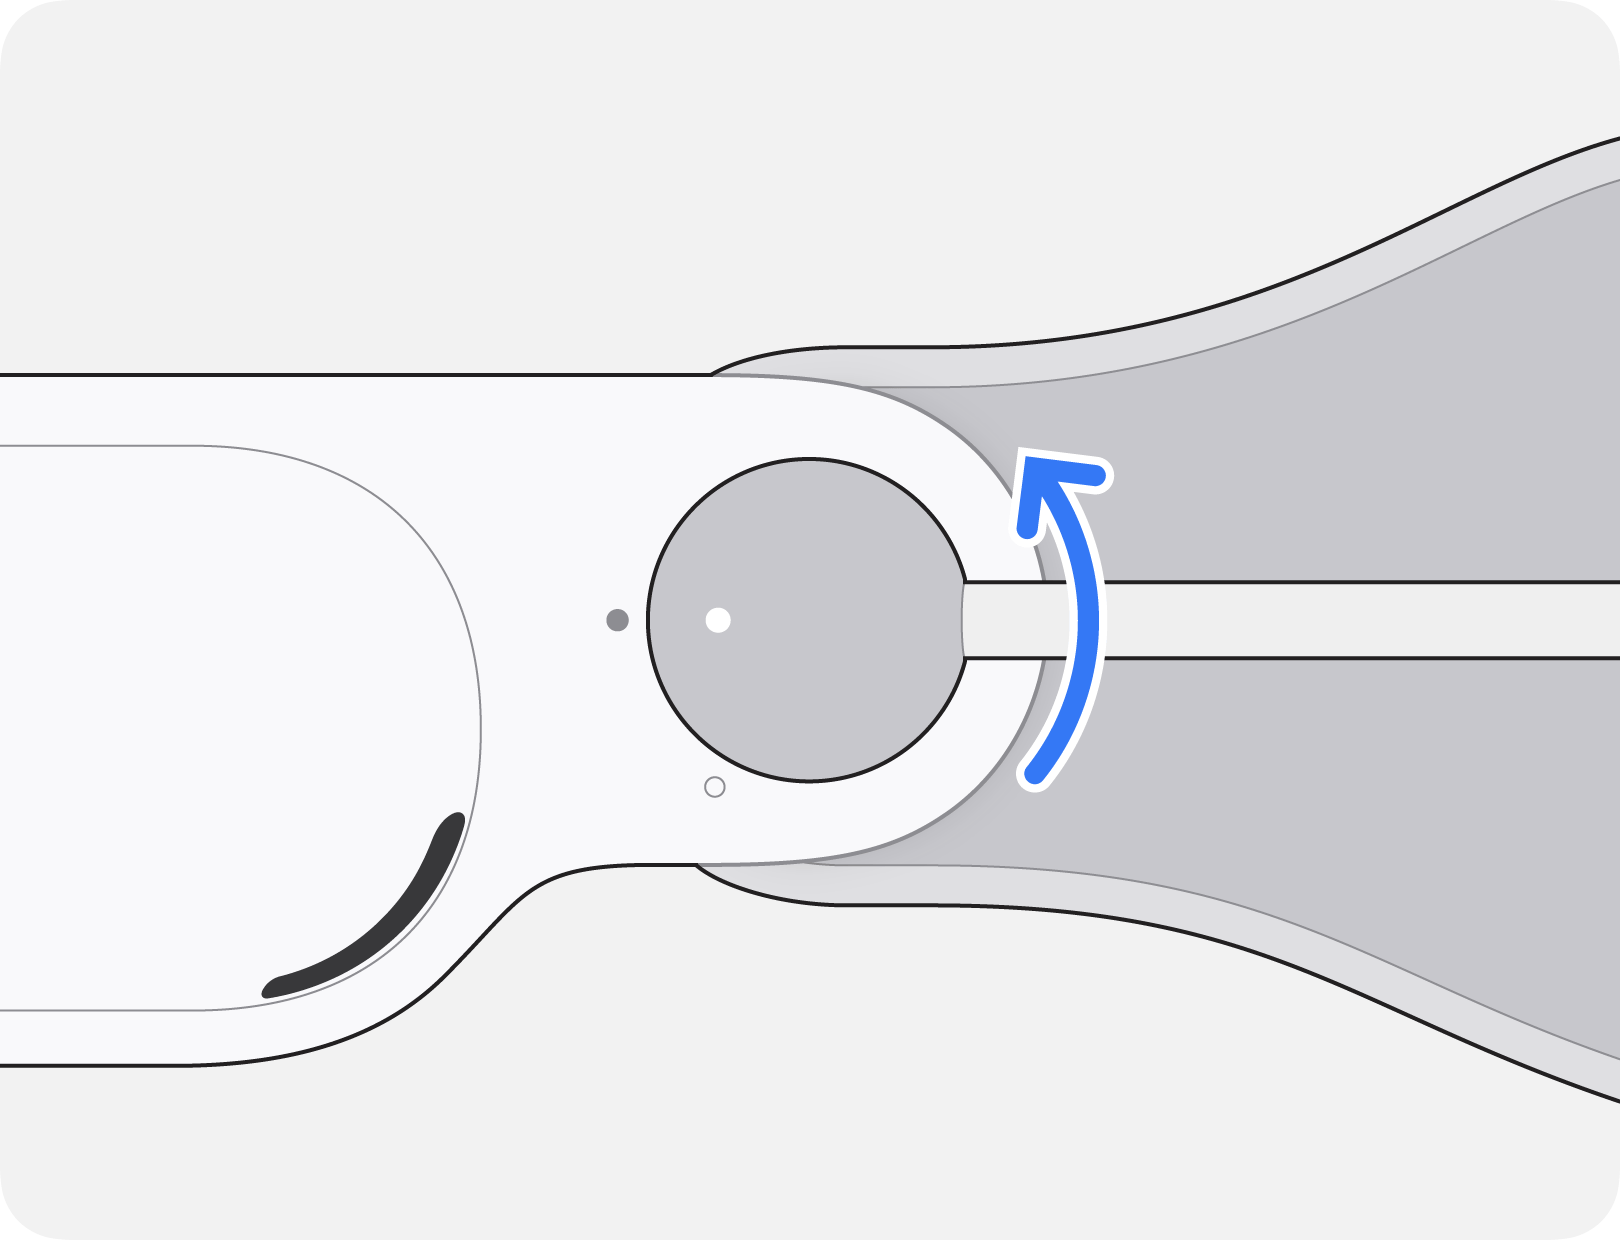
Locate the small eject holes next to each Audio Strap on the inside edge of the Enclosure.
Carefully insert the extraction tool into the eject hole on your Apple Vision Pro. Only use the included extraction tool — do not use a paper clip or SIM eject tool.

Slowly pull the Audio Strap outwards, keeping it straight and aligned, while continuing to press the extraction tool into the eject hole. Don't wiggle the strap or pull it off at an angle.
Remove the extraction tool from the eject hole.
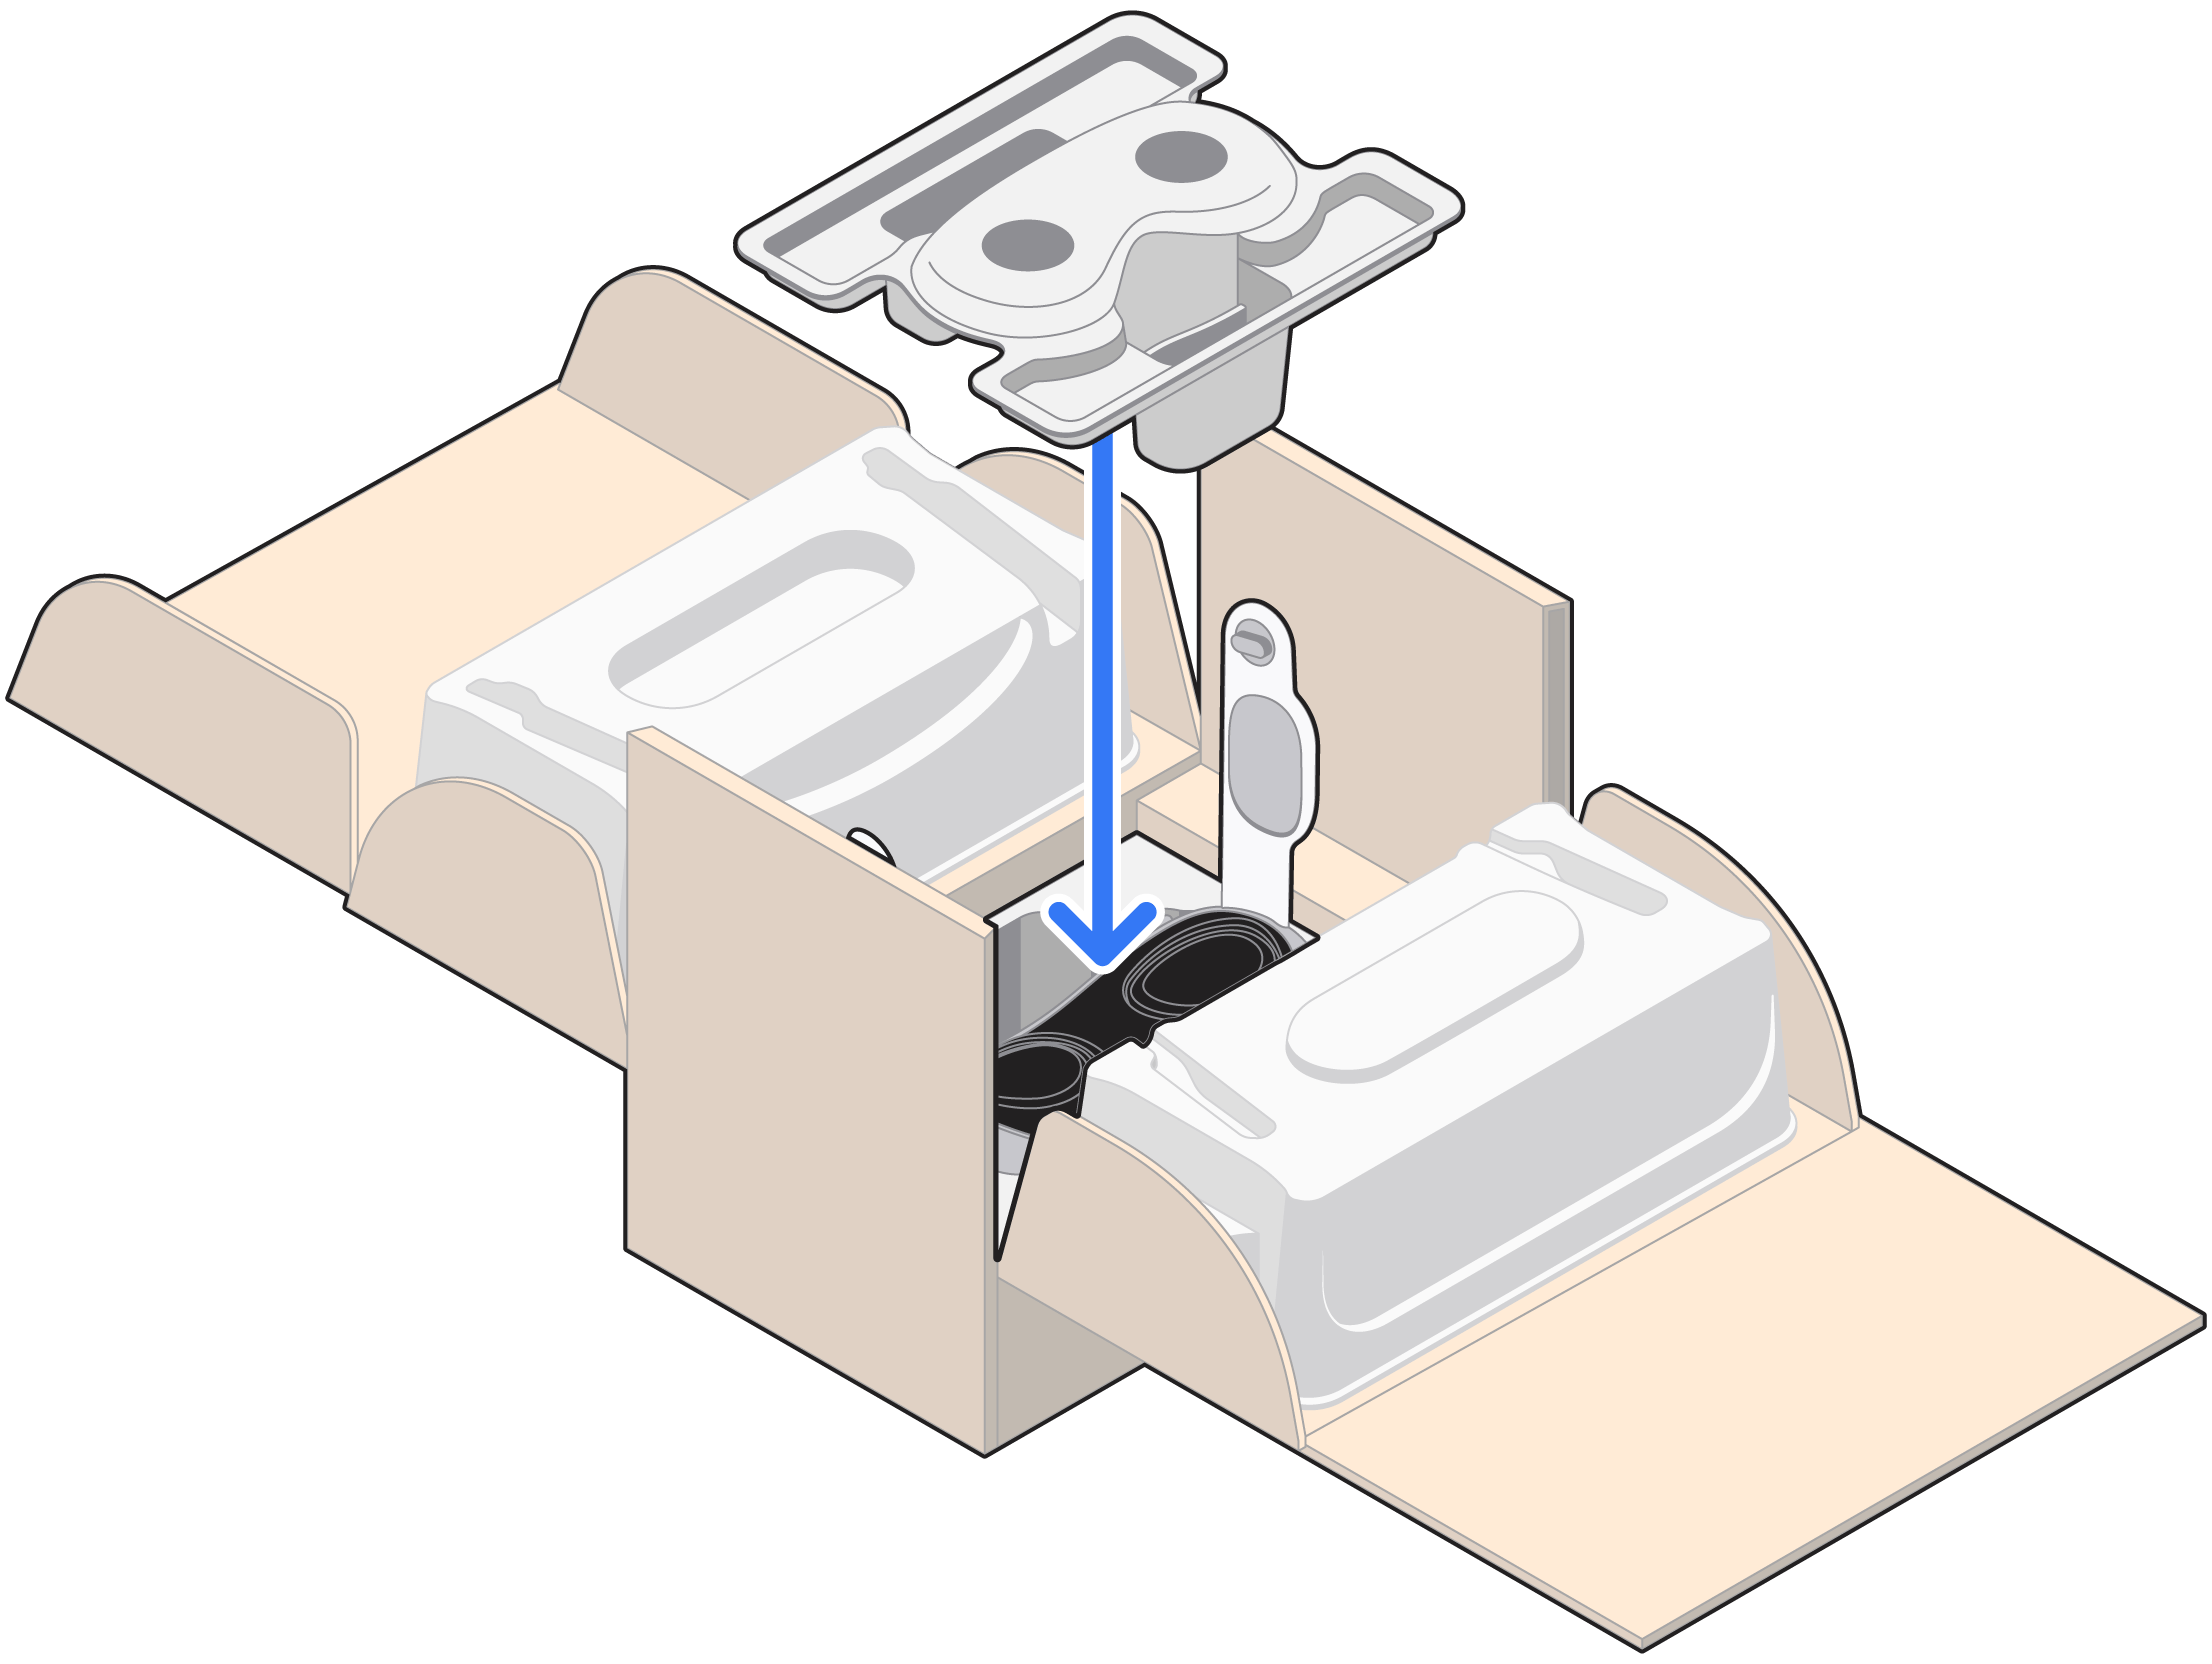
Place both Audio Straps into the molded tray in the smaller box, and put the lid on the box.
Put the small box into the large shipping box and close it.
Seal the box with tape and mail the box to Apple.*
* Apple is not responsible for any damage during shipping.
Prepare your Apple Vision Pro Enclosure
Turn the power cable counterclockwise to remove it from the Audio Strap.
Remove the head band from your Apple Vision Pro and place it in a safe location. If you include extra items in the box, we won't be able to return them to you.
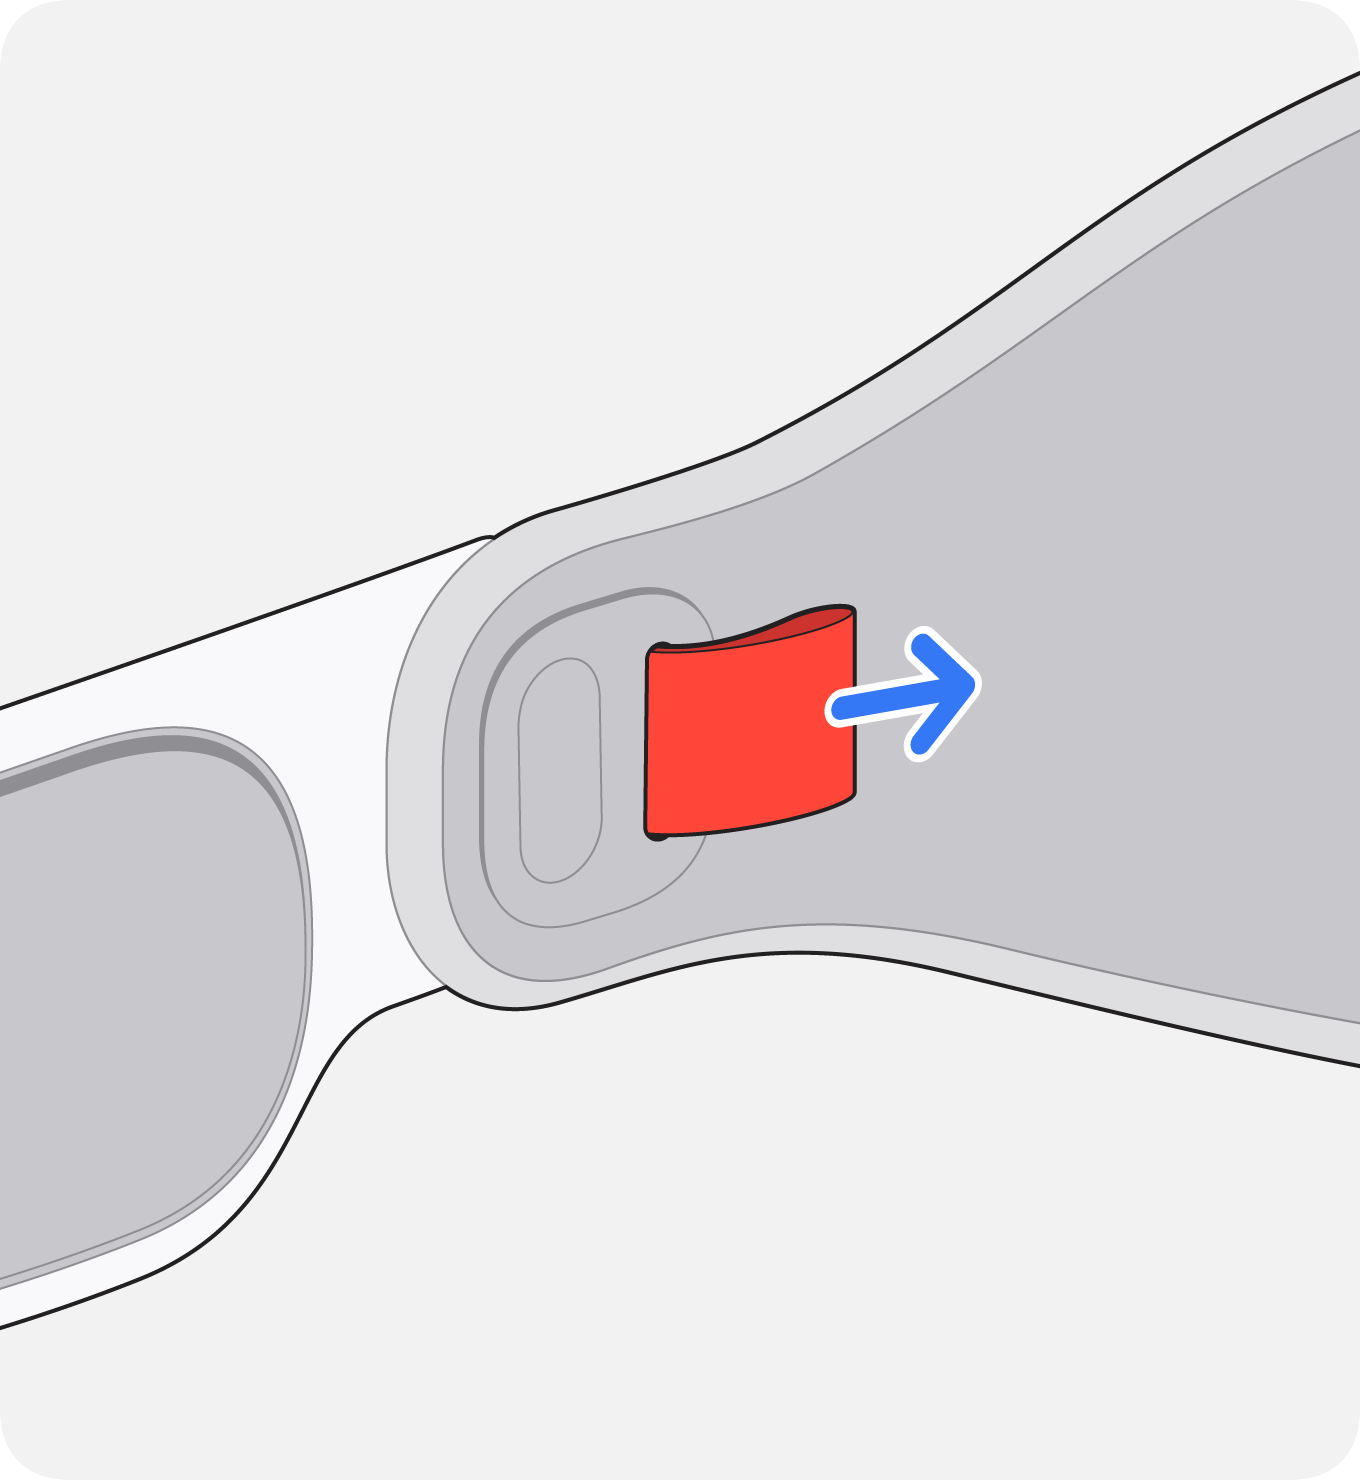
Pull the Light Seal and Light Seal Cushion straight off the Enclosure, then place them in a safe location.
If you have ZEISS Optical Inserts, remove your ZEISS Optical Inserts and place them in a safe location.
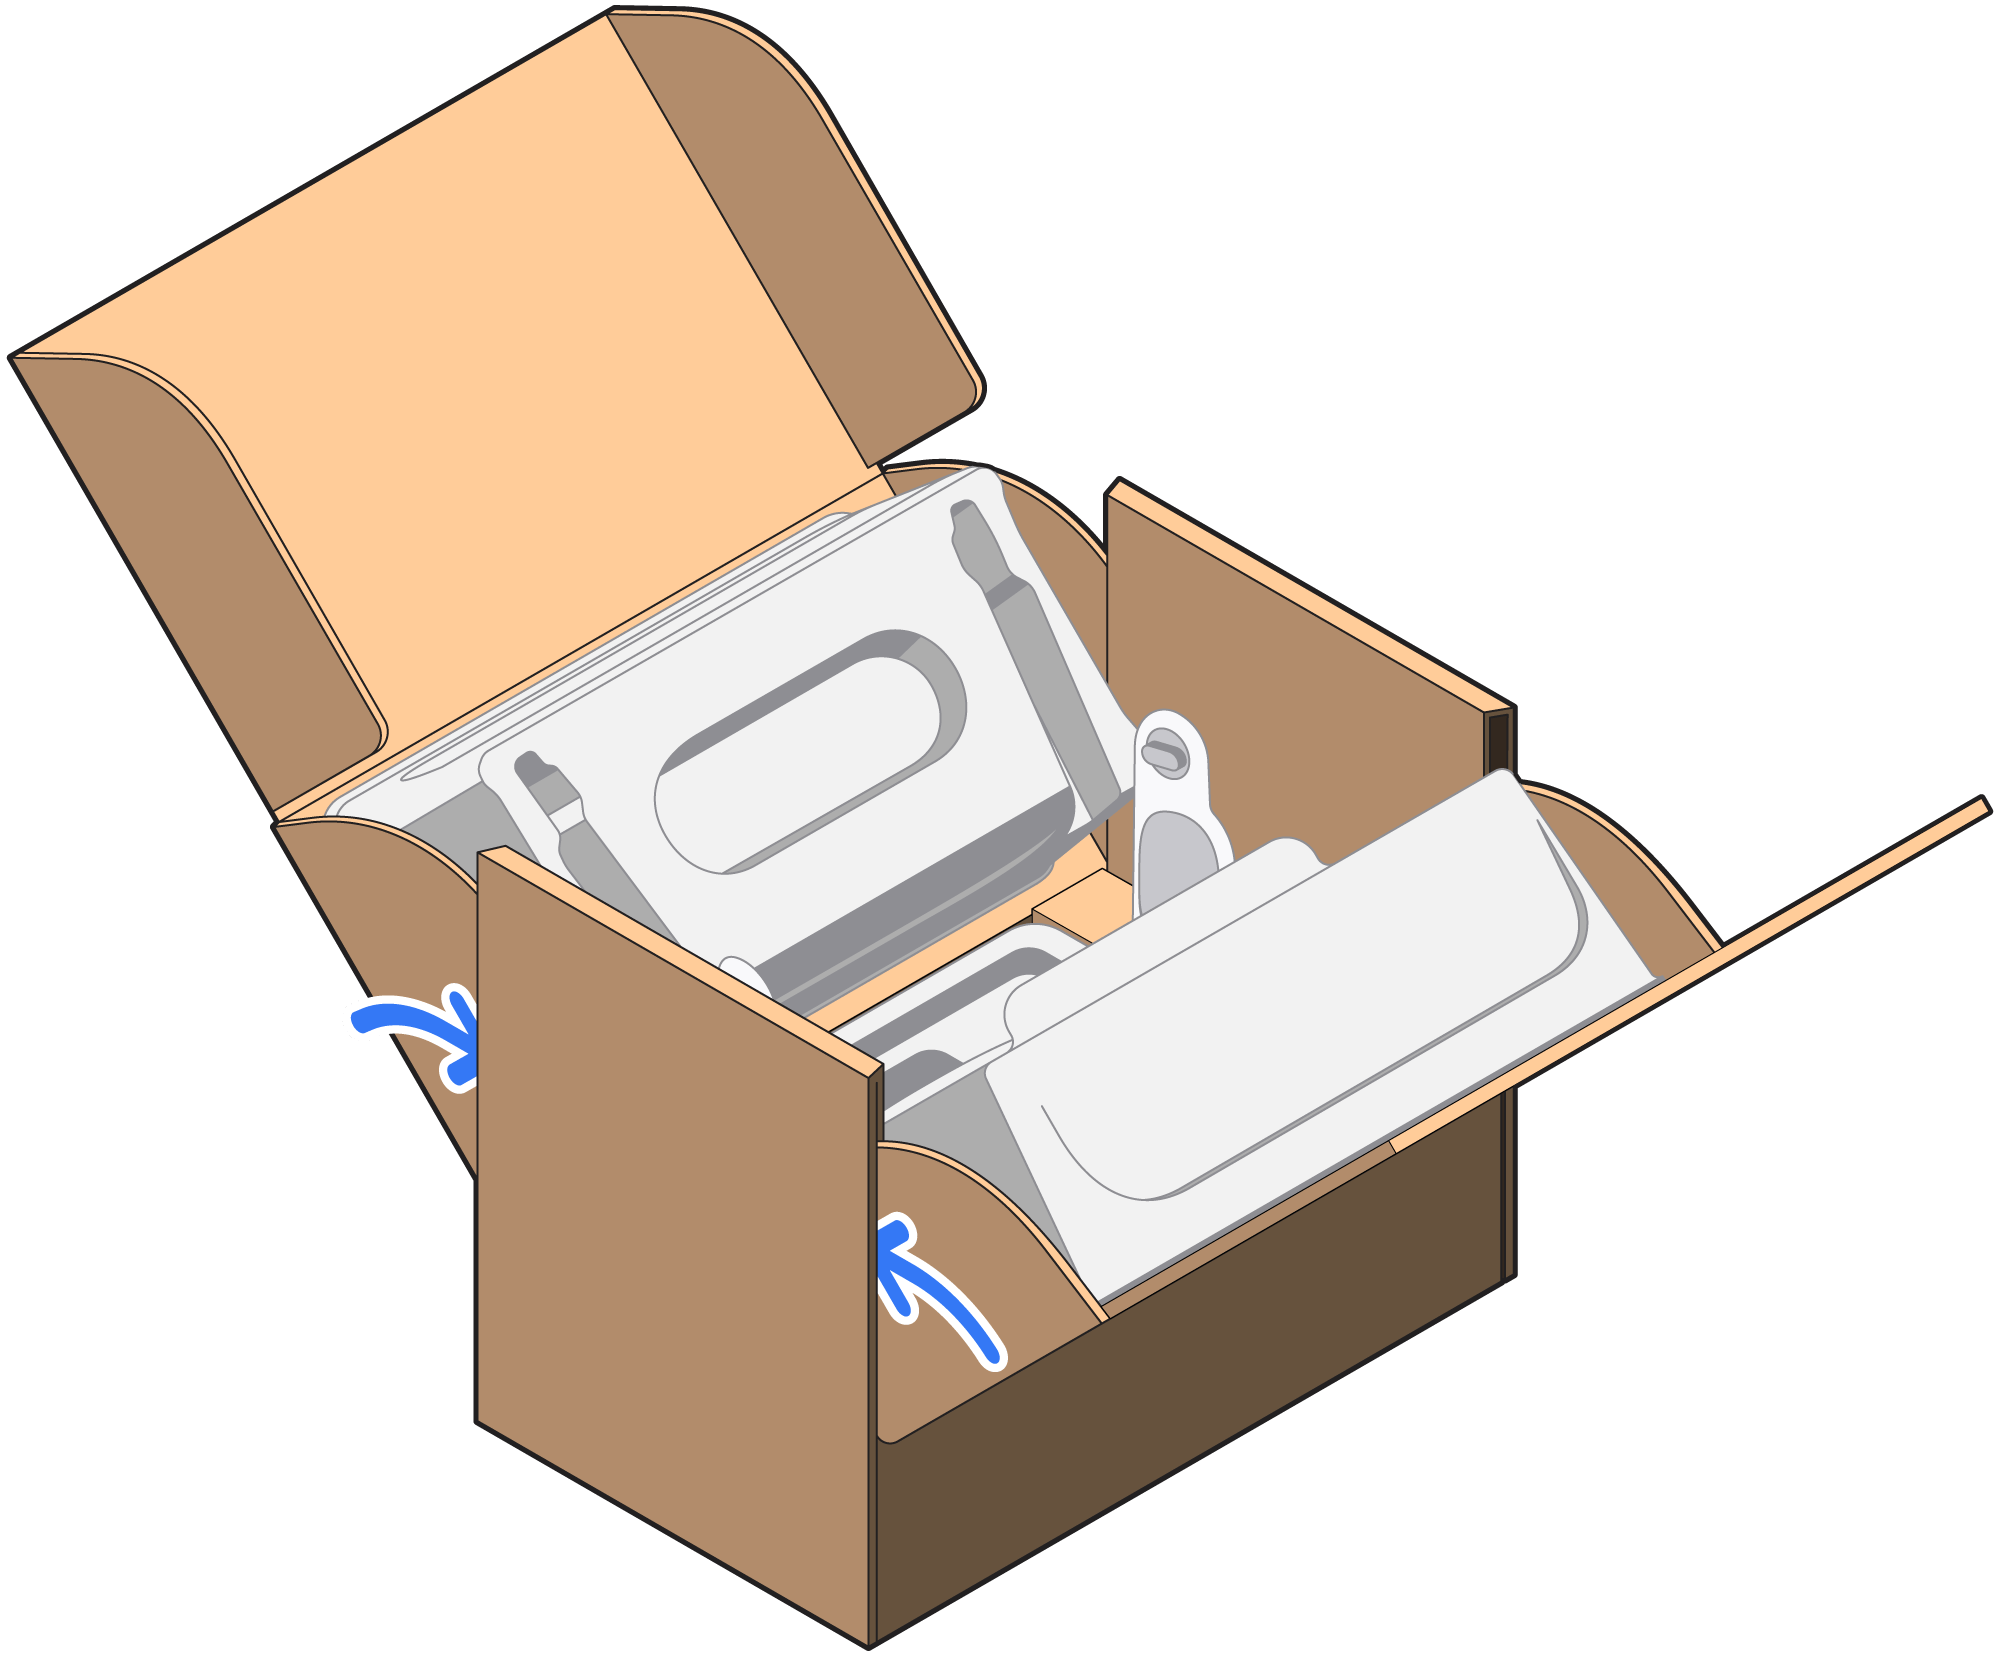
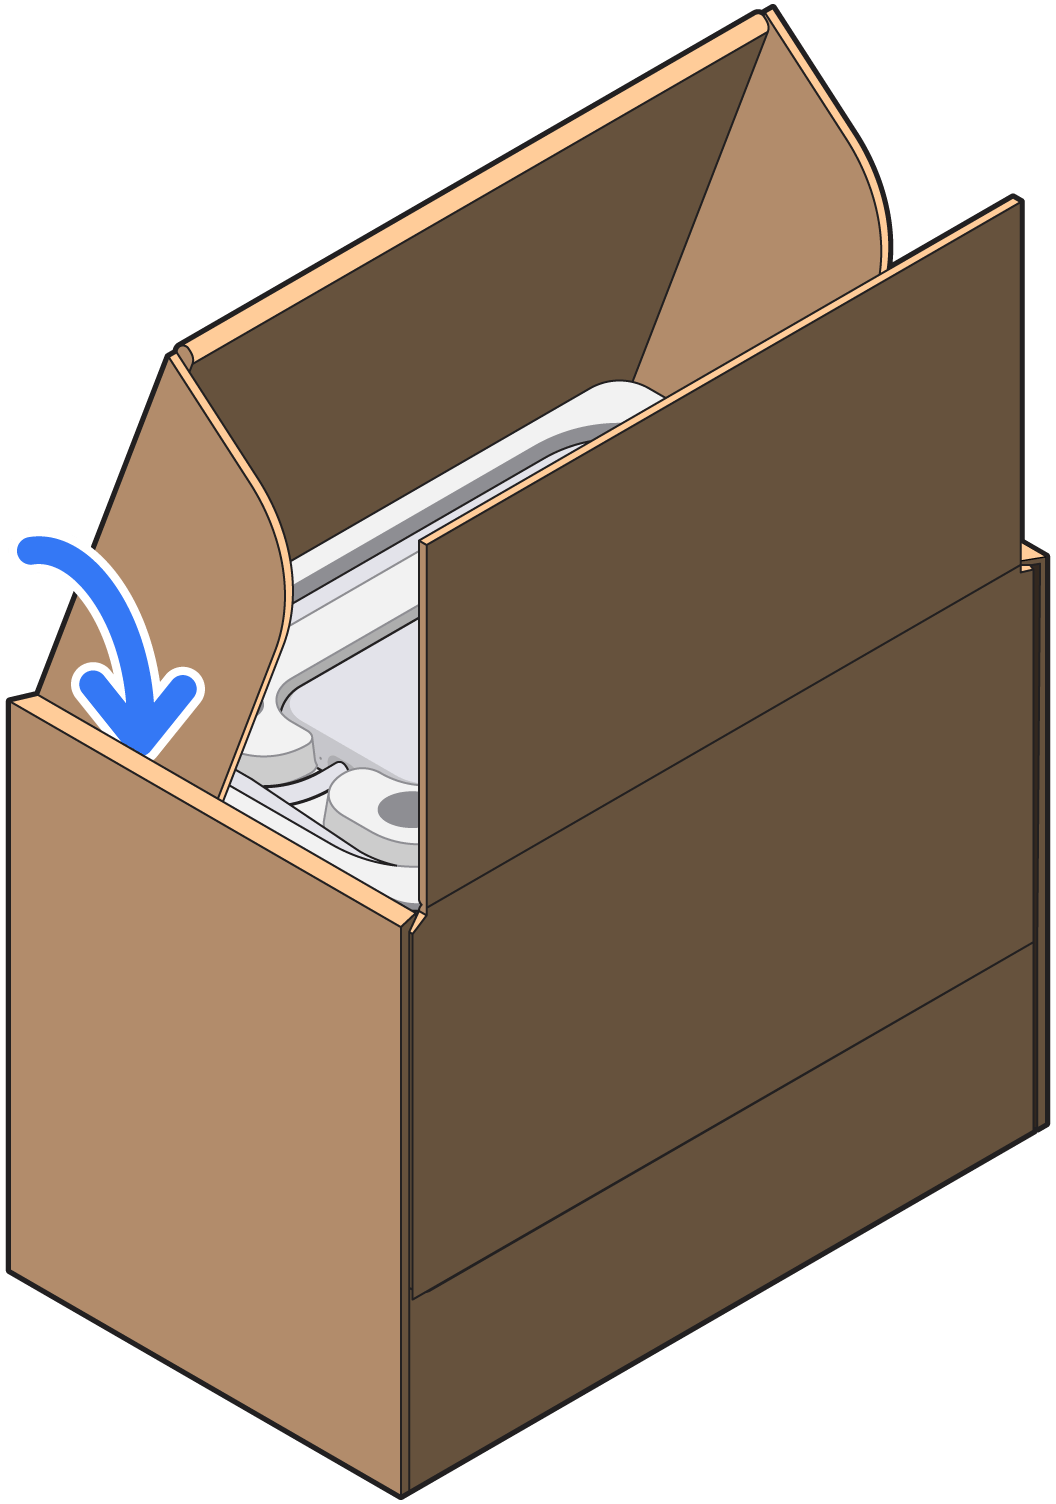
Open the box and set the removable molded inserts, tape, and shipping label aside for now.
Pick up the protective film from the bottom of the box and remove the backing.
Apply the protective film to the cover glass of your Enclosure.
Place the Enclosure cover glass-side down into the tray.

Place the secondary molded tray on top of the Enclosure.
Fold the sides of the box upwards. The molded trays on each side will hold the Audio Straps upright.
Place the battery into the molded tray and wrap the power cable around the tray.
Place the battery tray on top of the inner cartons.
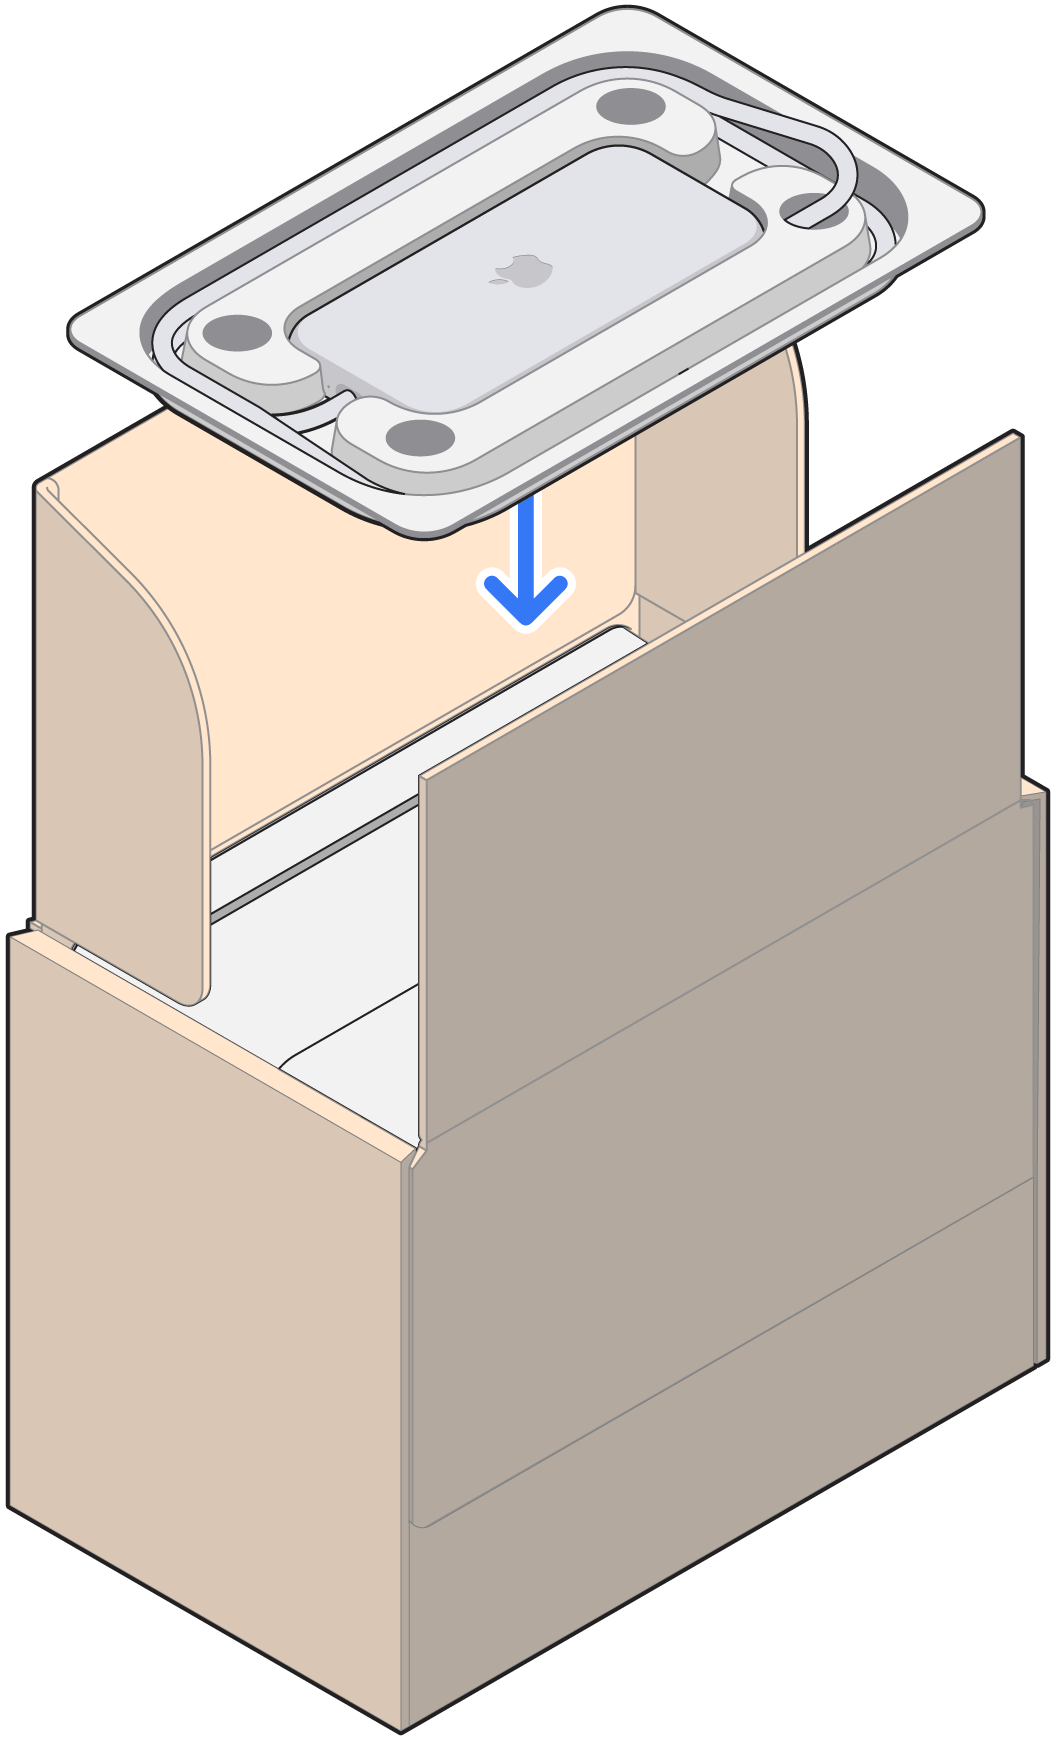
Slide the top flaps into the box and fold down the lid.
Remove the backing from the adhesive strip on the other lid, and fold it down.
Seal the box with the included pieces of tape, apply the shipping label, and mail the box to Apple.* If there is a battery sticker pasted on the outside of the box, please make sure the battery sticker is not obstructed.
* Apple is not responsible for any damage during shipping.
Ship your Apple Vision Pro battery, power cable, Audio Strap, or Enclosure
Find the name of the courier on the return shipping label.
Visit the courier’s website to schedule a pickup or find a drop-off location.
Get a receipt from the courier.
Don’t leave your package in a courier drop box.
NOTICE TO CALIFORNIA CONSUMERS
An estimate for repairs, as required (section 9844 of the California Business and Professions Code), shall be given to the customer by the service dealer in writing. The service dealer may not charge for work done or parts supplied in excess of the estimate without the prior consent of the customer. Where provided in writing the service dealer may charge a reasonable fee for services provided in determining the nature of the malfunction in preparation of a written estimate for repair. For information, contact the Bureau of Electronic and Appliance Repair, Department of Consumer Affairs, Sacramento, CA 95814.
A buyer of this product in California has the right to have this product serviced and repaired during the warranty period. The warranty period will be extended for the number of whole days that the product has been out of the buyer's hands for warranty repairs. If a defect exists during the warranty period, the warranty will not expire until the defect has been fixed. The warranty period also will be extended if the warranty repairs have not been performed due to delays caused by circumstances beyond the control of the buyer, or if the warranty repairs did not remedy the defect and the buyer notifies the manufacturer or seller of the failure of the repairs within 60 days after they were completed. If, after a reasonable number of attempts, the defect has not been fixed, the buyer may return this product for a replacement or a refund subject, in either case, to deduction of a reasonable charge for usage. The time extension does not affect the protection or remedies the buyer has under other laws.