Set paper size, page orientation, and margins in Pages
Choose a paper size or create a custom paper size, choose portrait or landscape page orientation, and set the margins for your Pages document on Mac, iPhone, or iPad.
Set paper size, page orientation, and margins on Mac
In Pages on Mac, you can set the paper size, page orientation, and margins for your document.
Set paper size, page orientation, and margins
Pages templates use the most common margin, orientation, and paper size settings, but you can change these settings in the Document sidebar.
Click the Document button
 in the toolbar, then click the Document tab in the sidebar.
To change the paper size, click the pop-up menu in the sidebar that shows the current paper size, then choose an option.
If you want to print your document on 8.5” x 11” printer paper, choose US Letter.
If you don't see the size you want in the menu, you can create a custom paper size.
To change the orientation of your page, click the orientation you want under Page Orientation.
To change document margins in a word-processing document, click the arrows or enter values in the fields next to Top, Bottom, Left, and Right in the Document Margins section. For the Blank template, all margins are automatically set to one inch. If you're using a different template, margin sizes vary. You can also adjust paragraph margins for specific paragraphs to indent them from document margins.
You can use the vertical ruler to make sure your margins and other items are where you need them in your document:
Choose Pages > Settings (or choose Pages > Preferences on macOS Monterey or earlier).
Click Rulers, then select "Show vertical rulers whenever rulers are shown."
Choose View > Show Ruler.
Learn how to add pages to your document, add page numbers that automatically adjust as pages are added or deleted, and work with templates.
Create a custom paper size
If the paper size you want to use for your document doesn't appear in the Paper Size pop-up menu, you can create a custom paper size. This is helpful if you need to create documents with the same paper size.
Choose File > New, then choose a template to create a new document.
Choose File > Page Setup.
Click the Paper Size pop-up menu, then choose Manage Custom Sizes.
Click the Add button
 .
.Double-click the new untitled name in the list, then type a name for your custom size.
Type the width and height of the paper in the Width and Height fields.
Set the print margins, then click OK.
Click OK to close the Page Setup window.
When you print, your document will print using the custom paper size.
When setting up your document, it’s also helpful to use rulers, set tab stops and add and format sections. Some templates have predetermined sections that you can add to or delete.
Set paper size, page orientation, and margins on iPhone or iPad
Open your document in Pages.
On iPhone, tap the More button
 . On iPad, tap the document name or tap the More button depending on what you see in the toolbar.
Tap Document Options, then tap Document Setup.
To change the page orientation, tap Portrait or Landscape.
To change paper size, tap an option under Paper Size:
If you want to print your document on 8.5” x 11” printer paper, choose Letter.
If you want a custom size, tap Custom Size, then enter the dimensions. When you print, your document will print using the custom paper size.
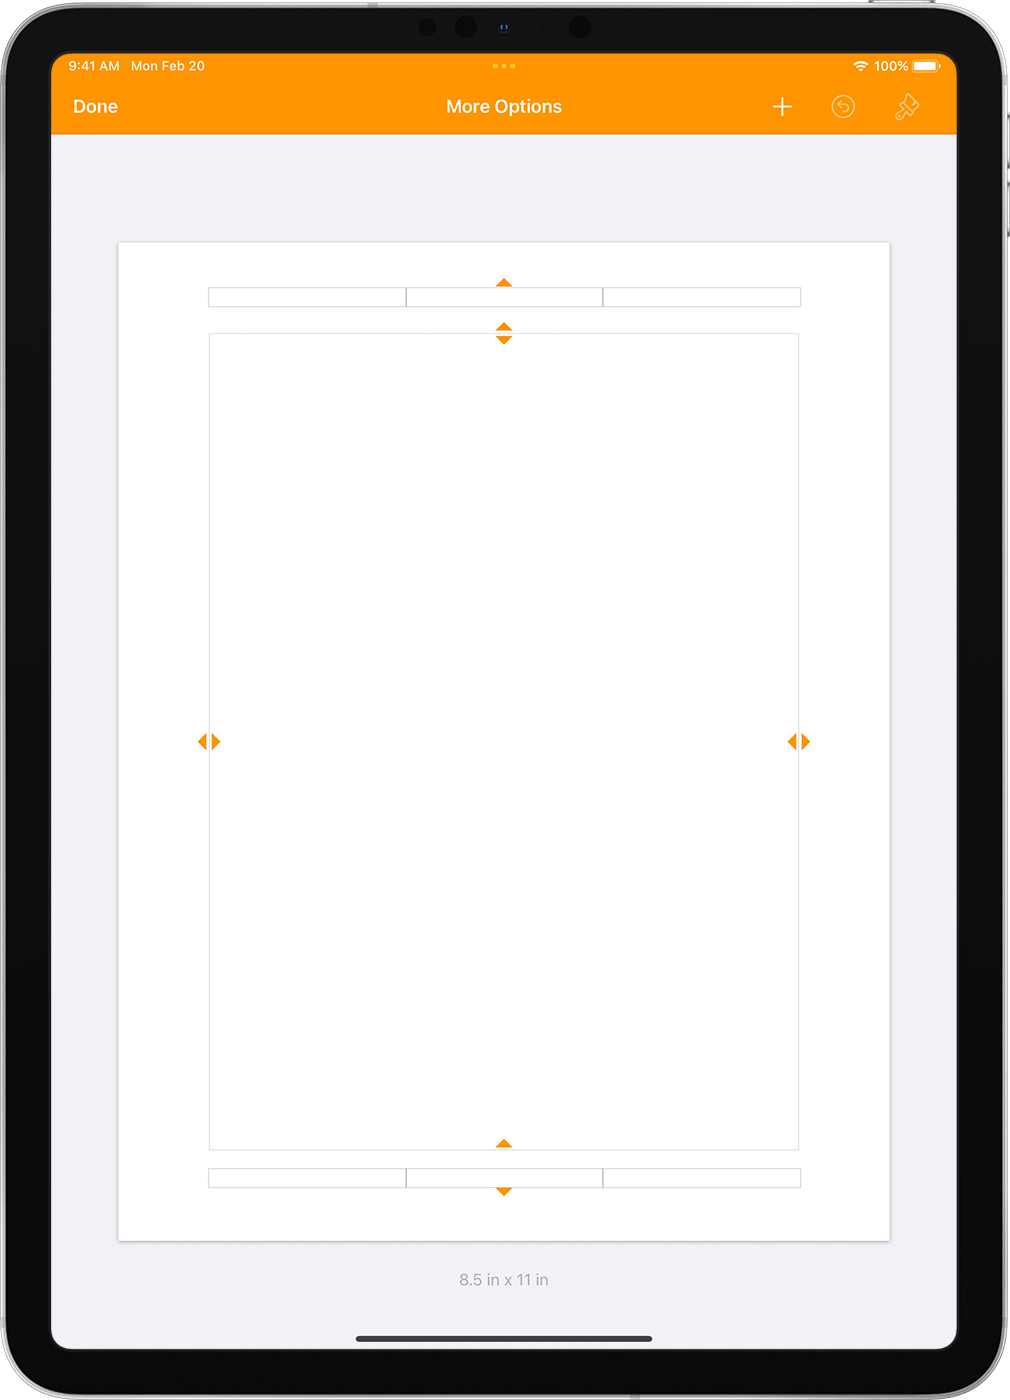
To adjust the margins for a word-processing document, tap More Options, then drag the arrows around the body text box. You can change the margins of all sides of the page. Tap Done to save your changes.
Learn how to add pages to your document, add page numbers that automatically adjust as pages are added or deleted, and work with templates.