How to use disk mode on your iPod
If you can't restore your iPod or it's not recognized in iTunes, try using disk mode.
Choose your iPod model
Disk mode is supported on iPod nano (7th generation), iPod nano (6th generation), and iPod models with a click, touch, or scroll wheel. Disk mode isn't supported on iPod touch or iPod shuffle.
Choose your iPod model, then follow the steps to use disk mode. Learn if your iPod has a click, touch, or scroll wheel.
iPod nano (6th or 7th generation)
Make sure that your iPod has a battery charge.
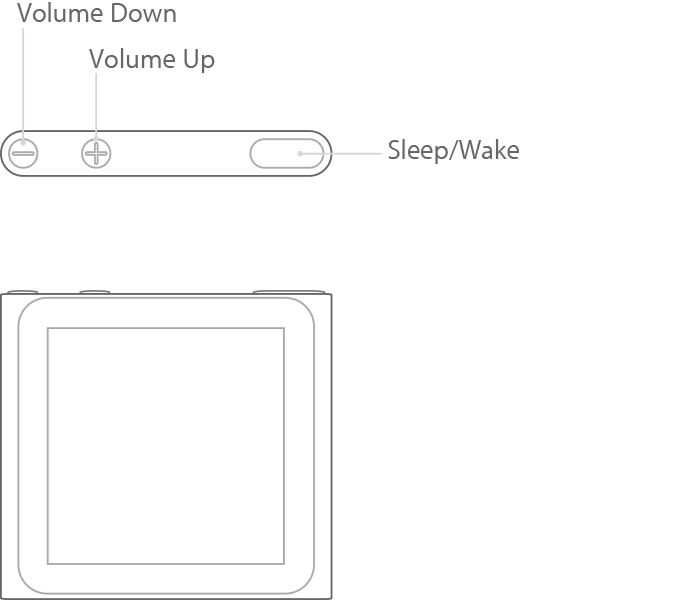
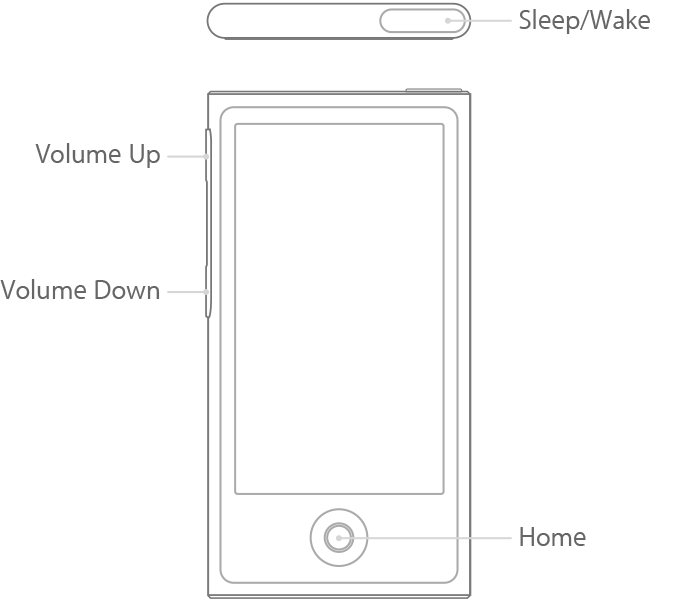
For iPod nano (7th generation), press the Sleep/Wake and Home buttons at the same time until you see the Apple logo.
For iPod nano (6th generation), press the Sleep/Wake and Volume Down buttons at the same time until you see the Apple logo.
When you see the Apple logo, hold down the Volume Up and Volume Down buttons at the same time until your iPod enters disk mode.
iPod nano (7th generation) and iPod nano (6th generation) have Multi-Touch displays for navigation. If you have an earlier model of iPod nano, use the steps for iPod models with a Click Wheel.
iPod nano (6th generation)
iPod nano (7th generation)
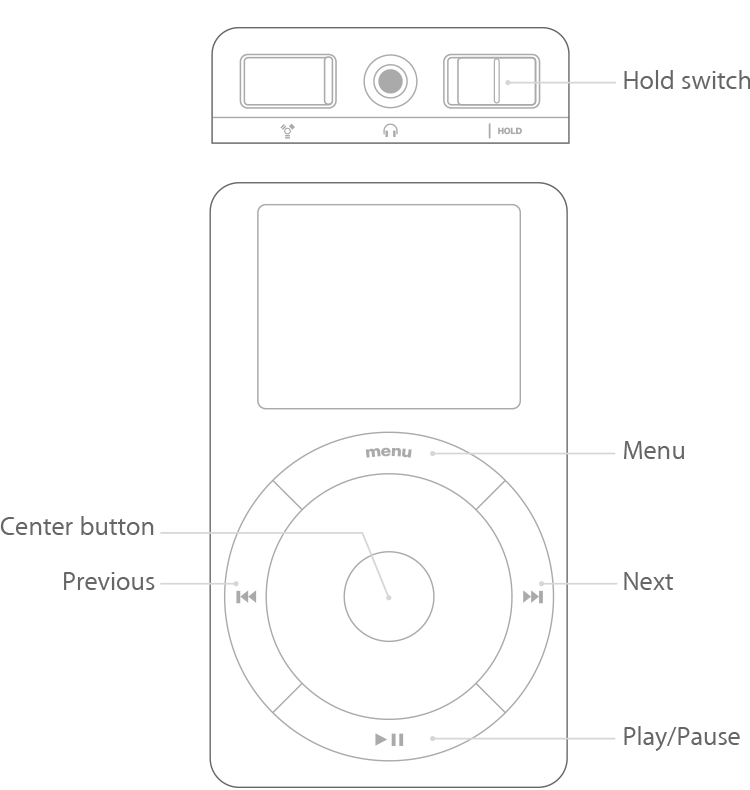
iPod with a Click Wheel
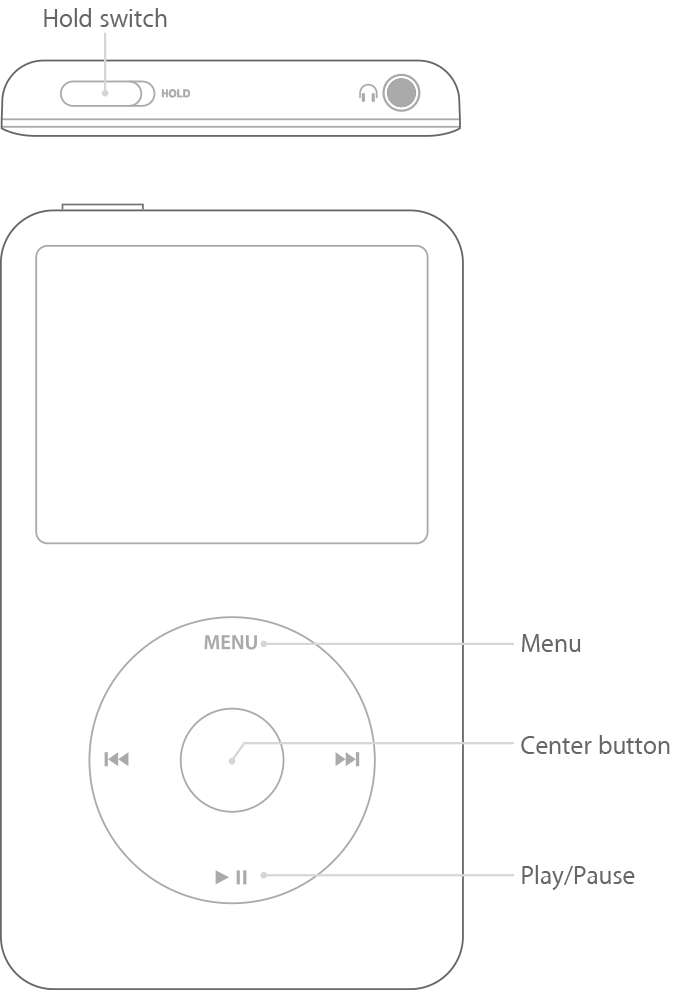
If your iPod has a Click Wheel, the controls are on the wheel: Menu at the top, Play/Pause at the bottom, and Prev/Next on the left and right. This includes iPod classic, iPod with Video, iPod photo, iPod nano (5th generation and earlier), and iPod mini.
To use disk mode:
Set your iPod on a flat surface and make sure that your iPod has a battery charge.
Slide the Hold switch on and off.
Press and hold the Menu and Center buttons until you see the Apple logo. Make sure that the finger pressing the Center button isn't touching the Click Wheel.
When you see the Apple logo, release the Menu and Center buttons.
Press and hold the Center and Play/Pause buttons until you see the disk mode screen. Make sure that you press the Play/Pause buttons toward the outside of the Click Wheel and not near the center.
Connect your iPod to your computer. The screen on your iPod should display Do not disconnect. Make sure that you eject your iPod in iTunes before you disconnect it from your computer.
To exit disk mode, press the Center and Menu buttons at the same time until you see the Apple logo.
iPod with a touch or scroll wheel
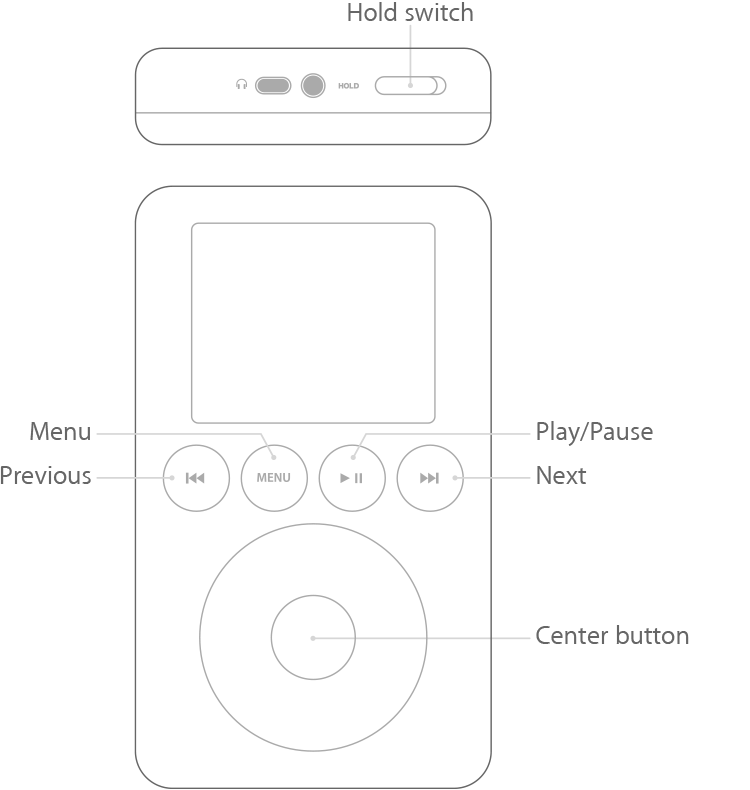
If your iPod has a touch or scroll wheel, the buttons (Previous, Menu, Play/Pause, and Next) are above or around the wheel.
To use disk mode:
Make sure that your iPod has a battery charge.
Slide the Hold switch on and off.
Reset your iPod. Press and hold the Play/Pause and Menu buttons at the same time until you see the Apple logo. When you see the Apple logo, let go of the buttons. Then press and hold the Previous and Next buttons at the same time until you see the disk mode screen. When you reset your iPod, your music and data files are saved but some customized settings might be lost.
Connect your iPod to your computer. The screen on your iPod should display Don't disconnect. Make sure that you eject your iPod in iTunes before you disconnect it from your computer.
To exit disk mode, press the Center and Menu buttons at the same time until you see the Apple logo.
iPod (Dock Connector)
iPod (Touch Wheel) or iPod (Scroll Wheel)
Get help
Learn what to do if you see a red X icon on your iPod classic or iPod nano (5th generation or earlier).
If you can't use disk mode, you might need to take your iPod in for service.