Use iCloud Photos
iCloud Photos keeps your photos and videos safe, up to date, and available automatically on all of your Apple devices, on iCloud.com, and even your PC. When you use iCloud Photos, you don't need to import photos from one iCloud device to another. iCloud Photos always uploads and stores your original, full-resolution photos. You can keep full-resolution originals on each of your devices, or save space with device-optimized versions instead. Either way, you can download your originals whenever you need them, as long as you have enough space on your device. Any organizational changes or edits you make are always kept up to date across all your Apple devices. Learn how to set up and use iCloud Photos.
The photos and videos that you keep in iCloud Photos use your iCloud storage. Before you turn on iCloud Photos, make sure that you have enough space in iCloud to store your entire collection. You can see how much space you need and then upgrade your storage plan if necessary.
Import to your Mac
You can import photos and videos to your Mac by connecting your device to your Mac. However, if you use iCloud Photos, then you don't need to import.
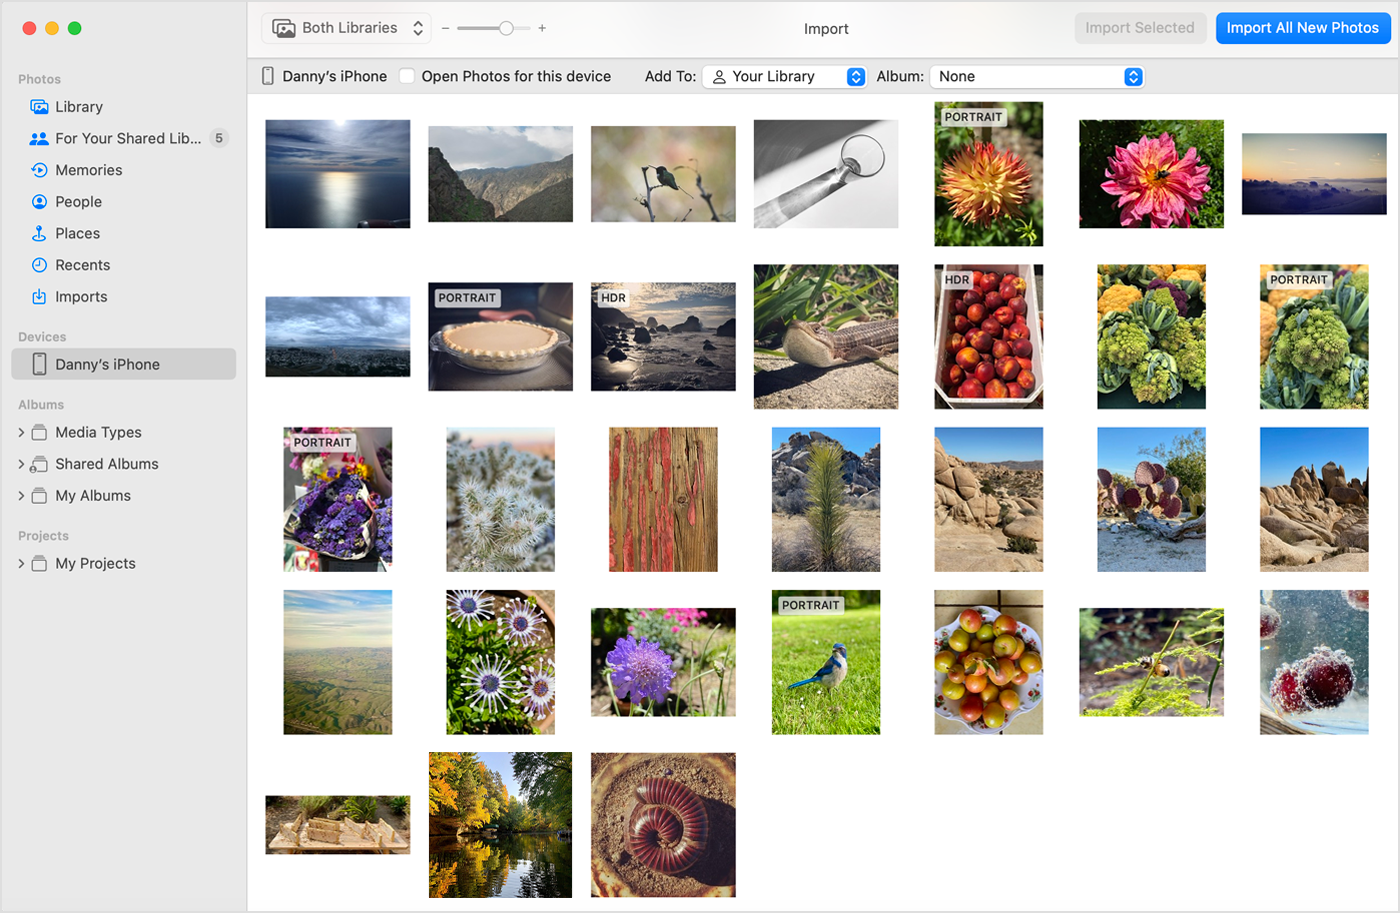
To import to your Mac:
- Connect your iPhone or iPad to your Mac with a USB cable.
- Open the Photos app on your computer.
- The Photos app shows an Import screen with all the photos and videos that are on your connected device. If the Import screen doesn't automatically appear, click the device's name in the Photos sidebar.
- If asked, unlock your iOS or iPadOS device using your passcode. If you see a prompt on your iOS or iPadOS device asking you to Trust This Computer, tap Trust to continue.
- Choose where you want to import your photos. Next to "Import to," you can choose an existing album or create a new one.
- Select the photos you want to import and click Import Selected, or click Import All New Photos.
- Wait for the process to finish, then disconnect your device from your Mac.
Import to your Windows PC
You can import photos to your PC by connecting your device to your computer and using the Apple Devices app:
- Install the Apple Devices app from the Microsoft Store.
- Connect your iPhone or iPad to your PC with a USB cable.
- If asked, unlock your iOS or iPadOS device using your passcode.
- If you see a prompt on your iOS or iPadOS device asking you to Trust This Computer, tap Trust or Allow to continue.
Then, visit Microsoft's website to learn how to import photos to the Microsoft Photos app in Windows.
If you have iCloud Photos turned on, you need to download the original, full resolution versions of your photos to your iPhone or iPad before you import to your PC.
When you import videos from your iOS or iPadOS device to your PC, some might be rotated incorrectly in the Microsoft Photos app. You can add these videos to iTunes to play them in the correct orientation.
If you want to ensure photos from your iOS or iPadOS device have the best compatibility with Windows, try these steps:
- On your iOS or iPadOS device, open the Settings app.
- Tap Camera, then tap Formats.
- Tap Most Compatible. From now on, your camera will create photos and videos in JPEG and H.264 formats.
More ways to transfer photos and videos to your computer
- Use AirDrop to quickly send photos and videos to your Mac.
- Import photos and video from storage media, like a hard disk or SD card, to Photos for macOS.
- Use a scanner and Image Capture to import photos that were taken with a film camera.
- Import your images directly to a folder on your Mac with Image Capture.
- Sync music, movies, and more from your iOS devices using your computer.
- Use Time Machine to back up all of your files, including your photos and videos, to an external hard drive.